Upcut Saw Instruction Procedure
Purpose
Using the Upcut saw will provide you with digital accuracy and a cleaner and smoother cut
Powering on Machine
|
1. Turn on the control panel by pressing the red switch located on the right side of the blue electrical box behind the control panel |
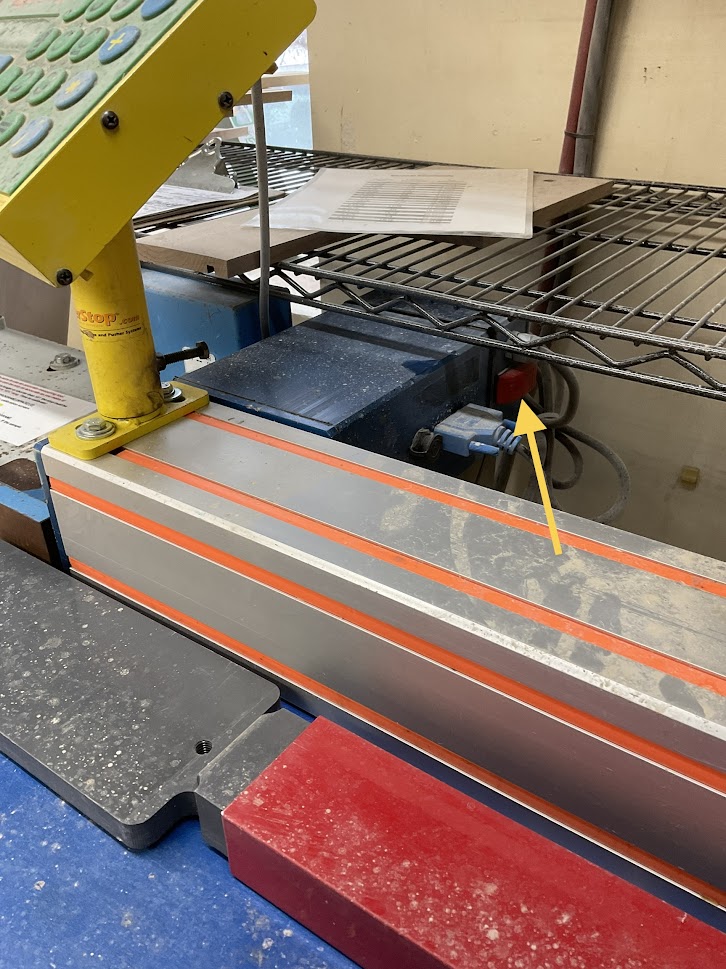 |
|
2. Turn on the saw by pressing the black start button located on the blue electrical box located left of the control panel |
 |
Calibrating Machine
3. On the control panel Press ("Program List", "Space Calib",2) This will bring up the calibration screen
4. Enter 1, 0, "Space Calib", 1, /, 4, "Program List"
Steps 3 and 4 only need to be done in the morning before the shift starts
Running Machine
5. Using the decimal equivalents enter your length to be cut
For example if your length is 12 1/2 inches you will enter 12.
6. Press "Start"
|
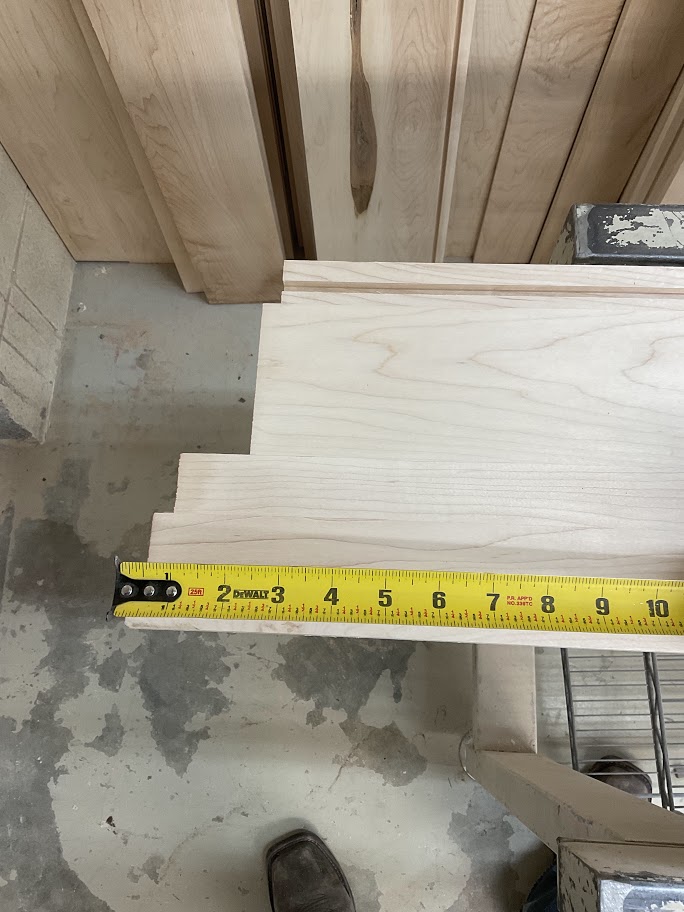
7. Measure the length of damage on the board to be cut |
 |
8. Press "+", enter the damaged length the press "=" then press the "Start" button
For example our desired length is 12.5 inches and we have 4 inches of damage this step will make your cut length 16.5 inches
|
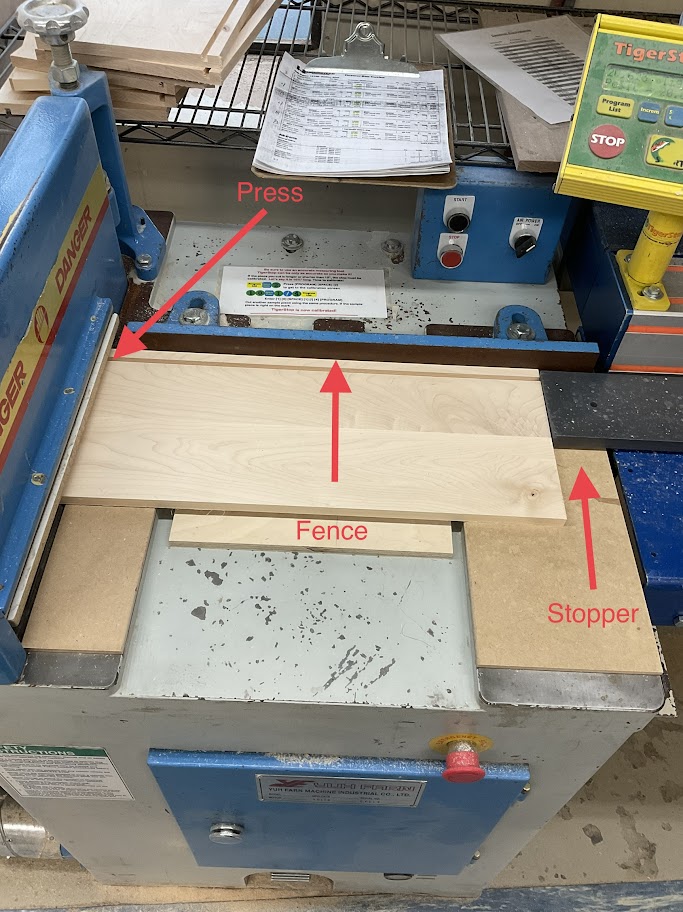
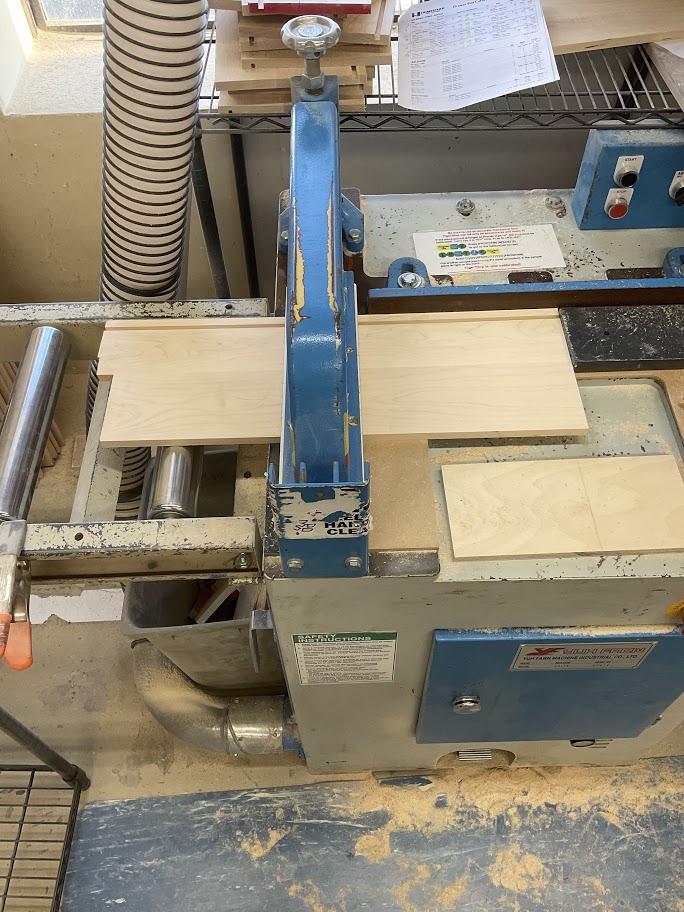
9. Run your board through the press, flat against the fence to the stopper |
 |
|
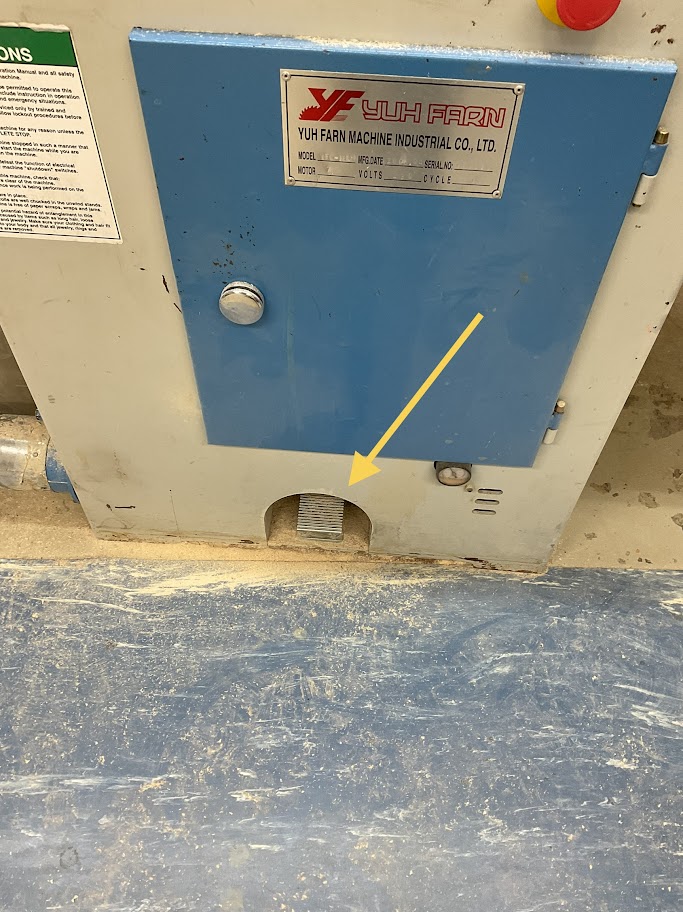
10. Once the board is in place press the foot pedal located below the machine |
 |
11. When the board is cut press "-", re-enter the damaged length then "=" then the "Start" button
This step will take off the 4 inches you added and put you back to your desired 12.5 inches
|
12. Rotate the board where the damaged length is out and then press the foot pedal to cut off the damaged length |
 |
Note that steps 3, 4, and 7 are only needed when cutting a new board
Powering off Machine
|
13. Turn off the saw by pressing the red stop button on the blue electrical box located left of the control panel |
 |
|
14. Turn off the control panel by pressing the red switch located on the right side of the blue electrical box behind the control panel |
 |
No comments to display
No comments to display