# Upcut Saw Instruction Procedure

<span style="text-decoration: underline;"><span style="color: rgb(0, 0, 0); text-decoration: underline;">**Purpose**</span></span>

<span style="color: rgb(0, 0, 0);">**Using the Upcut saw will provide you with digital accuracy and a cleaner and smoother cut**</span>

<details id="bkmrk-powering-on-machine-"><summary>Powering on Machine</summary>

<table border="1" class="align-center" style="border-collapse: collapse; width: 100%; border-width: 0px; height: 349px;"><colgroup><col style="width: 50%;"></col><col style="width: 50%;"></col></colgroup><tbody><tr style="height: 349px;"><td class="align-left" style="border-width: 0px; vertical-align: middle; height: 349px;">**1. Turn on the control panel by pressing the red switch located on the right side of the blue electrical box behind the control panel**

</td><td style="border-width: 0px; height: 349px;">**[![Image 1.jpg](http://help.homesteadcabinet.net/uploads/images/gallery/2023-01/scaled-1680-/U5Vimage-1.jpg)](http://help.homesteadcabinet.net/uploads/images/gallery/2023-01/U5Vimage-1.jpg)**</td></tr></tbody></table>

<table border="1" class="align-center" style="border-collapse: collapse; width: 100%; border-width: 0px; height: 349px;"><colgroup><col style="width: 50%;"></col><col style="width: 50%;"></col></colgroup><tbody><tr style="height: 349px;"><td class="align-left" style="border-width: 0px; vertical-align: middle; height: 349px;">**2. Turn on the saw by pressing the black start button located on the blue electrical box located left of the control panel**

  
</td><td style="border-width: 0px; height: 349px;">**[![Image 2.jpg](http://help.homesteadcabinet.net/uploads/images/gallery/2023-01/scaled-1680-/rUjimage-2.jpg)](http://help.homesteadcabinet.net/uploads/images/gallery/2023-01/rUjimage-2.jpg)**</td></tr></tbody></table>

</details><details id="bkmrk-calibrating-machine-"><summary>Calibrating Machine</summary>

**3. On the control panel Press ("Program List", "Space Calib",2) This will bring up the calibration screen**

**4. Enter 1, 0, "Space Calib", 1, /, 4, "Program List"**

<p class="callout info">***Steps 3 and 4 only need to be done in the morning before the shift starts***</p>

</details><details id="bkmrk-running-machine-5.-u"><summary>Running Machine</summary>

**5. Using the decimal equivalents enter your length to be cut**

<p class="callout info">***For example if your length is 12 1/2 inches you will enter 12.***</p>

**6. Press "Start"**

<table border="1" class="align-center" style="border-collapse: collapse; width: 100%; border-width: 0px; height: 349px;"><colgroup><col style="width: 50%;"></col><col style="width: 50%;"></col></colgroup><tbody><tr style="height: 349px;"><td class="align-left" style="border-width: 0px; vertical-align: middle; height: 349px;">**7. Measure the length of damage on the board to be cut**

</td><td style="border-width: 0px; height: 349px;">**[![Image 3.jpg](http://help.homesteadcabinet.net/uploads/images/gallery/2023-01/scaled-1680-/JG7image-3.jpg)
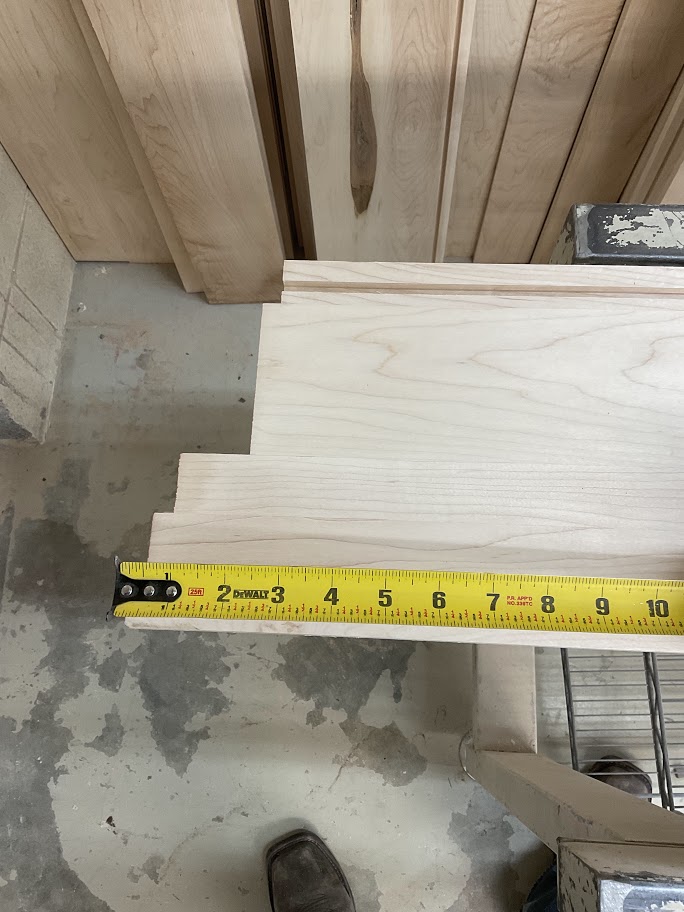
](http://help.homesteadcabinet.net/uploads/images/gallery/2023-01/JG7image-3.jpg)**</td></tr></tbody></table>

**8. Press "+", enter the damaged length the press "=" then press the "Start" button**

<p class="callout info">***For example our desired length is 12.5 inches and we have 4 inches of damage this step will make your cut length 16.5 inches***</p>

<table border="1" class="align-center" style="border-collapse: collapse; width: 100%; border-width: 0px; height: 349px;"><colgroup><col style="width: 50%;"></col><col style="width: 50%;"></col></colgroup><tbody><tr style="height: 349px;"><td class="align-left" style="border-width: 0px; vertical-align: middle; height: 349px;">**9. Run your board through the press, flat against the fence to the stopper**

  
</td><td style="border-width: 0px; height: 349px;">**[![Image 4.jpg](http://help.homesteadcabinet.net/uploads/images/gallery/2023-01/scaled-1680-/mVsimage-4.jpg)
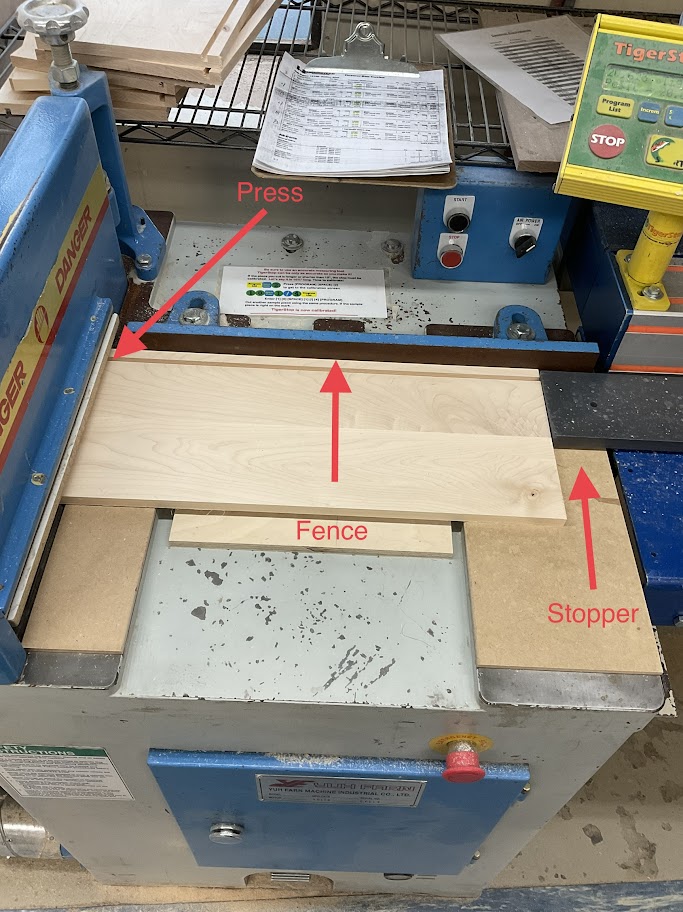
](http://help.homesteadcabinet.net/uploads/images/gallery/2023-01/mVsimage-4.jpg)**</td></tr></tbody></table>

<table border="1" class="align-center" style="border-collapse: collapse; width: 100%; border-width: 0px; height: 349px;"><colgroup><col style="width: 50%;"></col><col style="width: 50%;"></col></colgroup><tbody><tr style="height: 349px;"><td class="align-left" style="border-width: 0px; vertical-align: middle; height: 349px;">**10. Once the board is in place press the foot pedal located below the machine**

  
</td><td style="border-width: 0px; height: 349px;">**[![Image 5.jpg](http://help.homesteadcabinet.net/uploads/images/gallery/2023-01/scaled-1680-/CWHimage-5.jpg)
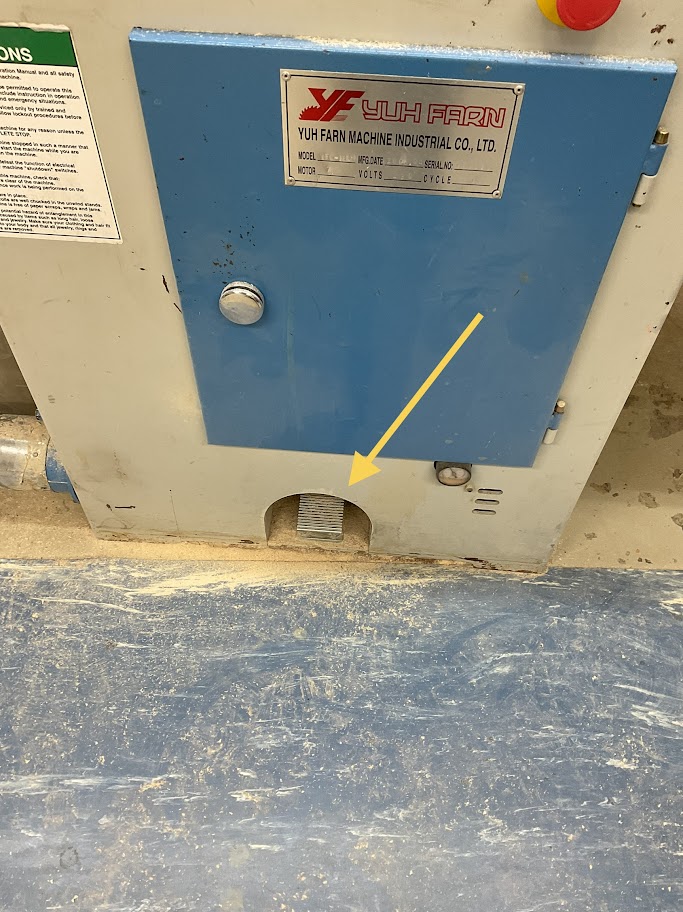
](http://help.homesteadcabinet.net/uploads/images/gallery/2023-01/CWHimage-5.jpg)**</td></tr></tbody></table>

**11. When the board is cut press "-", re-enter the damaged length then "=" then the "Start" button**

<p class="callout info">***This step will take off the 4 inches you added and put you back to your desired 12.5 inches***</p>

<table border="1" class="align-center" style="border-collapse: collapse; width: 100%; border-width: 0px; height: 349px;"><colgroup><col style="width: 50%;"></col><col style="width: 50%;"></col></colgroup><tbody><tr style="height: 349px;"><td class="align-left" style="border-width: 0px; vertical-align: middle; height: 349px;">**12. Rotate the board where the damaged length is out and then press the foot pedal to cut off the damaged length**

  
</td><td style="border-width: 0px; height: 349px;">**[![Image 6.jpg](http://help.homesteadcabinet.net/uploads/images/gallery/2023-01/scaled-1680-/tTDimage-6.jpg)
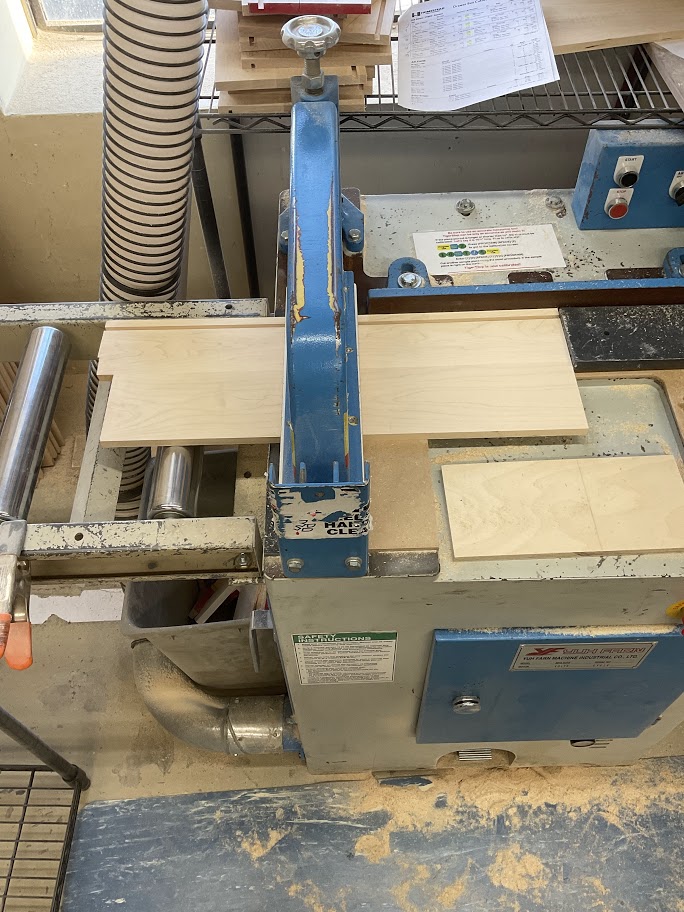
](http://help.homesteadcabinet.net/uploads/images/gallery/2023-01/tTDimage-6.jpg)**</td></tr></tbody></table>

<p class="callout info">***Note that steps 3, 4, and 7 are only needed when cutting a new board***  
</p>

</details><details id="bkmrk-powering-off-machine"><summary>Powering off Machine</summary>

<table border="1" class="align-center" style="border-collapse: collapse; width: 100%; border-width: 0px; height: 349px;"><colgroup><col style="width: 50%;"></col><col style="width: 50%;"></col></colgroup><tbody><tr style="height: 349px;"><td class="align-left" style="border-width: 0px; vertical-align: middle; height: 349px;">**13. Turn off the saw by pressing the red stop button on the blue electrical box located left of the control panel**

  
</td><td style="border-width: 0px; height: 349px;">**[![Image 7.jpg](http://help.homesteadcabinet.net/uploads/images/gallery/2023-01/scaled-1680-/wQWimage-7.jpg)](http://help.homesteadcabinet.net/uploads/images/gallery/2023-01/wQWimage-7.jpg)**</td></tr></tbody></table>

<table border="1" class="align-center" style="border-collapse: collapse; width: 100%; border-width: 0px; height: 349px;"><colgroup><col style="width: 50%;"></col><col style="width: 50%;"></col></colgroup><tbody><tr style="height: 349px;"><td class="align-left" style="border-width: 0px; vertical-align: middle; height: 349px;">**14. Turn off the control panel by pressing the red switch located on the right side of the blue electrical box behind the control panel**

  
</td><td style="border-width: 0px; height: 349px;">**[![Image 8.jpg](http://help.homesteadcabinet.net/uploads/images/gallery/2023-01/scaled-1680-/HUbimage-8.jpg)](http://help.homesteadcabinet.net/uploads/images/gallery/2023-01/HUbimage-8.jpg)**</td></tr></tbody></table>

</details>