Dovetail Jointer Instruction Procedure
Purpose
Dovetail joints make the drawer box stronger while still giving it a classier look
Powering Up Machine
|
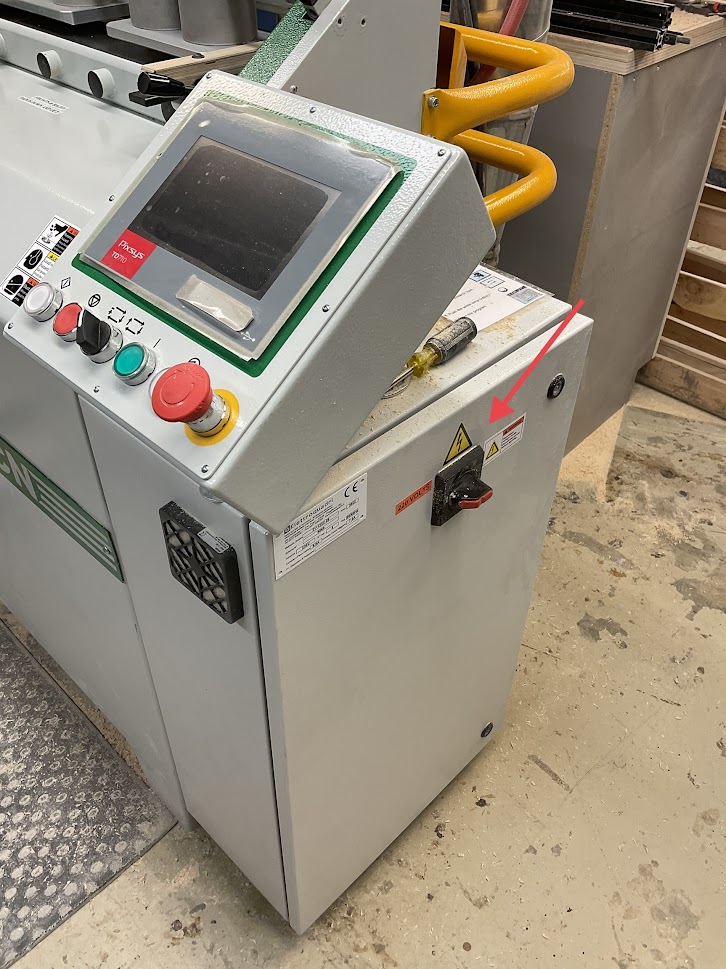
1. Turn the switch to the on position, located on the right side of the machine |
 |
|
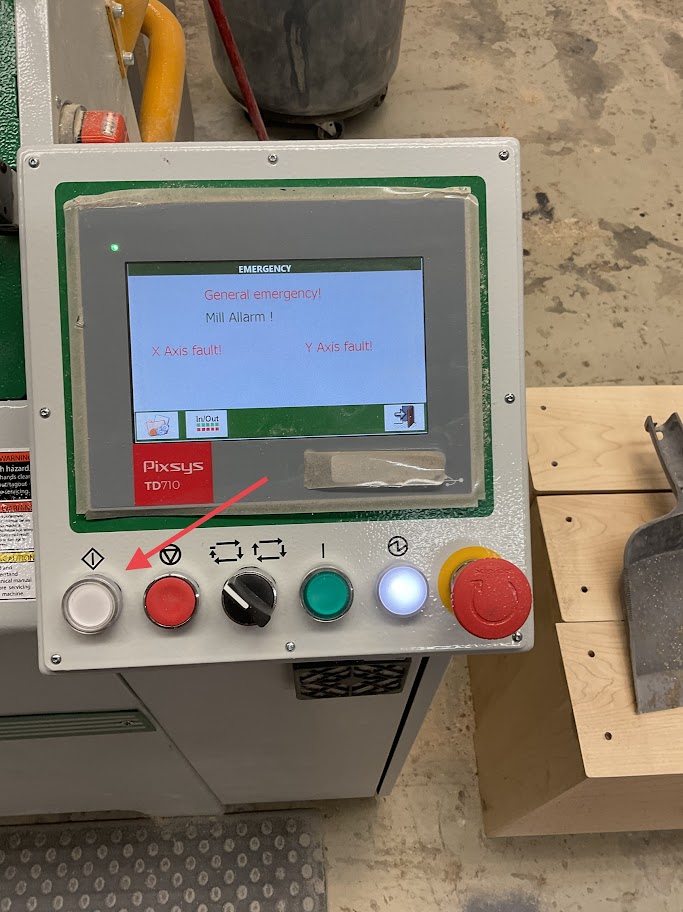
2. Press the white button on the left of the control panel |
 |
|
3. Press the green button on the right of the control panel |
 |
|
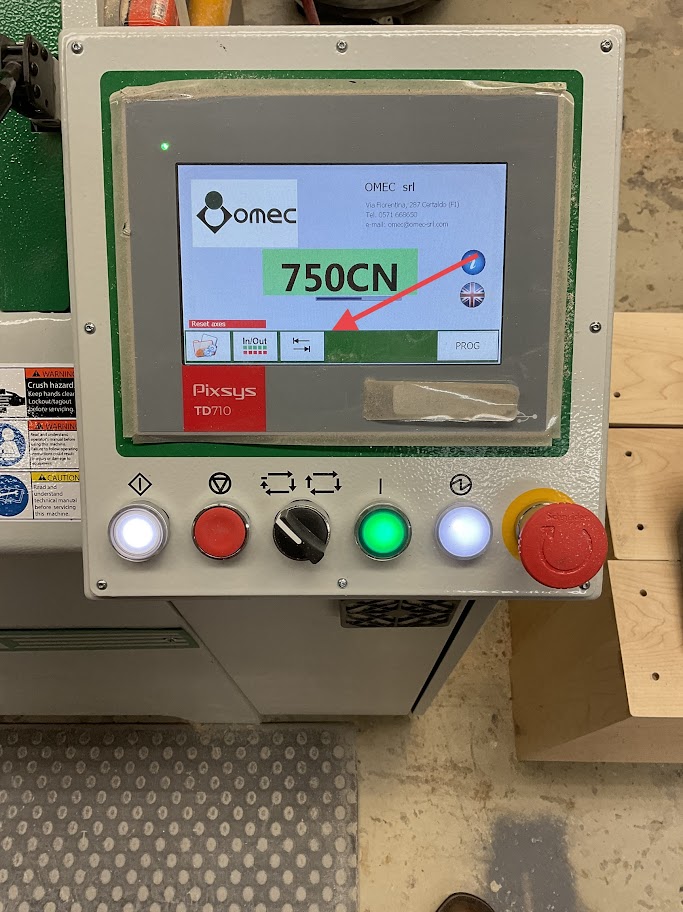
4. Press the open door icon located on the lower right side of the screen |
 |
|
5. Press the Zero Research icon on the lower left side of the screen |
 |
|
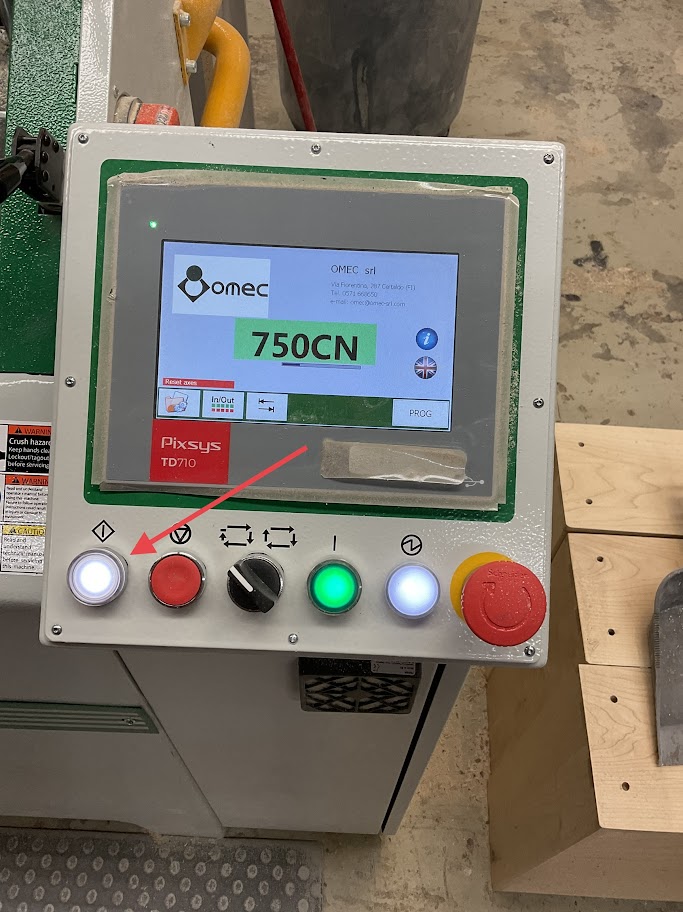
6. Press the white button on the left of the control panel |
 |
|
7. When the reset is complete press the close icon on the screen |
 |
|
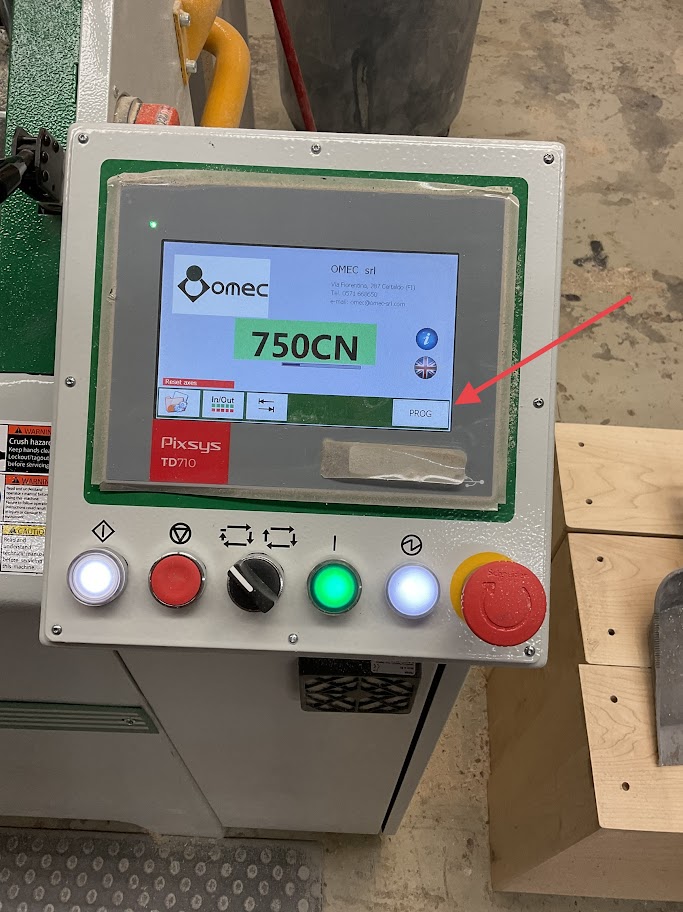
8. Press "PROG" icon on the lower right of the screen |
 |
|
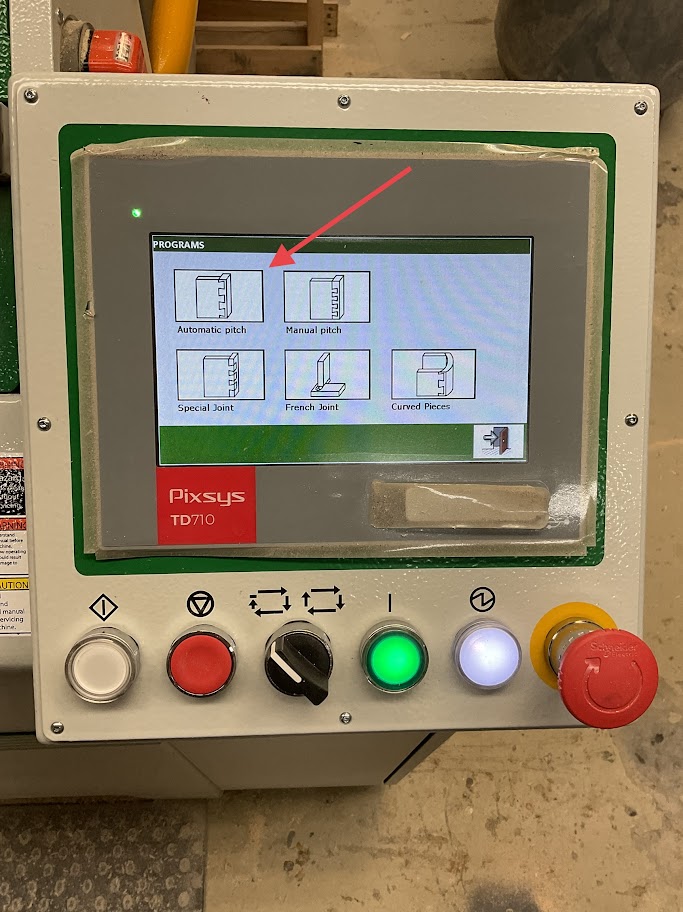
9. Select the "Automatic Pitch" icon on the upper left of the screen |
 |
Milling Set Up
|
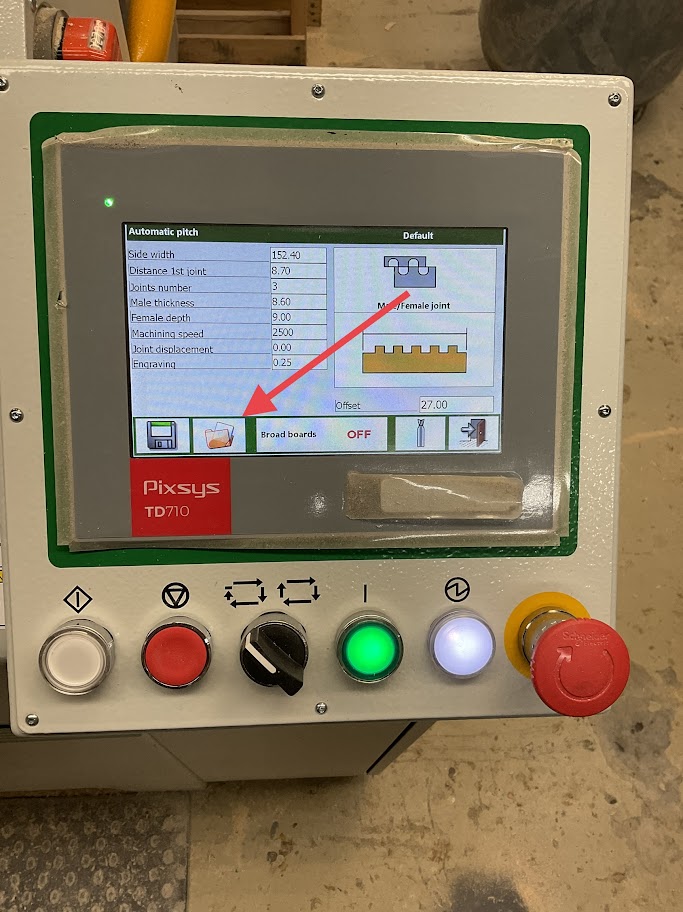
10. Press the Folder icon on the lower left of the screen |
 |
|
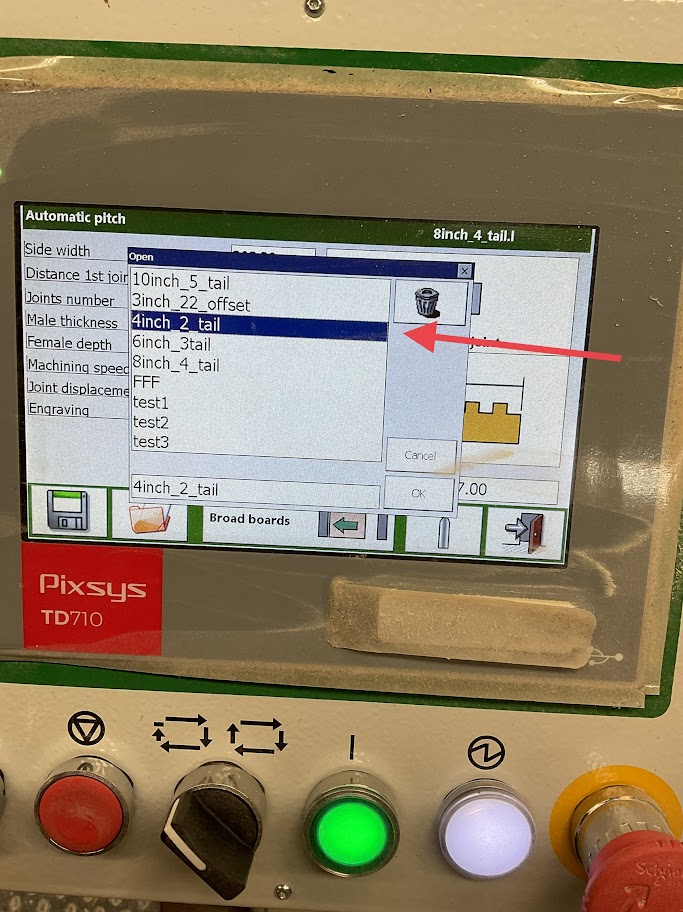
11. Select the file for the width of the board you will be milling For example, if the board width is 4 inch select the "4inch" file |
 |
Milling Board
|
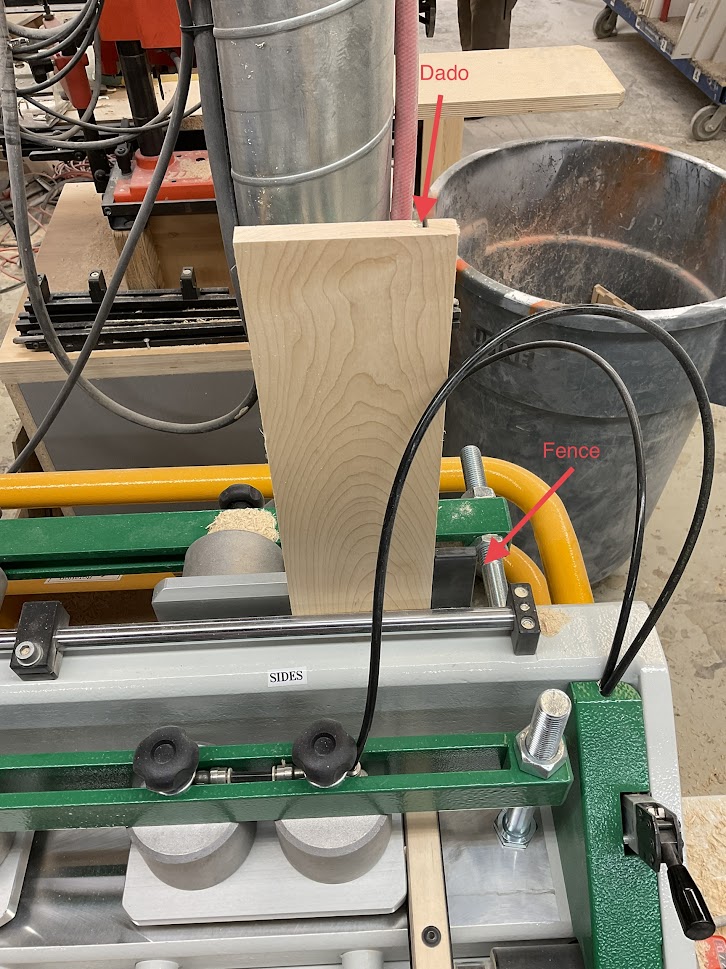
12. Place your side board in first with your panel being upright with the dado facing out and away flush against the fence |
 |
|
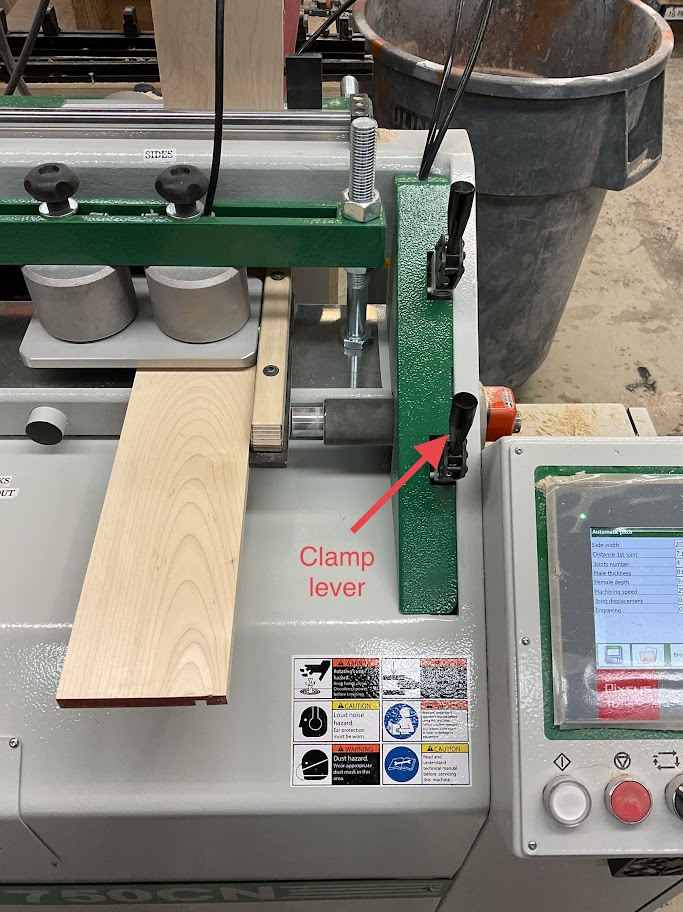
13. Push the clamp lever forward to secure the board in place |
 |
|
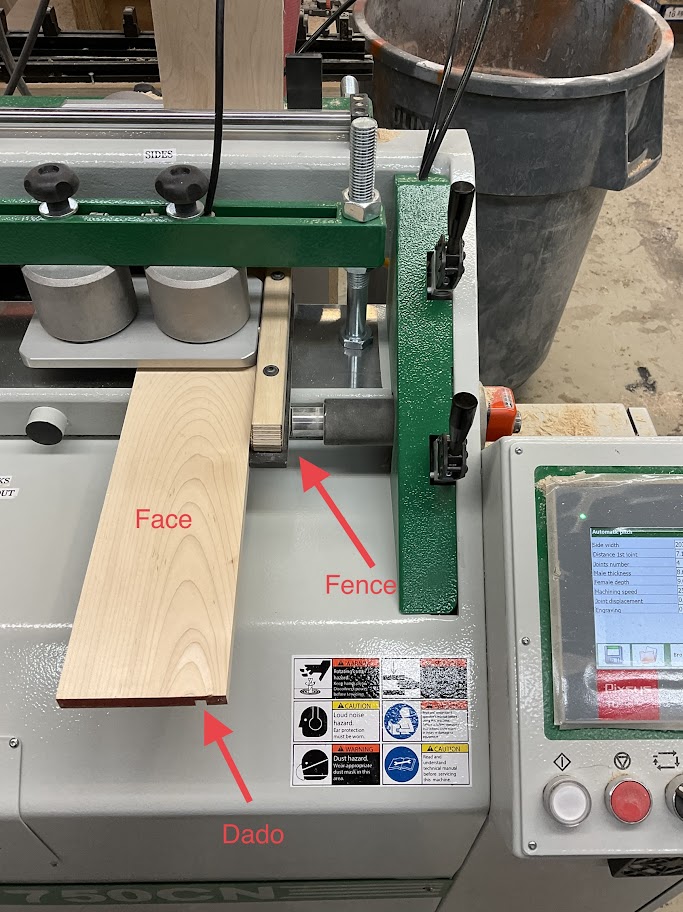
14. Place your front or back board face up with the dado down and away flush against the side panel and flush against the fence |
 |
|
15. Push the clamp lever forward to secure the board in place |
 |
|
16. Once all boards are in place and secured press the white button on the left side of the control panel to start the milling process. Repeat these steps for the left side. Make sure to look up in the right side of the screen to make sure the correct file is selected for the board size that is going to be dovetailed |
 |
|
17. Note, make sure that the "Broad Boards" icon is set to the side that the board will be milled. If boards are set on both sides made sure the "Broad Boards" icon says OFF |
 |
Powering off Machine
|
18. Simply turn the power switch in the off position, Located on the right side of the machine
|
 |
No comments to display
No comments to display