Parts Inspection Instruction Procedure
Purpose
To Make sure all imperfections are caught and any additional steps are properly done before wrapping and labeled for safe shipping.
Part Identification
1. Go to production coach
|
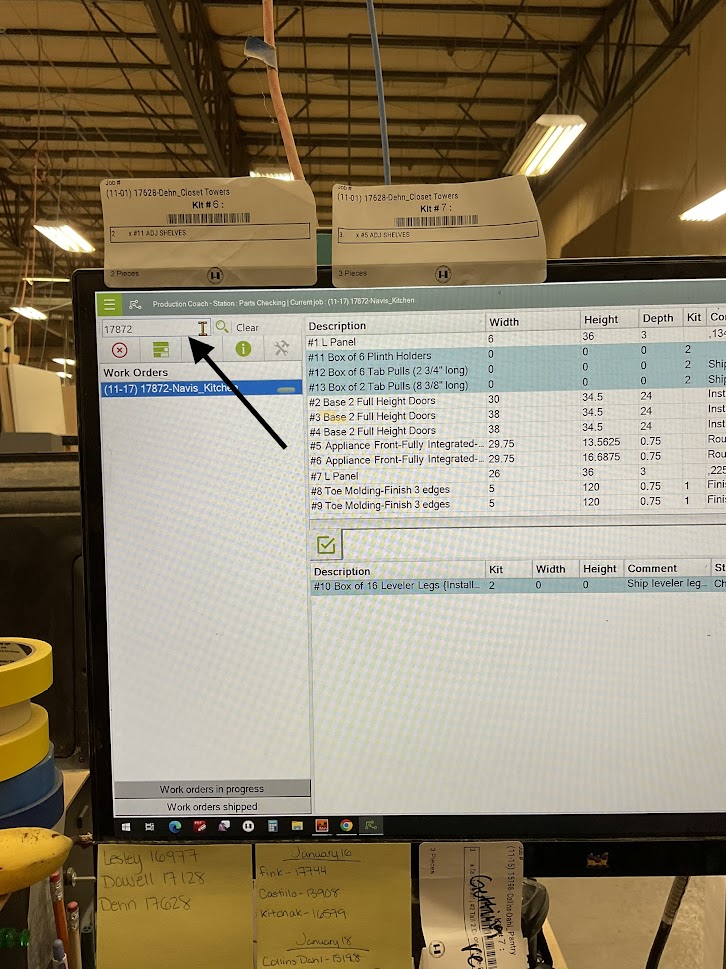
2. Type the job name or job number in the search bar located in the top left corner |
 |
|
3. On the left side of the screen click on the room the part is for |
 |
|
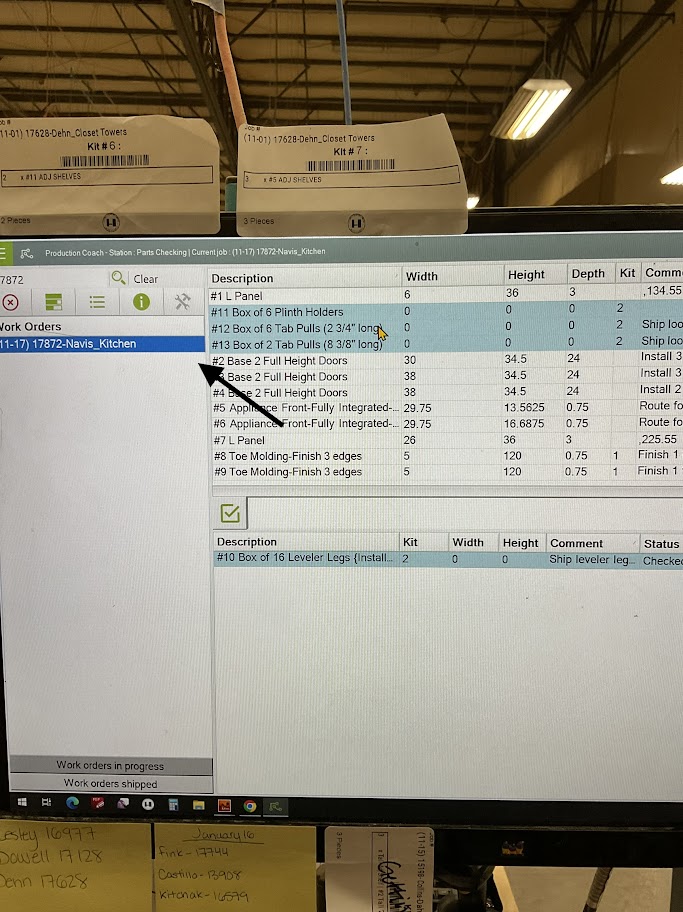
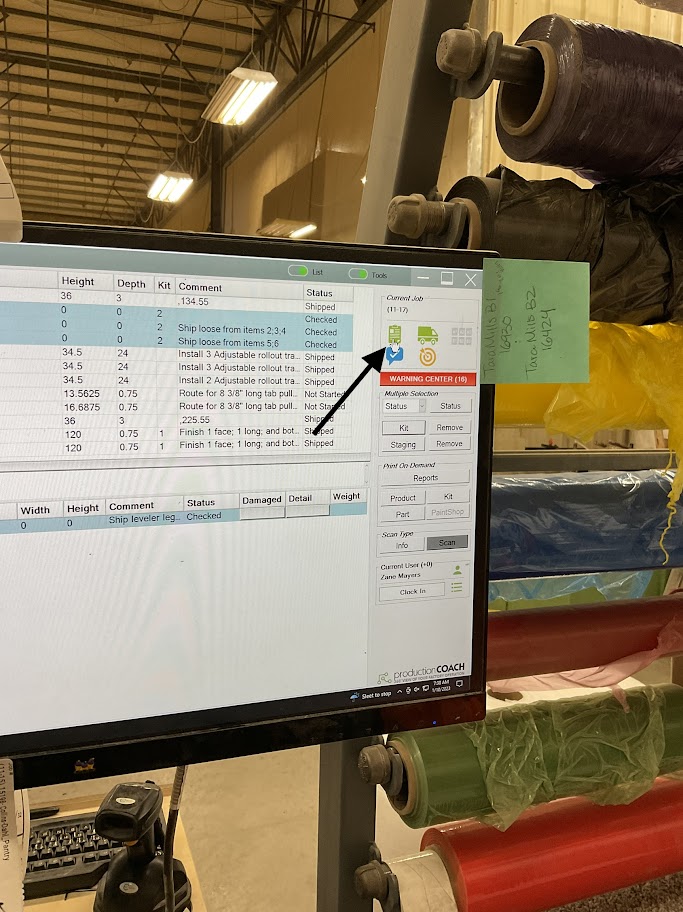
4. Click on the green clipboard located on the right side of the screen |
 |
|
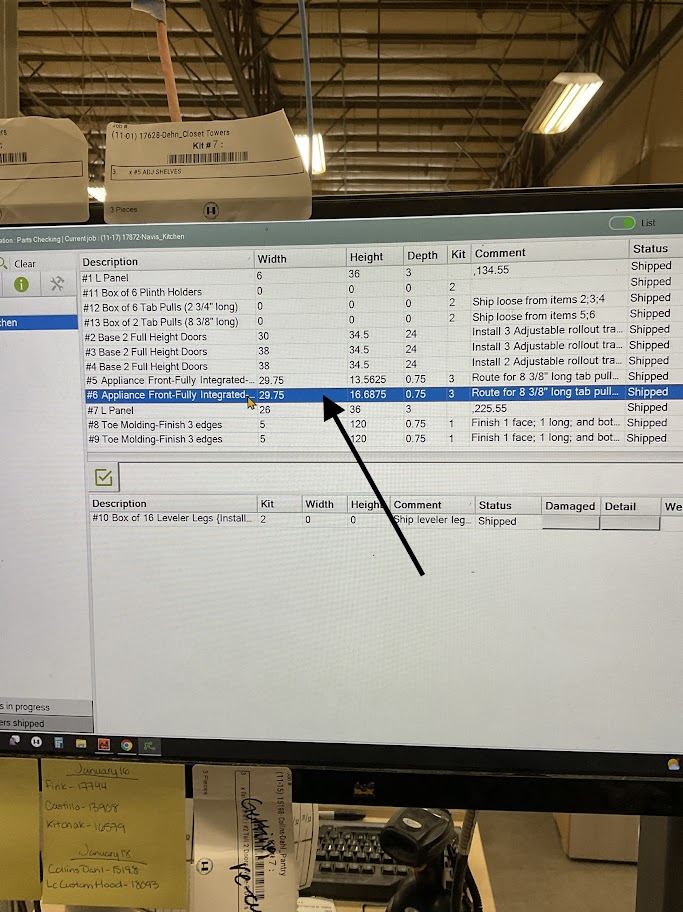
5. On the left side of the screen click on the part you are inspecting |
 |
6. Using the part number on the label to verify the right part was looked up
Often there are parts that are labeled incorrectly or not labeled. If you come across this, stop and get your supervisor, they will walk you through the additional steps
Part Verification
|
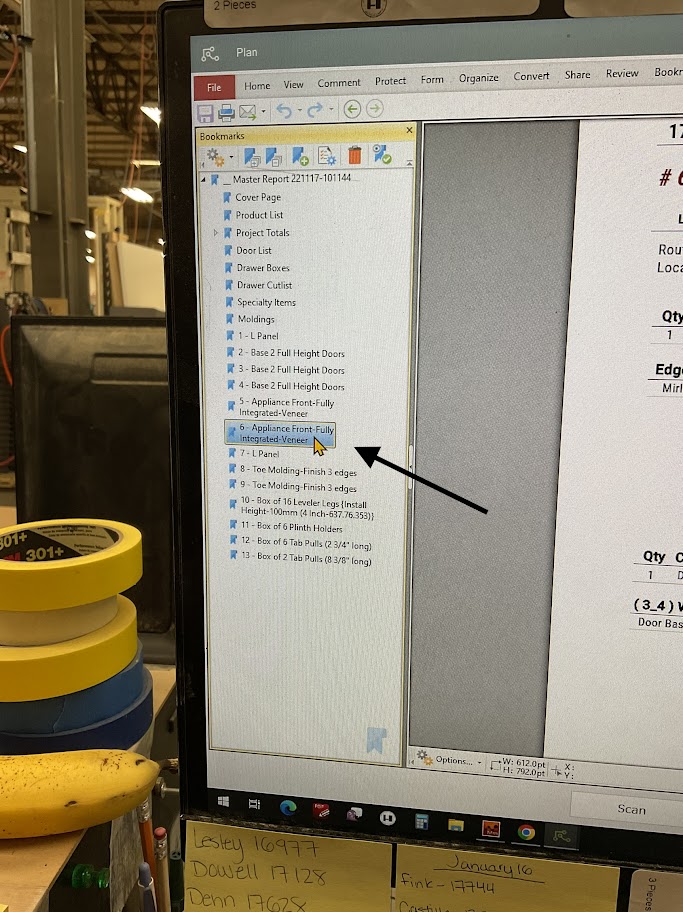
1. Use the spec sheet to verify measurements and any special instructions for the part. If there are any additional steps, make sure they are all accounted for If your not sure of all additional steps, stop your process and ask your supervisor |
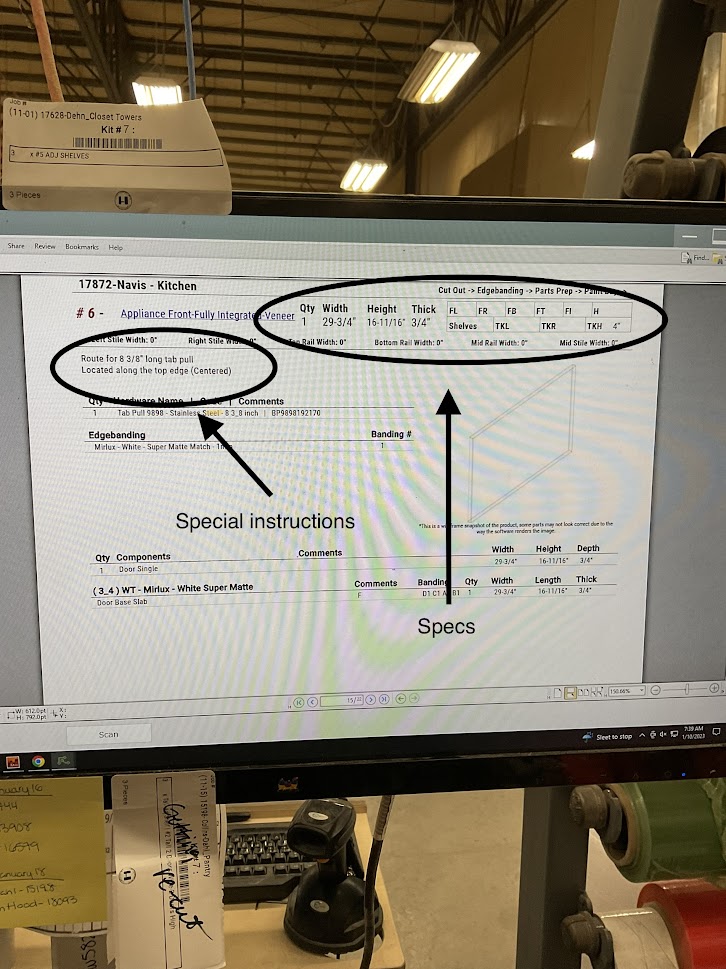 |
2. Measure the width, height, and depth of the part being inspected
3. Verify all special instructions are complete and correct
Part Inspection
1. Inspect all finished surfaces for any imperfections
If imperfections are found inform your supervisor or the department it was made in before continuing
2. Inspect edge band for imperfections, including chips around the edge band and remove any remaining glue let by the edge bander
|
3. When the inspection is complete go back to the main screen and click on the part that was inspected |
 |
4. Status check the part as "Checked" to ensure others that the part has been inspected
|
5. Click the "Product" icon located on the lower right side of the screen This step will print a finished product label to be applied when inspection is completed |
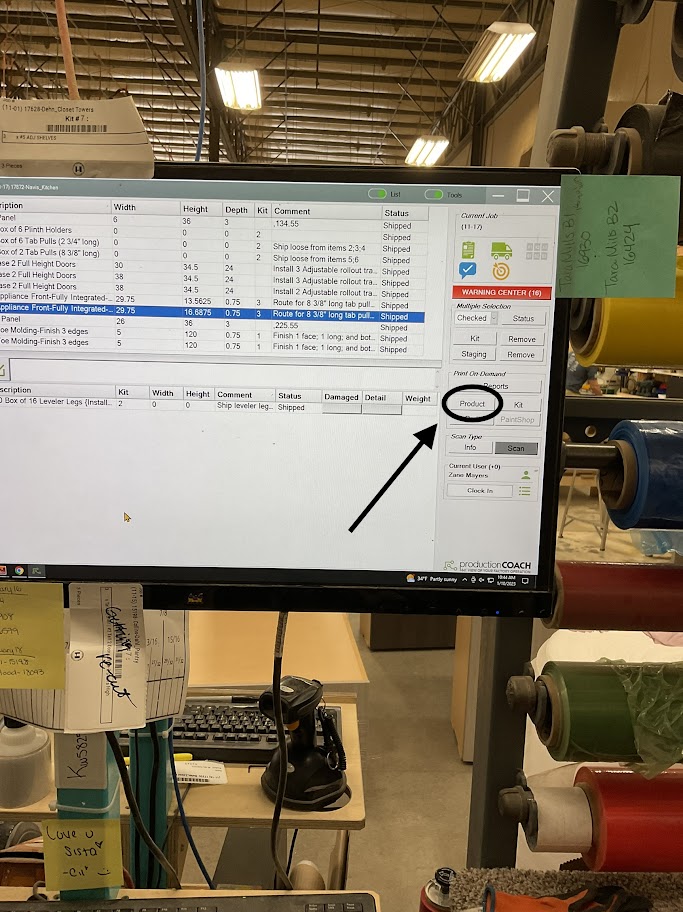 |
Part Shipping Prep
|
1. Wrap the part in foam |
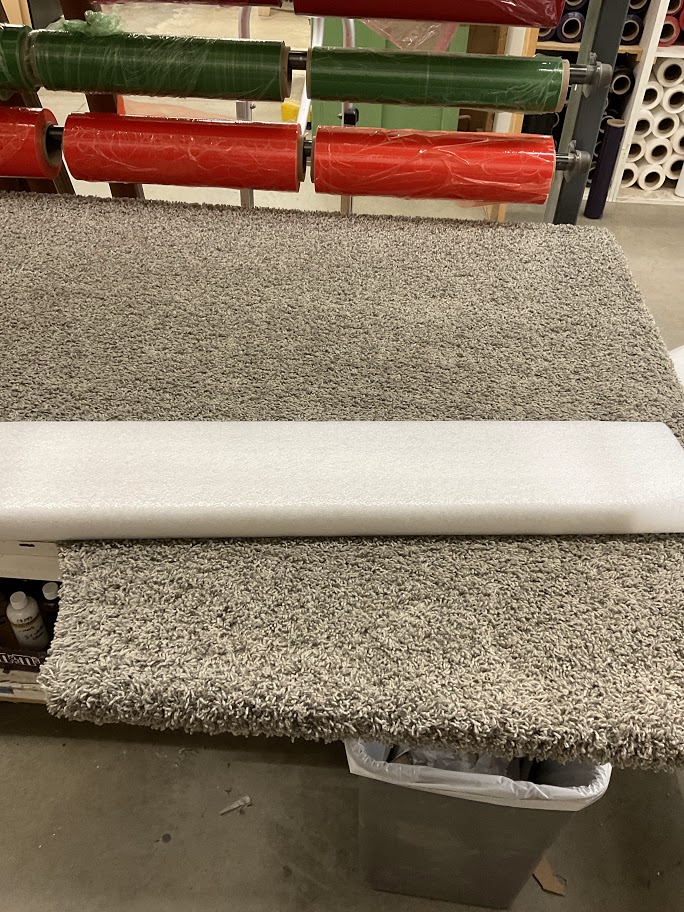 |
2. Use edge protectors on all finished edges or edges that are 1.5 inches or bigger
3. Check finished label and refer to the white board to verify color the part will be wrapped in
|
4. Wrap part in coordinated color |
 |
5. Attach finished label to the part and place tape over the label to prevent it from falling off
6. Scan finished label
This will change the status of the part to wrapped
No comments to display
No comments to display