# L-Panel Instruction Procedure

<span style="text-decoration: underline;">**Purpose**</span>

The purpose of an L-Panel is to fill the void between the wall and the cabinet. This will allow for a smoother and much cleaner look.

<details id="bkmrk-material-prep-1.-rev"><summary>Material Prep</summary>

<table border="1" class="align-center" style="border-collapse: collapse; width: 100%; border-width: 0px; height: 349px;"><colgroup><col style="width: 50%;"></col><col style="width: 50%;"></col></colgroup><tbody><tr style="height: 349px;"><td class="align-left" style="border-width: 0px; vertical-align: middle; height: 349px;">**1. Review paperwork for any special instructions that might be needed**</td><td style="border-width: 0px; height: 349px;">**[![Image 1.jpg](http://help.homesteadcabinet.net/uploads/images/gallery/2022-12/scaled-1680-/bWkimage-1.jpg)
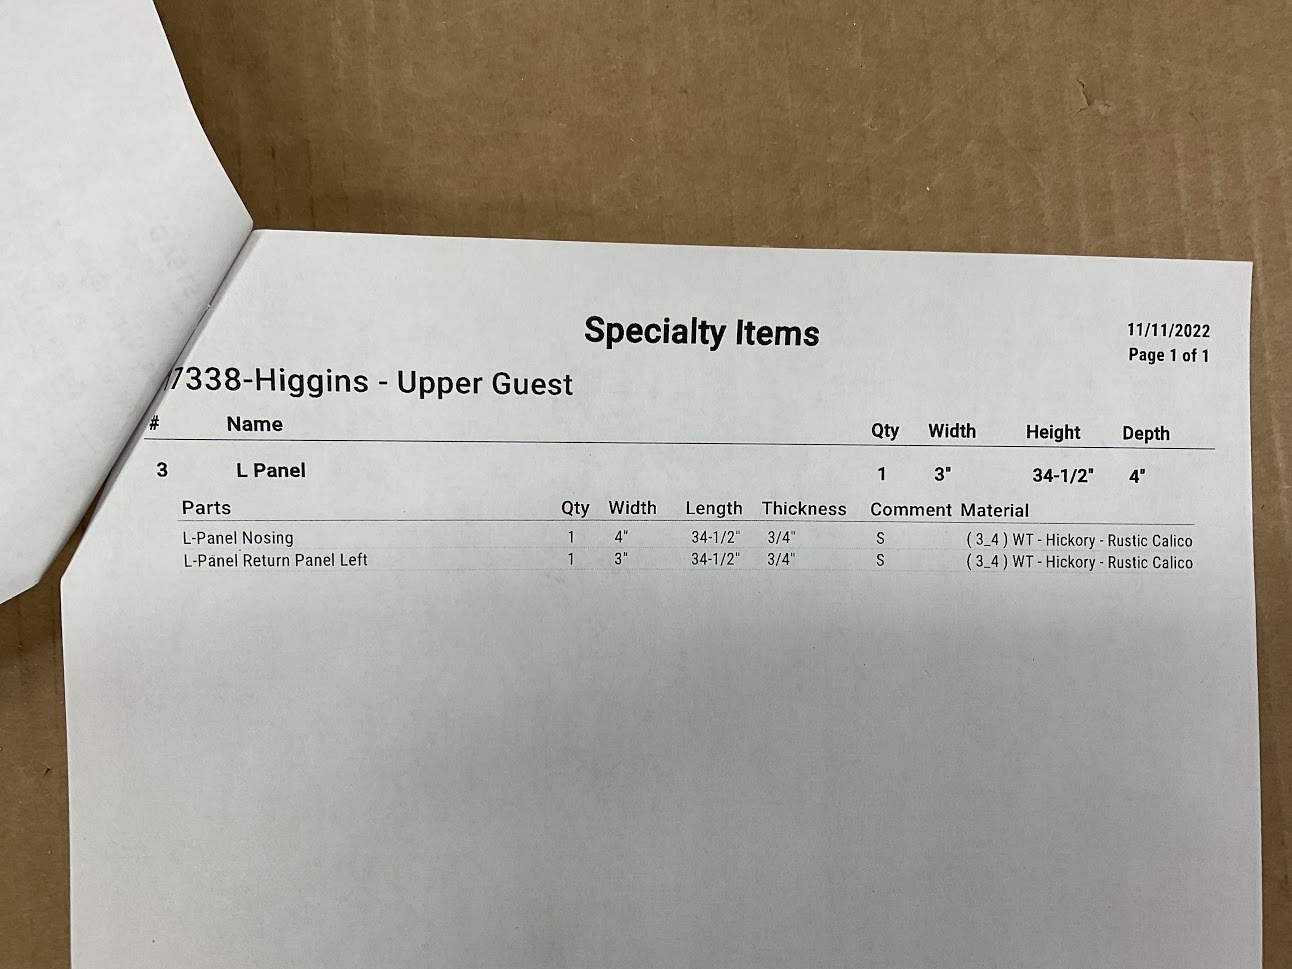
](http://help.homesteadcabinet.net/uploads/images/gallery/2022-12/bWkimage-1.jpg)**</td></tr></tbody></table>

<table border="1" class="align-center" style="border-collapse: collapse; width: 100%; border-width: 0px; height: 349px;"><colgroup><col style="width: 50%;"></col><col style="width: 50%;"></col></colgroup><tbody><tr style="height: 349px;"><td class="align-left" style="border-width: 0px; vertical-align: middle; height: 349px;">**2. Gather materials and verify parts are correct with your paperwork.**</td><td style="border-width: 0px; height: 349px;">**[![Image 2.jpg](http://help.homesteadcabinet.net/uploads/images/gallery/2022-12/scaled-1680-/7yximage-2.jpg)
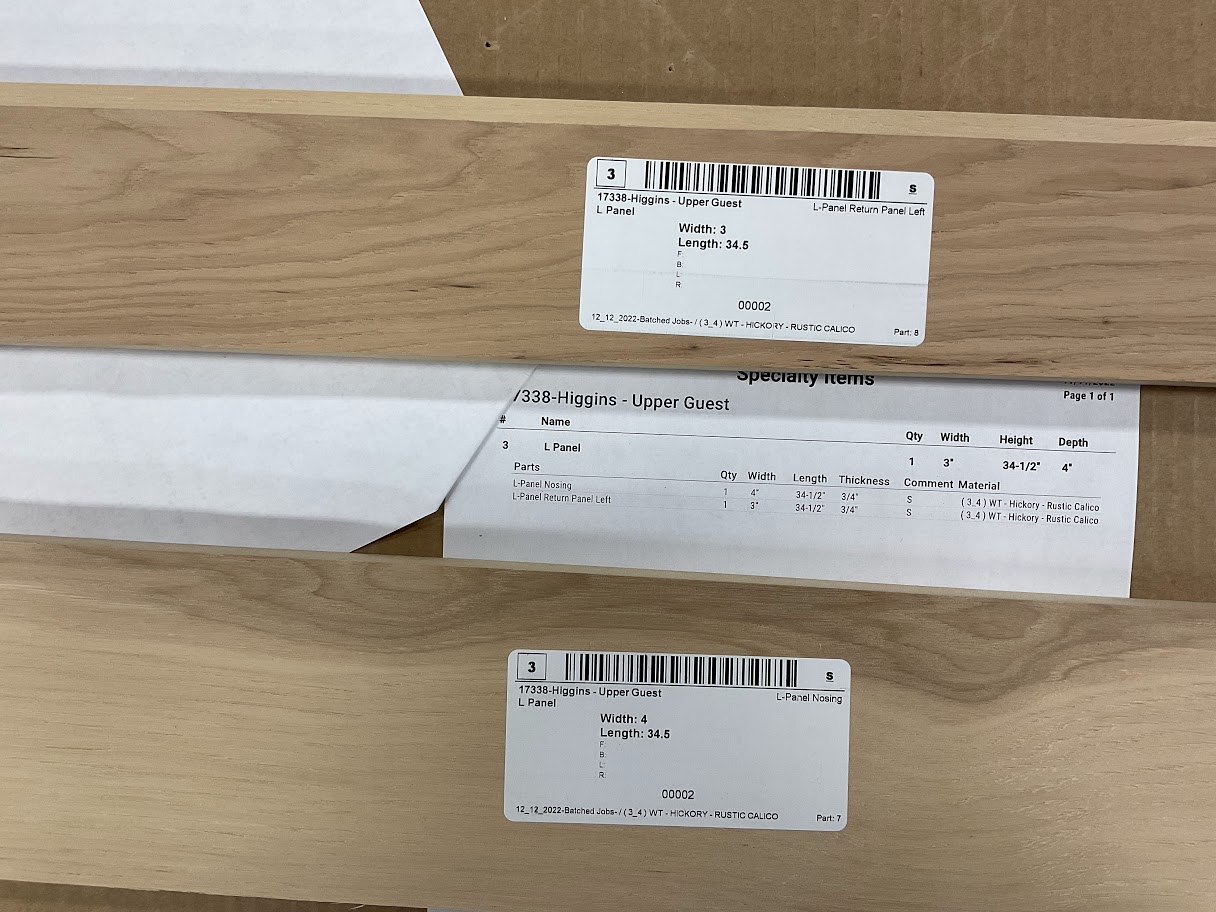
](http://help.homesteadcabinet.net/uploads/images/gallery/2022-12/7yximage-2.jpg)**</td></tr></tbody></table>

<table border="1" class="align-center" style="border-collapse: collapse; width: 100%; border-width: 0px; height: 349px;"><colgroup><col style="width: 50%;"></col><col style="width: 50%;"></col></colgroup><tbody><tr style="height: 349px;"><td class="align-left" style="border-width: 0px; vertical-align: middle; height: 349px;">**3. Inspect your material for any imperfections**

<p class="callout warning">**If any imperfections are found, inform our supervisor before continuing!**</p>

</td><td style="border-width: 0px; height: 349px;">**[![Image 3.jpg](http://help.homesteadcabinet.net/uploads/images/gallery/2022-12/scaled-1680-/HAEimage-3.jpg)
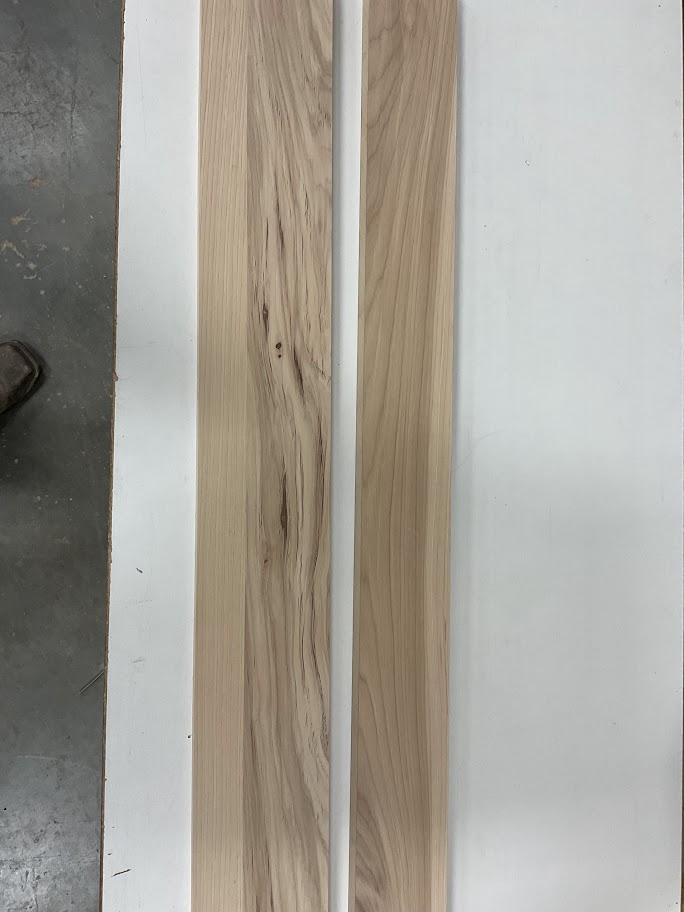
](http://help.homesteadcabinet.net/uploads/images/gallery/2022-12/HAEimage-3.jpg)**</td></tr></tbody></table>

</details><details id="bkmrk-assembly-1.-once-par"><summary>Assembly</summary>

<table border="1" class="align-center" style="border-collapse: collapse; width: 100%; border-width: 0px; height: 349px;"><colgroup><col style="width: 50%;"></col><col style="width: 50%;"></col></colgroup><tbody><tr style="height: 349px;"><td class="align-left" style="border-width: 0px; vertical-align: middle; height: 349px;">**1. Once parts are inspected, determine which part is your return panel and which is your nosing**

<p class="callout info">**Note that typically your return panel will be your wider part**</p>

</td><td style="border-width: 0px; height: 349px;">**[![Image 4.jpg](http://help.homesteadcabinet.net/uploads/images/gallery/2022-12/scaled-1680-/38nimage-4.jpg)](http://help.homesteadcabinet.net/uploads/images/gallery/2022-12/38nimage-4.jpg)**</td></tr></tbody></table>

**2. Use the Lock Miter to cut our nosing and return panel**

<p class="callout info">**Refer to the Lock Miter Instruction Procedure for proper equipment usage**</p>

<table border="1" class="align-center" style="border-collapse: collapse; width: 100%; border-width: 0px; height: 349px;"><colgroup><col style="width: 50%;"></col><col style="width: 50%;"></col></colgroup><tbody><tr style="height: 349px;"><td class="align-left" style="border-width: 0px; vertical-align: middle; height: 349px;">**3. Apply two strips of glue to your return panel**</td><td style="border-width: 0px; height: 349px;">**[![Image 5.jpg](http://help.homesteadcabinet.net/uploads/images/gallery/2022-12/scaled-1680-/gYVimage-5.jpg)
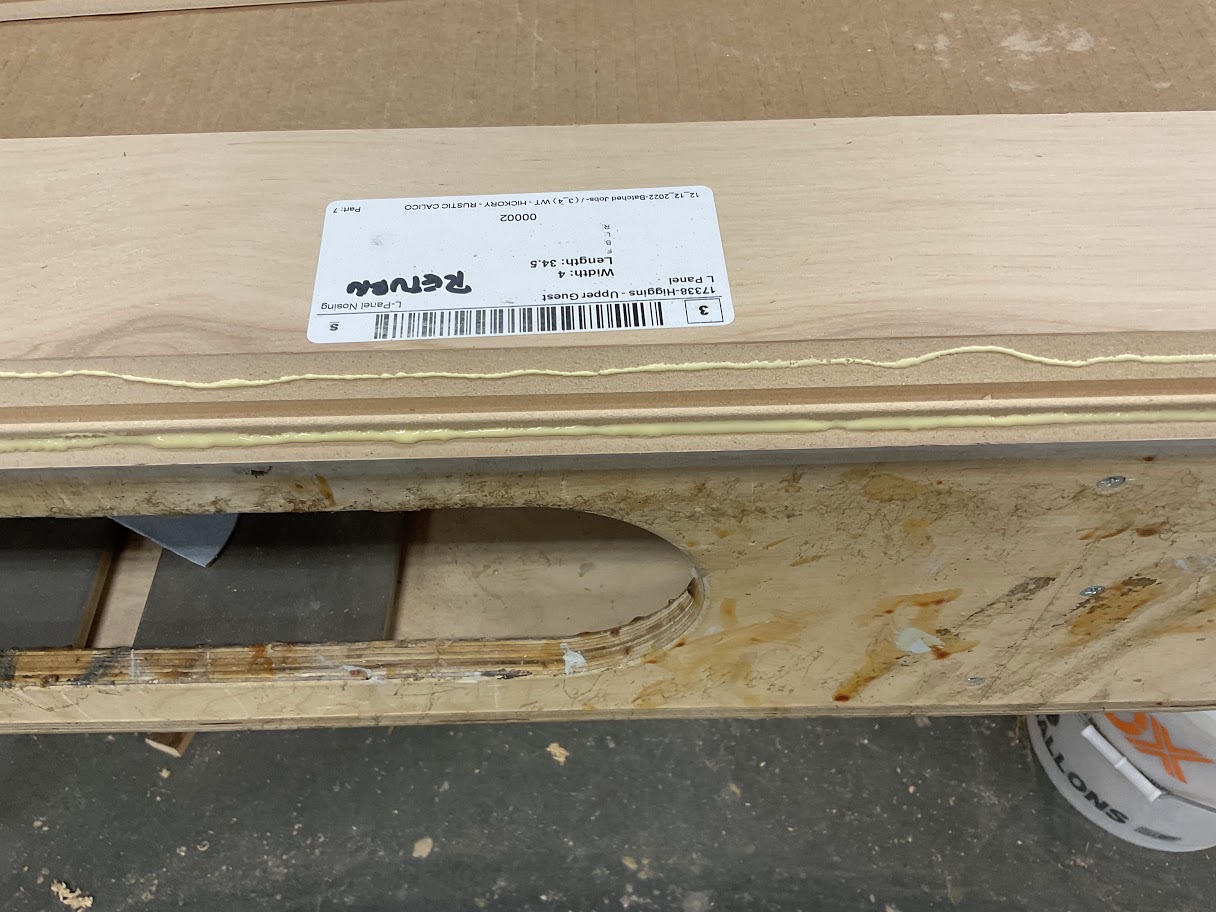
](http://help.homesteadcabinet.net/uploads/images/gallery/2022-12/gYVimage-5.jpg)**</td></tr></tbody></table>

<table border="1" class="align-center" style="border-collapse: collapse; width: 100%; border-width: 0px; height: 349px;"><colgroup><col style="width: 50%;"></col><col style="width: 50%;"></col></colgroup><tbody><tr style="height: 349px;"><td class="align-left" style="border-width: 0px; vertical-align: middle; height: 349px;">**4. Place your nosing on the return panel ensuring each side is flush** </td><td style="border-width: 0px; height: 349px;">**[![Image 6.jpg](http://help.homesteadcabinet.net/uploads/images/gallery/2022-12/scaled-1680-/6Gwimage-6.jpg)
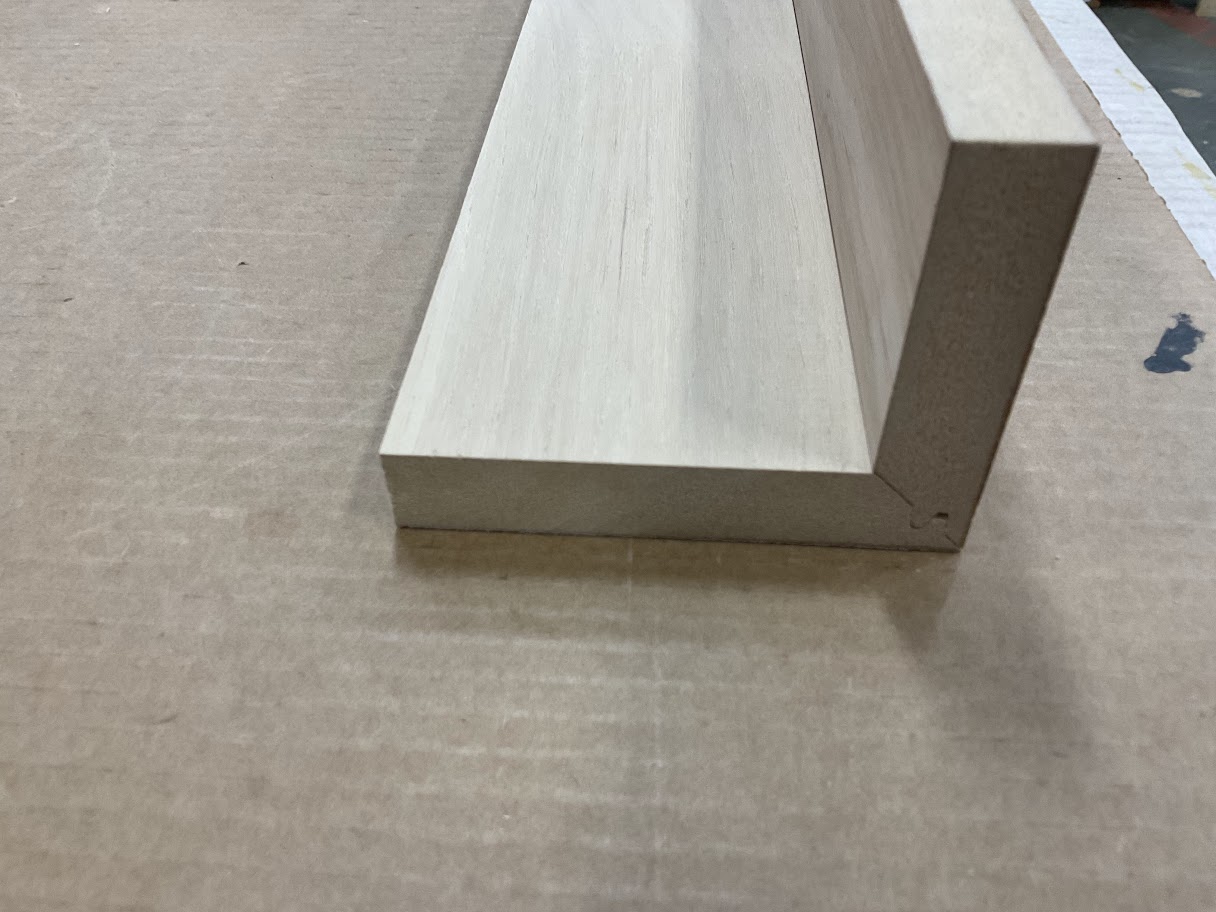
](http://help.homesteadcabinet.net/uploads/images/gallery/2022-12/6Gwimage-6.jpg)**</td></tr></tbody></table>

<table border="1" class="align-center" style="border-collapse: collapse; width: 100%; border-width: 0px; height: 349px;"><colgroup><col style="width: 50%;"></col><col style="width: 50%;"></col></colgroup><tbody><tr style="height: 349px;"><td class="align-left" style="border-width: 0px; vertical-align: middle; height: 349px;">**5. Apply clamps to join the two parts together and set our egg time for 10 minutes**</td><td style="border-width: 0px; height: 349px;">**[![Image 7.jpg](http://help.homesteadcabinet.net/uploads/images/gallery/2022-12/scaled-1680-/UAyimage-7.jpg)
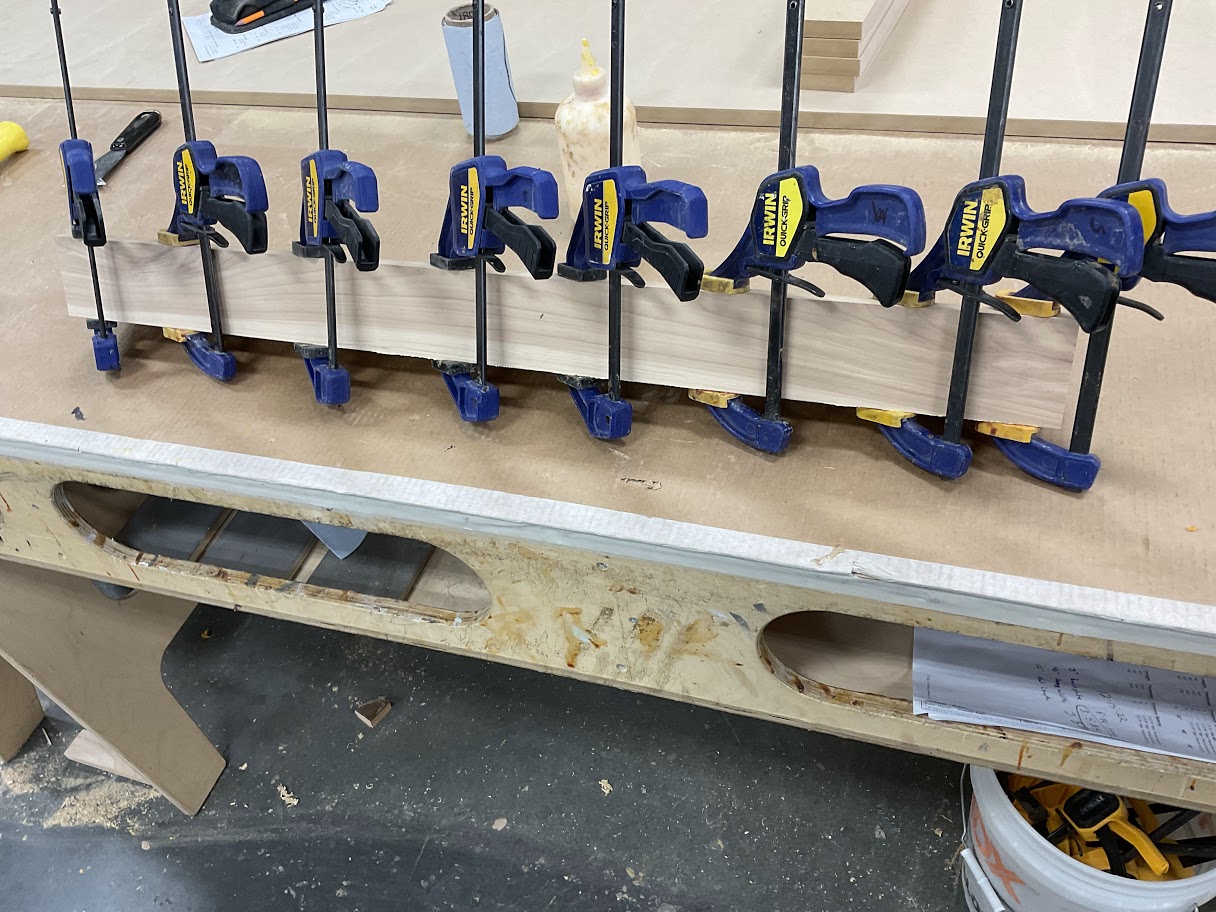
](http://help.homesteadcabinet.net/uploads/images/gallery/2022-12/UAyimage-7.jpg)**</td></tr></tbody></table>

</details><details id="bkmrk-finish-part-1.-once-"><summary>Finish Part</summary>

**1. Once glue has dried remove all unwanted glue that seeped through**

**2. Use orbital sander to give the finished peace a smooth finish**

<p class="callout warning">**Note 180 grit sandpaper is ideal for this step**</p>

**3. Roll jointed edge with round metal dowel to mash the fibers at the seem** </details>