Specialty
- Lock Miter
- Planer
- Rip Saw Instruction Procedure
- L-Panel Instruction Procedure
- Wide Belt Sander Instruction Procedure
Lock Miter
Purpose
To create a seamless joint that is more structurally sound
Power on Machine
| 1. Press “Feed Start” |  |
|
2. Press “Heads Start” |
 |
Miter Part
1. Prep all parts as explained on paperwork
2. Make sure machine table is clean and smooth before starting
| 3. Set feed speed to the part to be tooled | 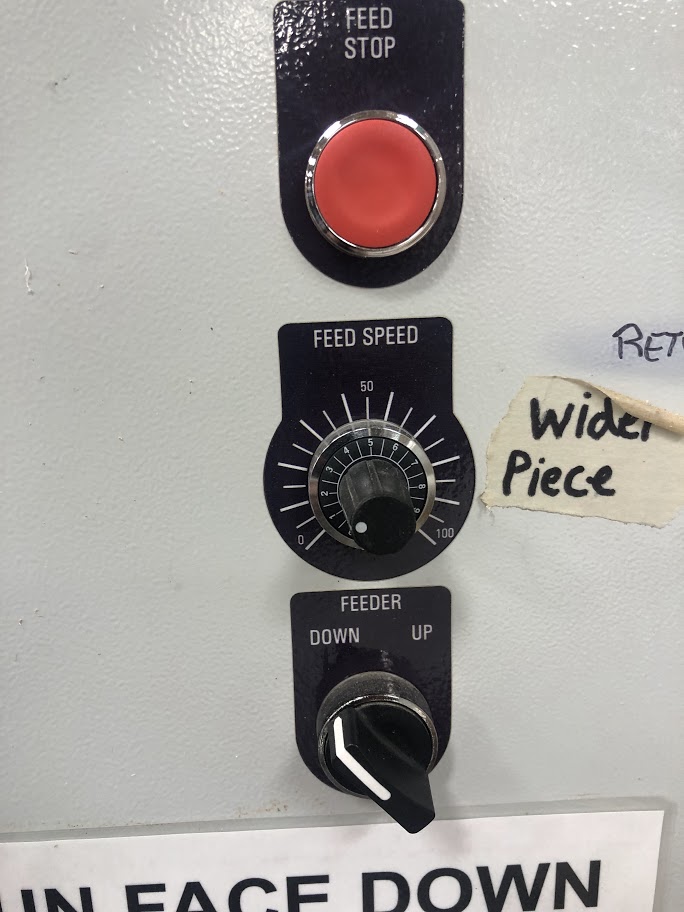 |
| 4. Set machine to the proper cut as explained on the paperwork given (Return cut or Nosing cut) | 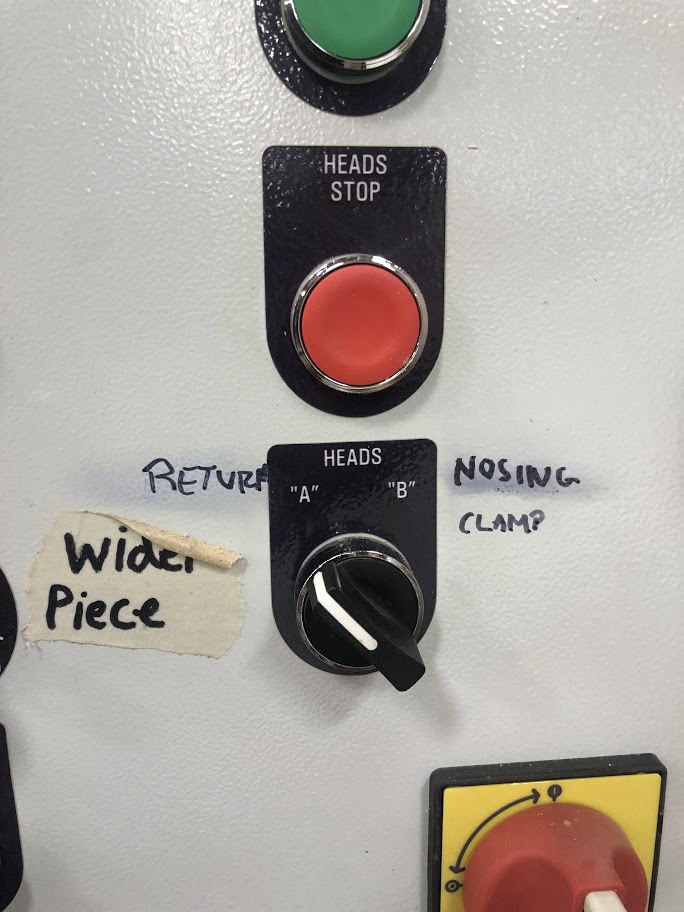 |
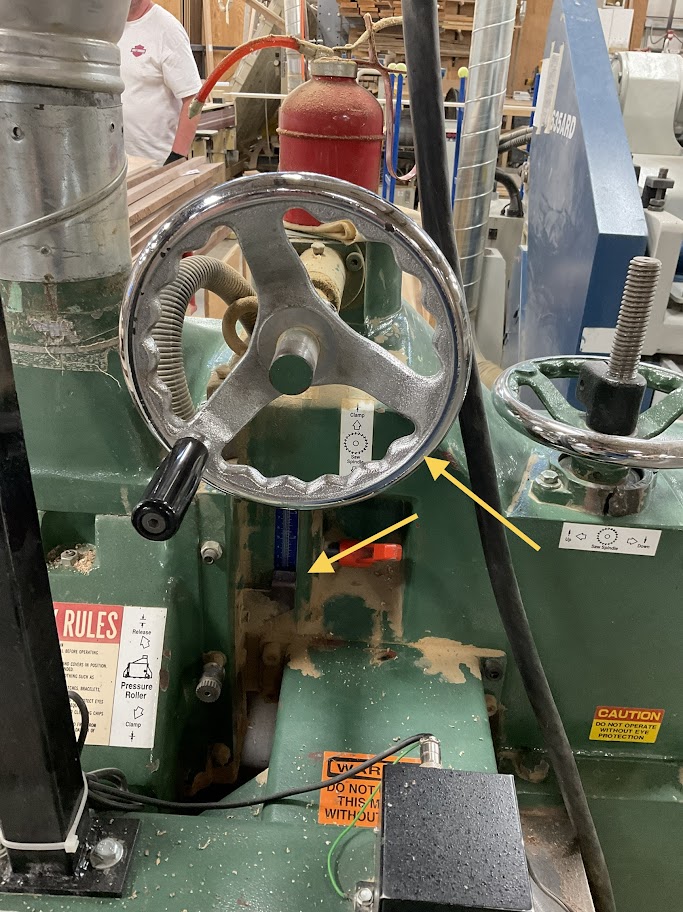
| 5. Set feeder height to parts thickness | 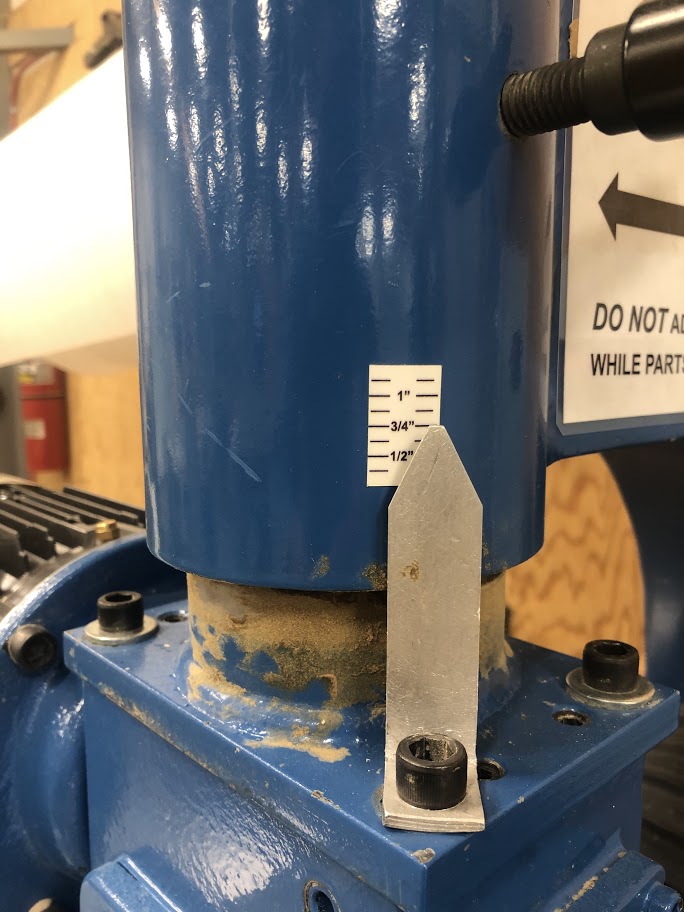 |
| 6. If part is 1 ¾” or less select and attach proper jig before running through the machine | 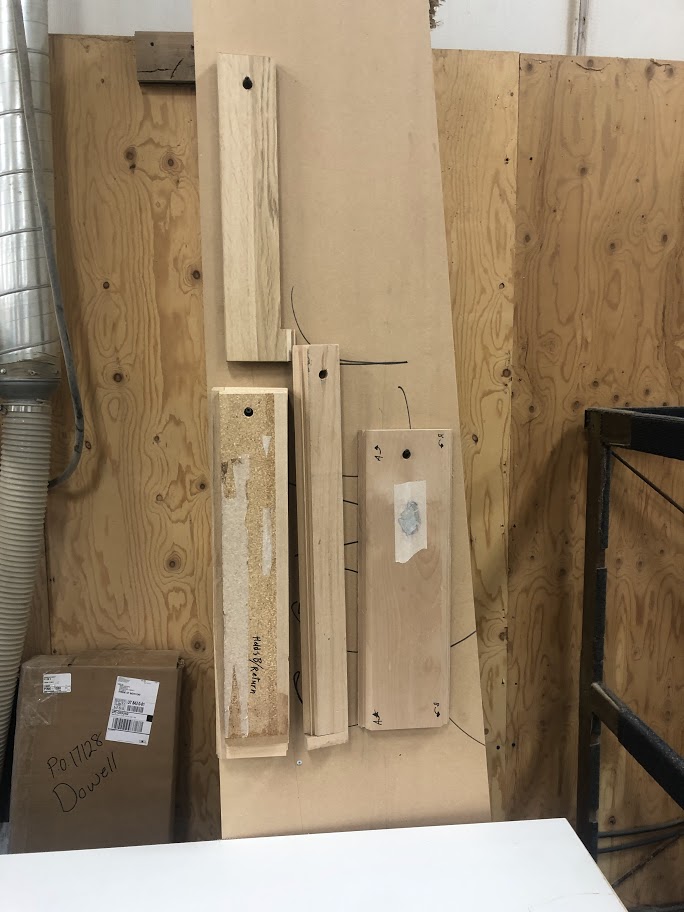 |
| 7. Feed part face down with side to be mitered against the fence | 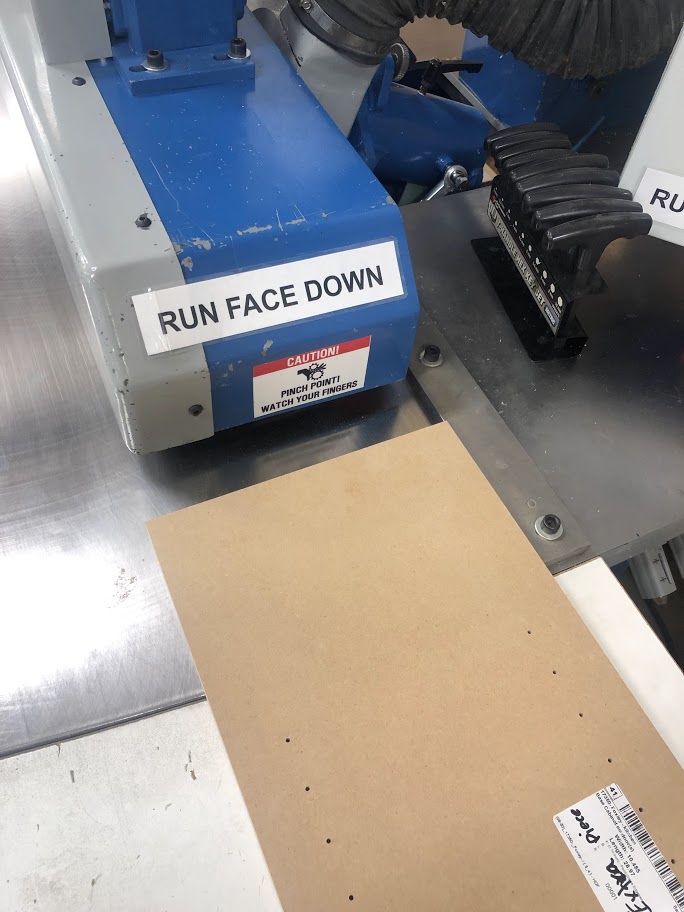 |
| 8. Inspect mitered edge for chips, cracks, ext. or if part need to be passed through the machine again (need a smooth sharp cut) | 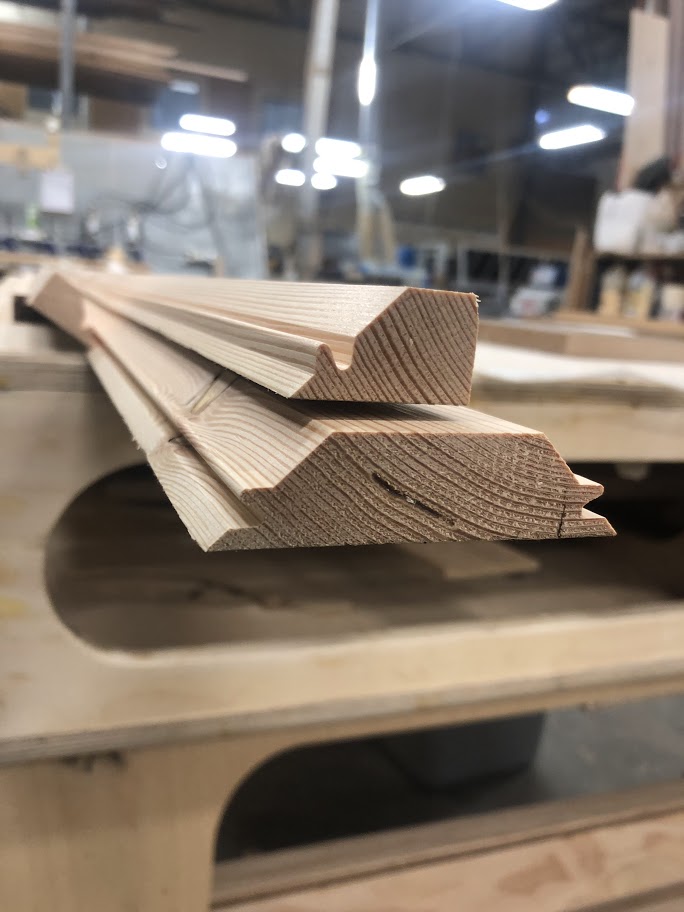 |
9. Blow off all remaining debris before passing through each part till all parts are done
Explain to the employee the importance of insuring the machine is set to the right cut for each piece. Explain to the employee why part need to be face down when ran through the machine. Explain to the employee why it's important to use a jig if part is 1 3/4" or smaller.
Powering off Machine
| Press “Feed Stop” | |
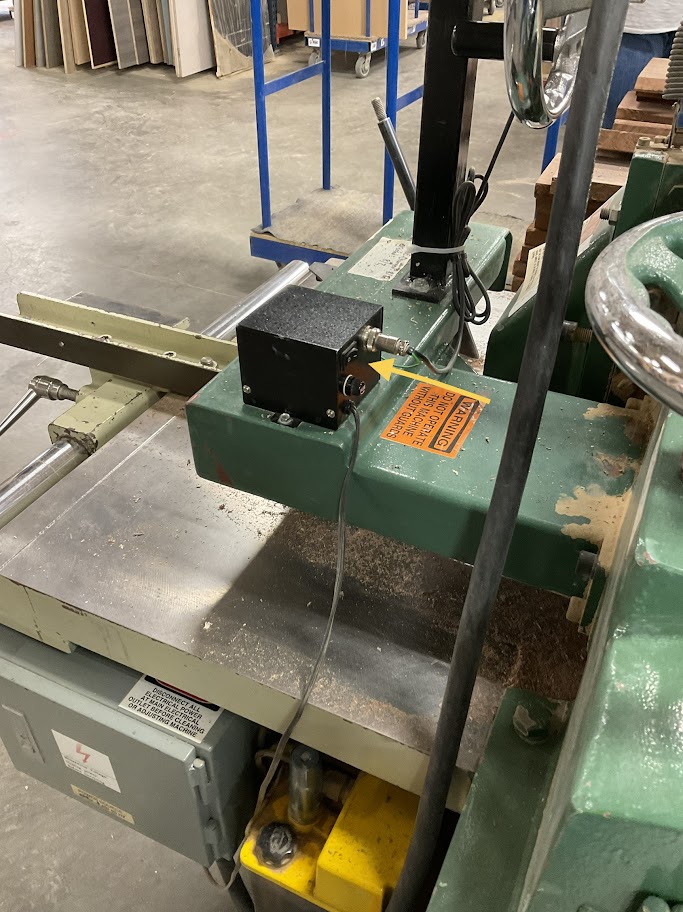
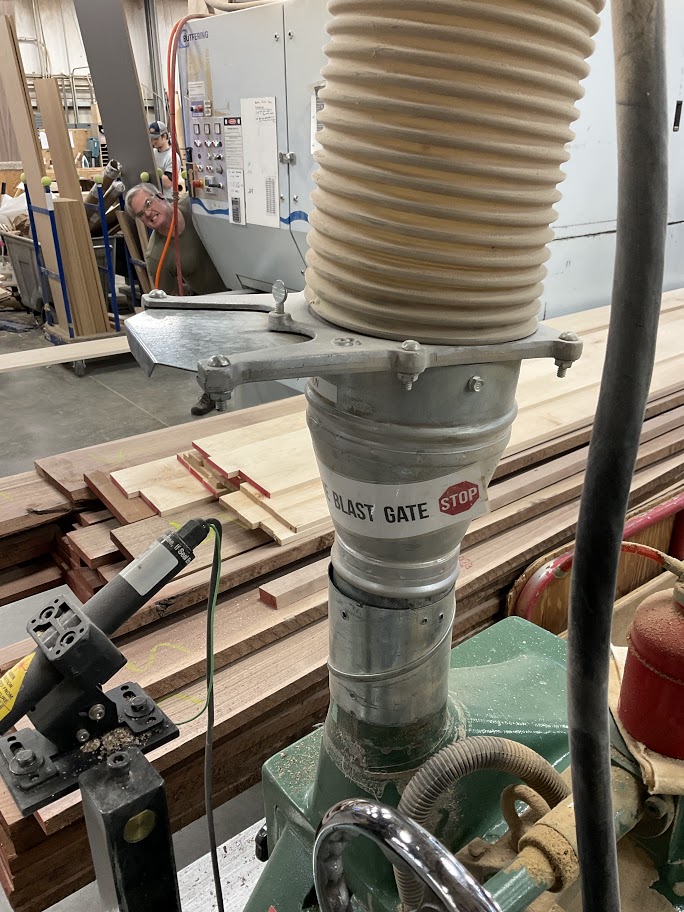
| 2. Press “Heads Stop” (see image 2) | |
| 3. Set feeder height back to 3/4 (see image 5) | |
4. Make sure machine is clean and smooth before leaving the machine
Explain to the employee way the machine needs to be set back to ¾”. Explain the importance of cleaning the machine before leaving.
Planer
Purpose
The purpose for using the planer is to trim boards to a rough thickness consistently throughout the length of the board.
Starting the Machine
|
1. Press the left green button to start lower head (Wait for the gage to reset) |
 |
| 2. Press the middle green button to start upper head (Wait for the gage to reset) | 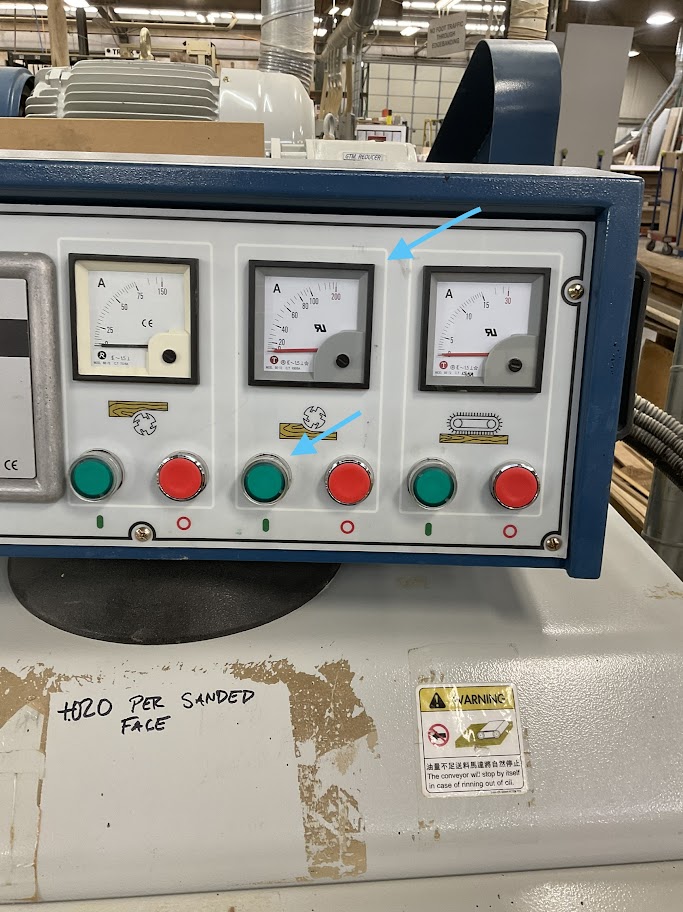 |
| 3. Press the right green button to start feeder | 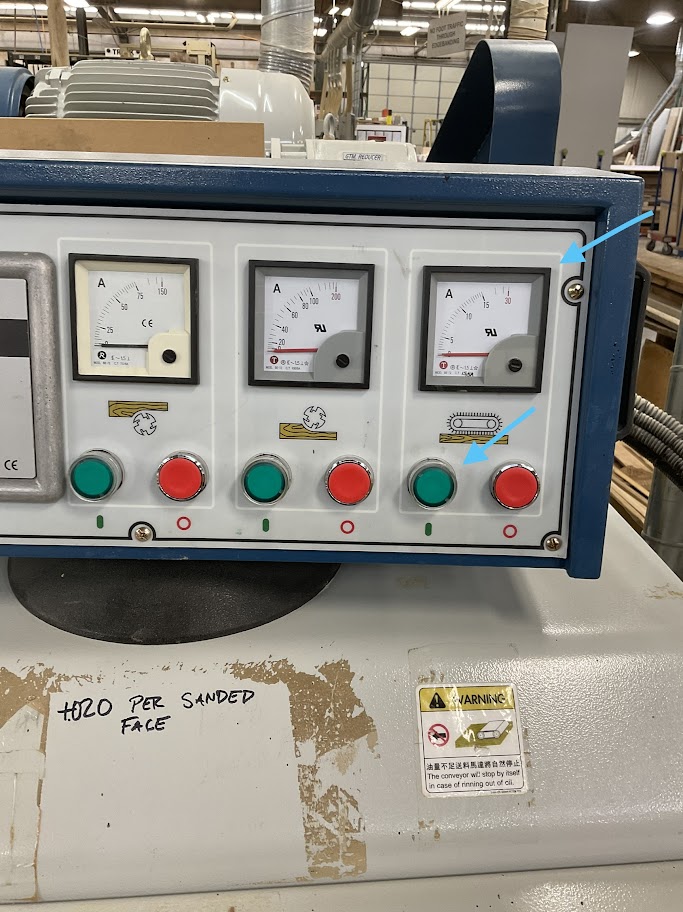 |
Setting the Machine
If Needed use micrometer to see your thickness in decimals. You will need to know this to set the machine,
|
1. Using the conversion table to set the machine to desired thickness Example, if the desired thickness is 3/4 of and inch you will set the machine for 0.75 |
 |
| 2. To set desired thickness first press the round red button. | 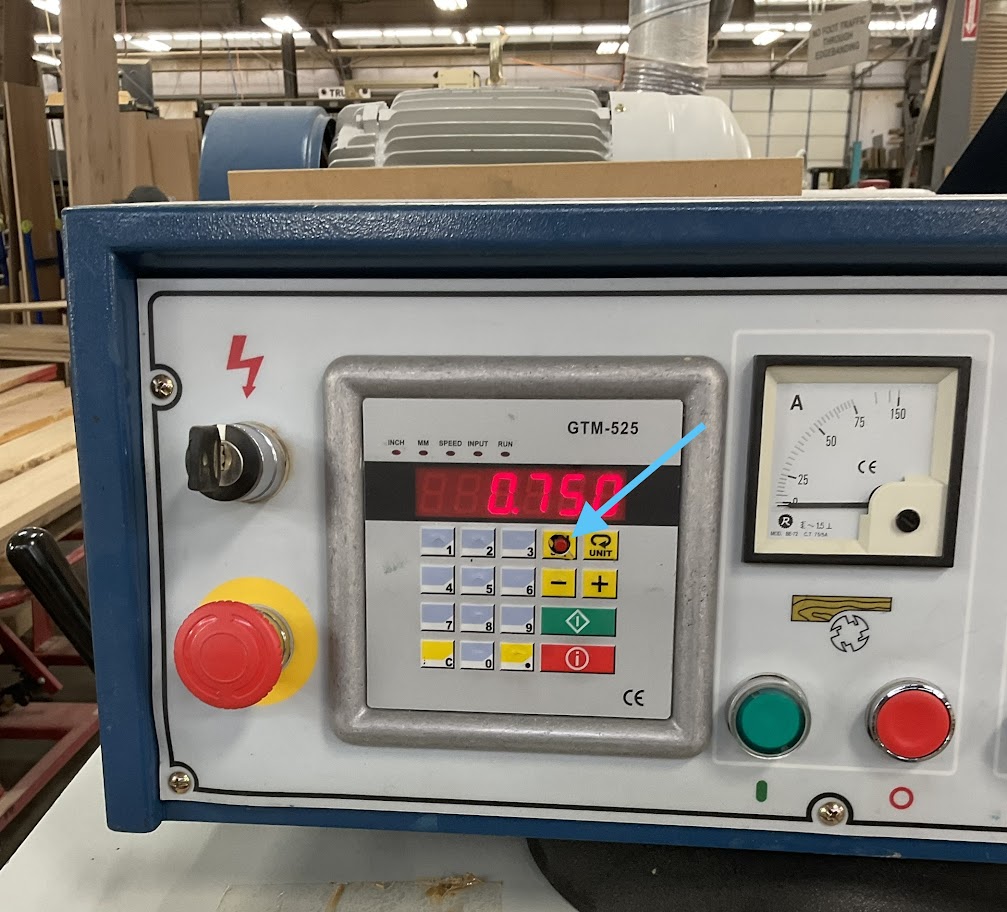 |
3. Using the conversion table, enter the desired thickness
|
4. Press the green button Wait till the machine is set at thickness before passing your board through |
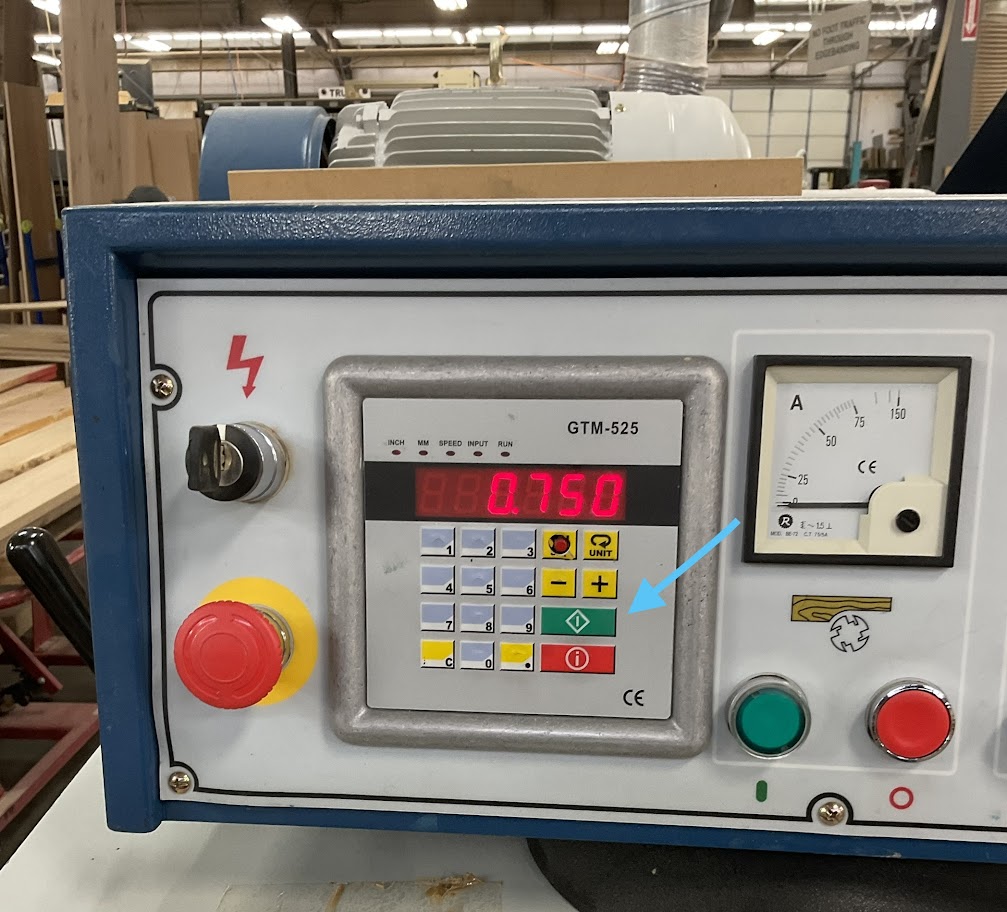 |
Explain to the employee not to exceed more then 1/4 of an inch per pass but only if both heads are set for 1/8 of an inch.
| 4. Use the wheel located at the bottom left of the machine to set your bottom head | 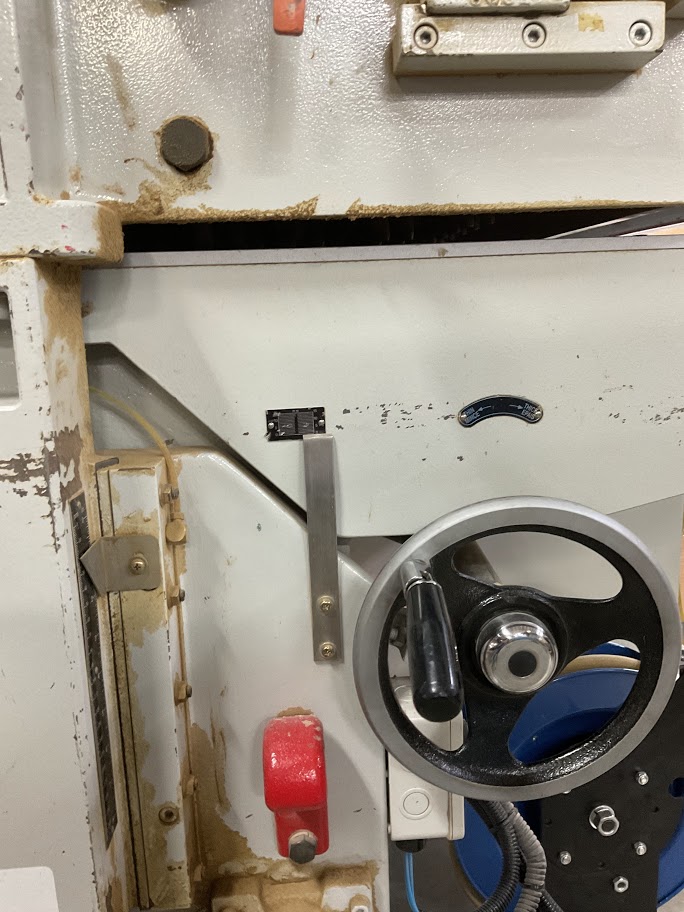 |
Explain to the employee why the bottle blade needs to be adjusted and how to properly do so. Also explain to the employee not to go straight to desired thickness if the board will be going through the Wide Belt Sander, but to make sure to add .020 extra per sanded face.
Powering off the Machine
| 1. Simply press red buttons | 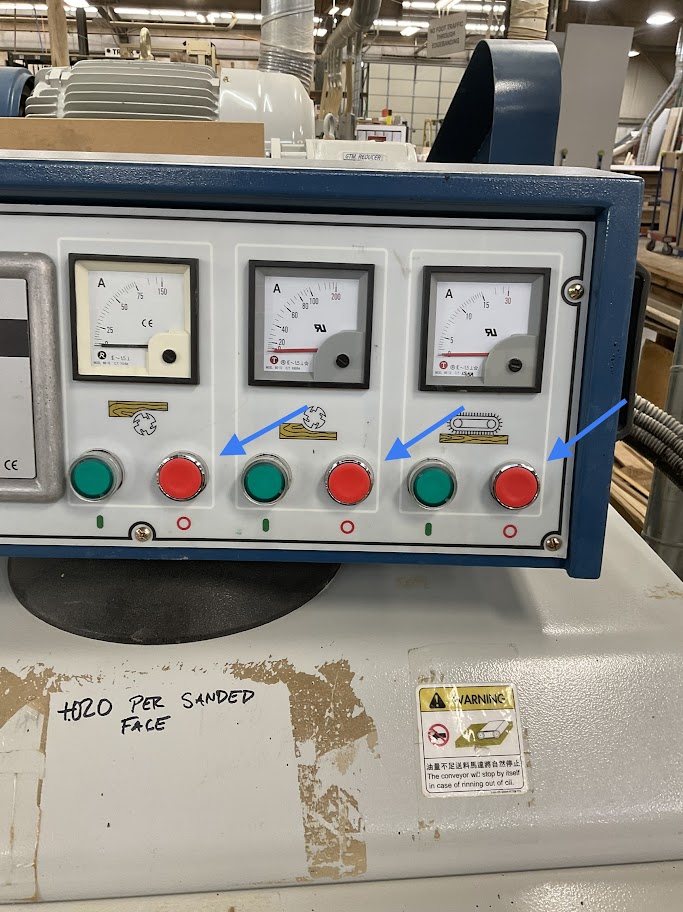 |
2. Be sure to use the air hose to blow off the machine after use.
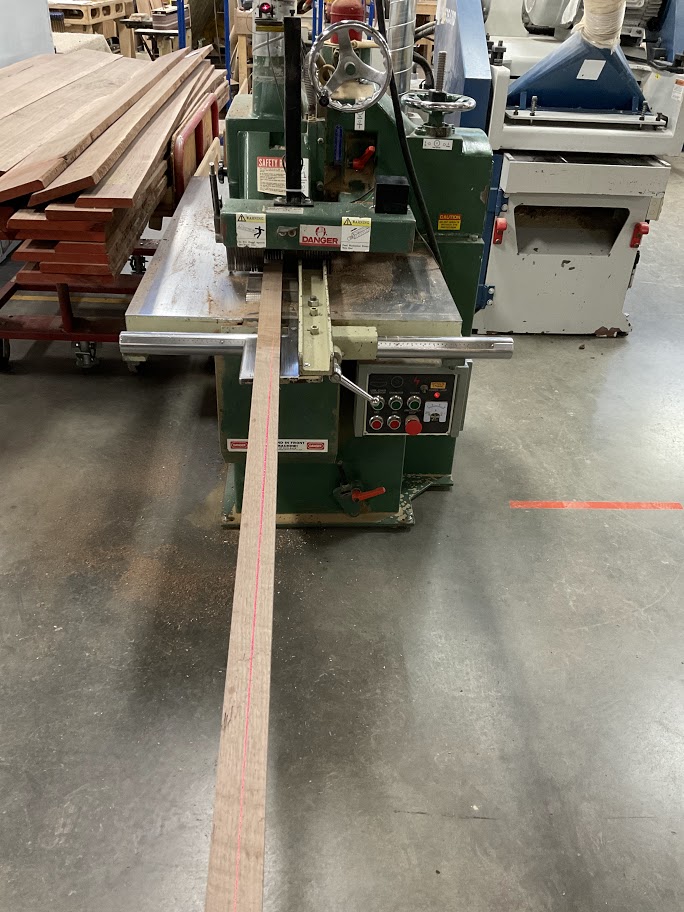
Rip Saw Instruction Procedure
Purpose
To make a straight edge on an unfinished board for a more consistent cut.
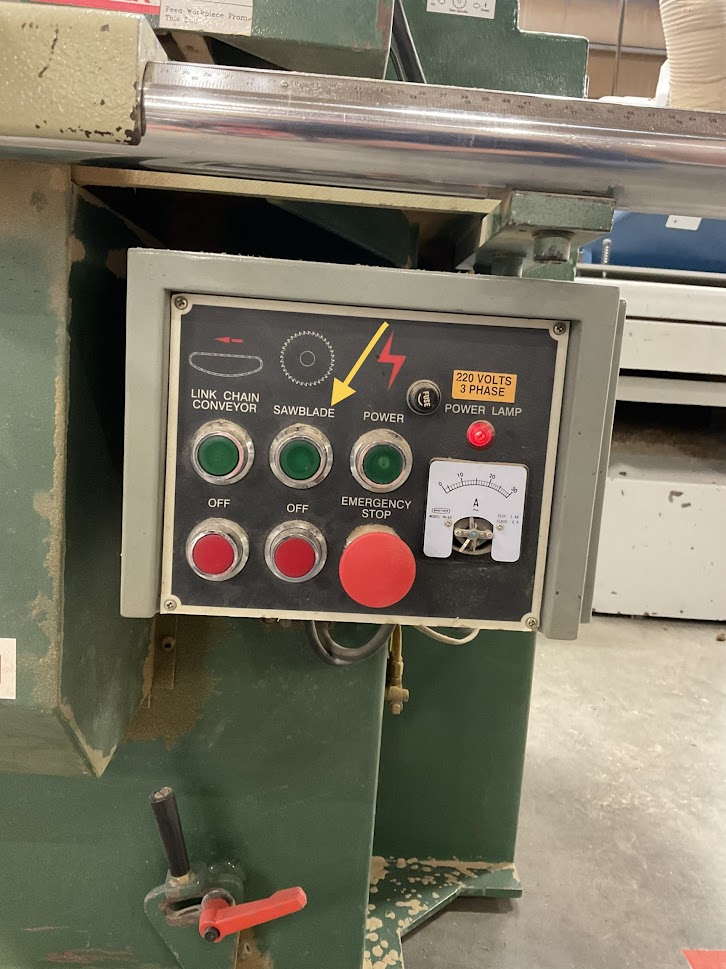
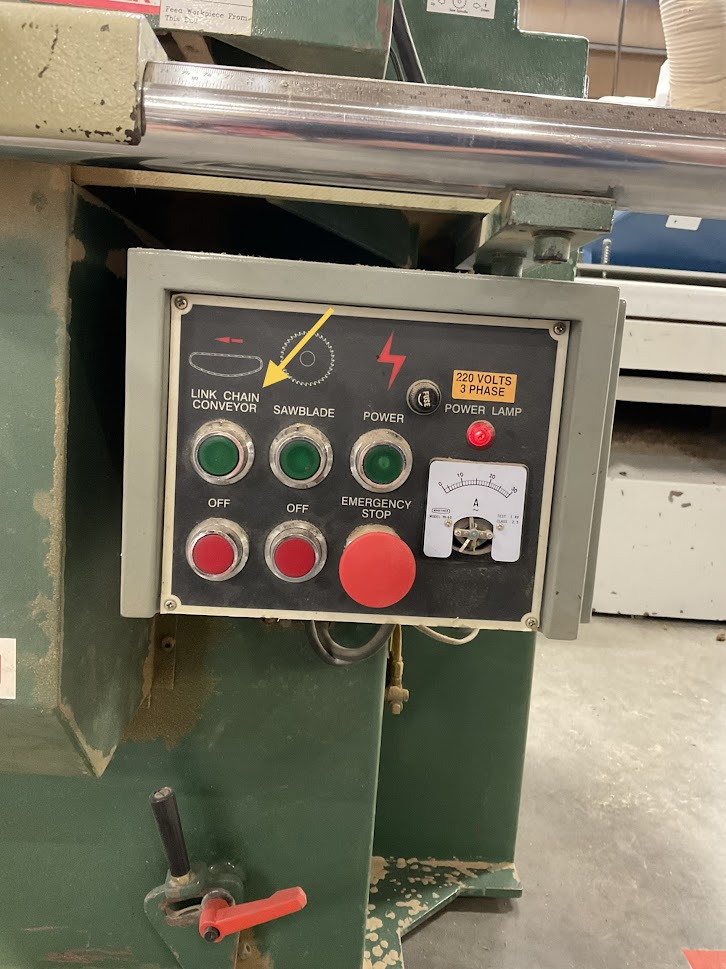
Power on Machine
|
1. Press the green button to start the saw blade |
 |
|
2. Press the green button to start link chain conveyor Chain conveyor will not start if the saw blade is not running |
 |
|
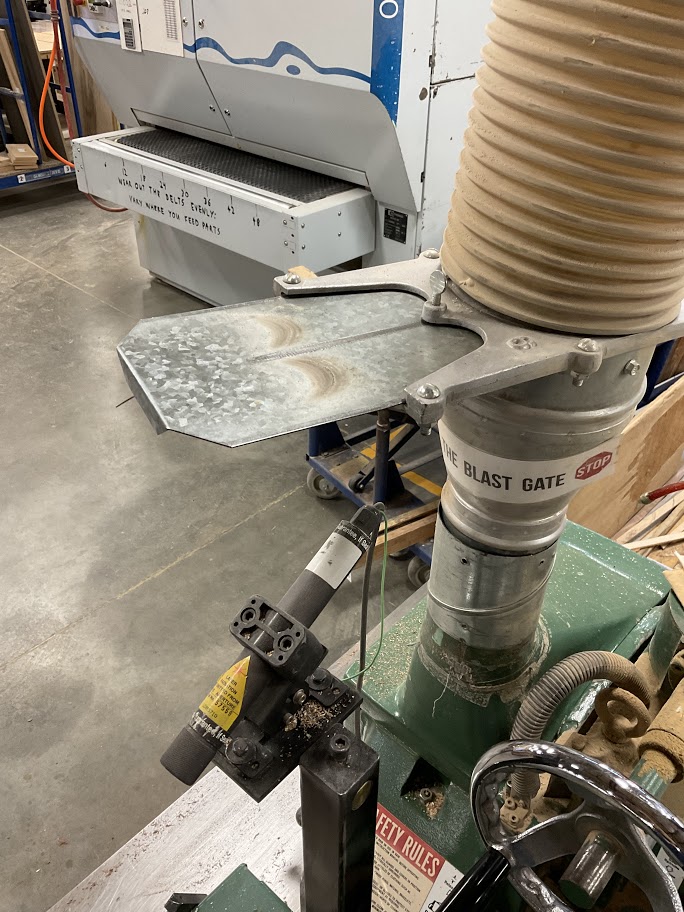
3. Open gate to the dust collector |
 |
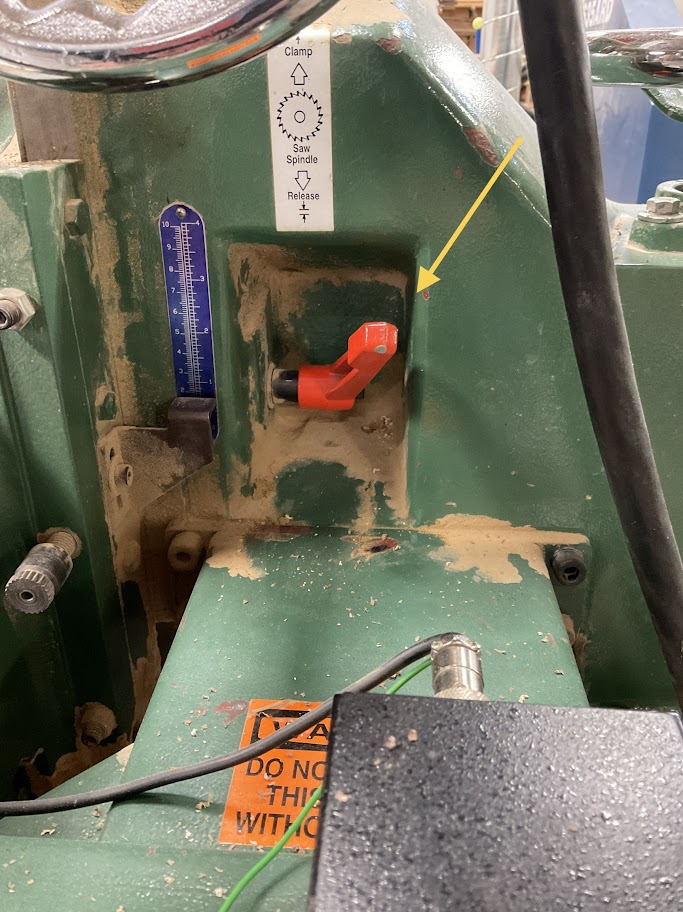
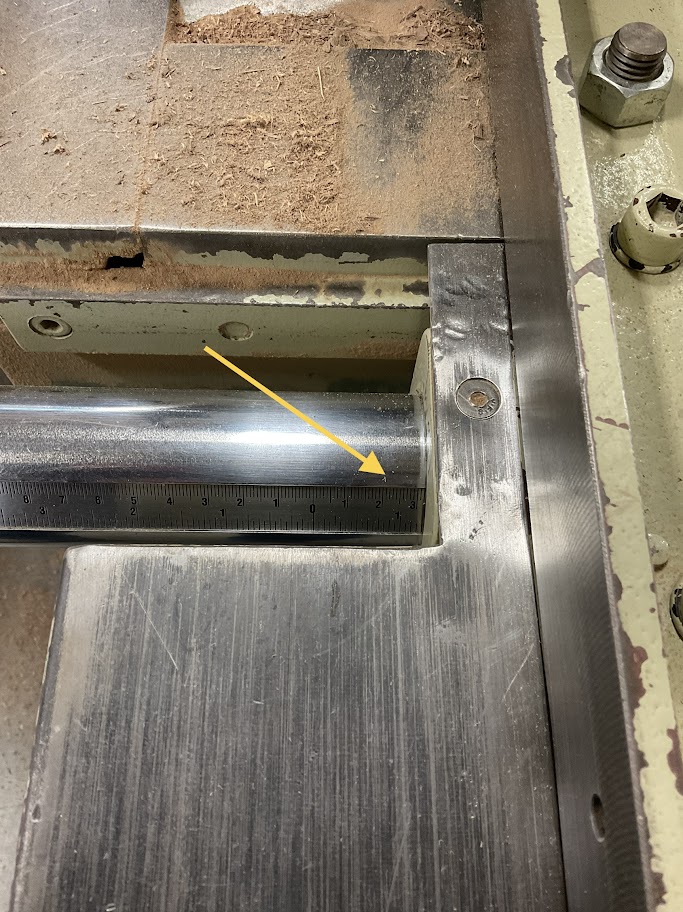
Machine Set Up
|
1. Start by loosening the clamp to set conveyor height |
 |
|
2. Turn the wheel to adjust the conveyor height then set the clamp back into the locked position Height should be set to 1/8 less than the thickness of the board to be cut |
 |
|
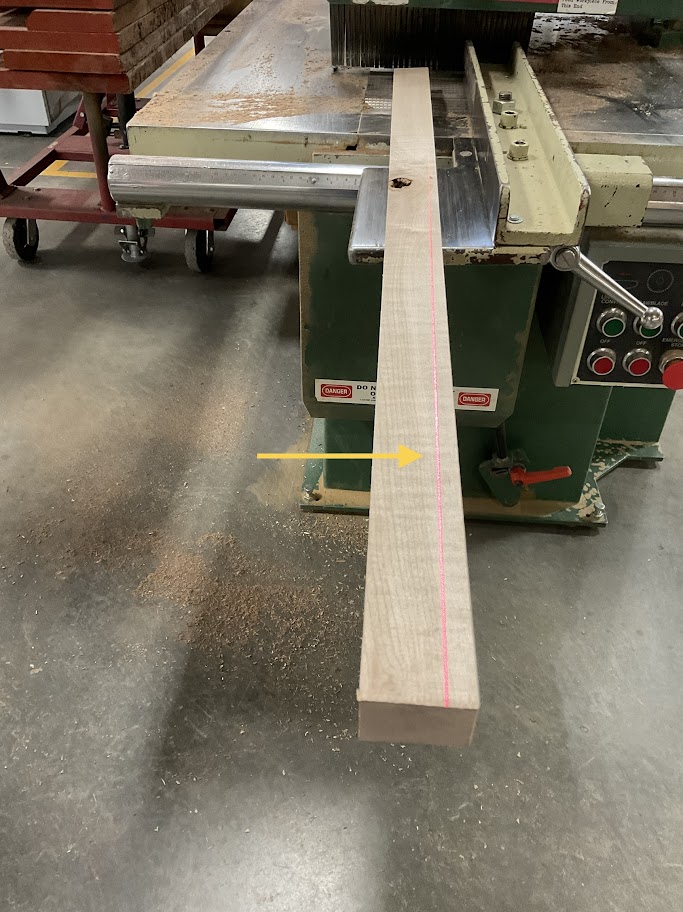
3. Turn on laser guide |
 |
Explain to the employee why the conveyor height needs to be set 1/8 of and inch less than the boards thickness
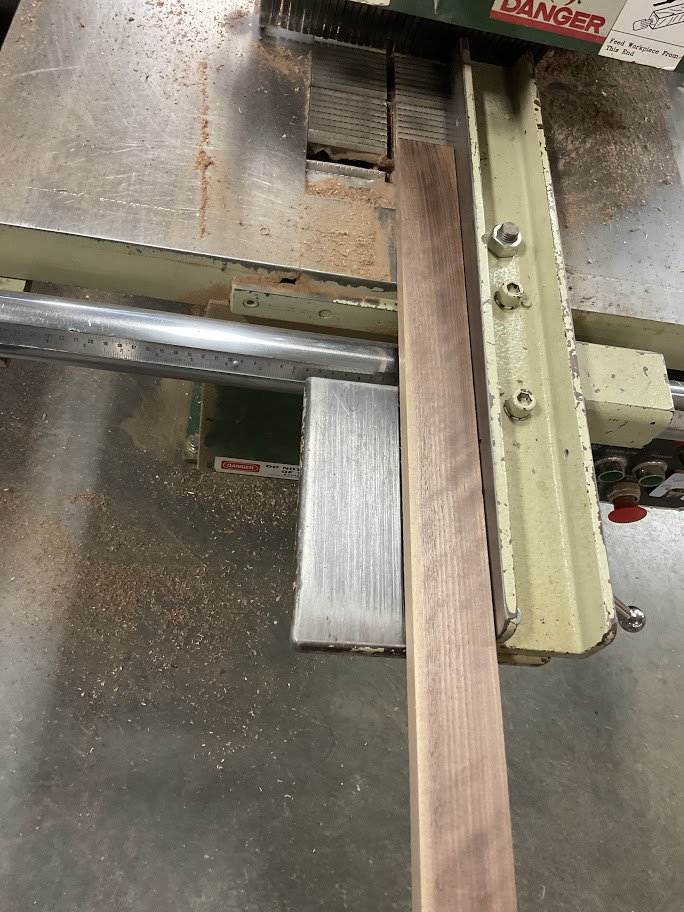
Ripping Part
|
1. Set the front right side of the board in the center groove of the conveyor |
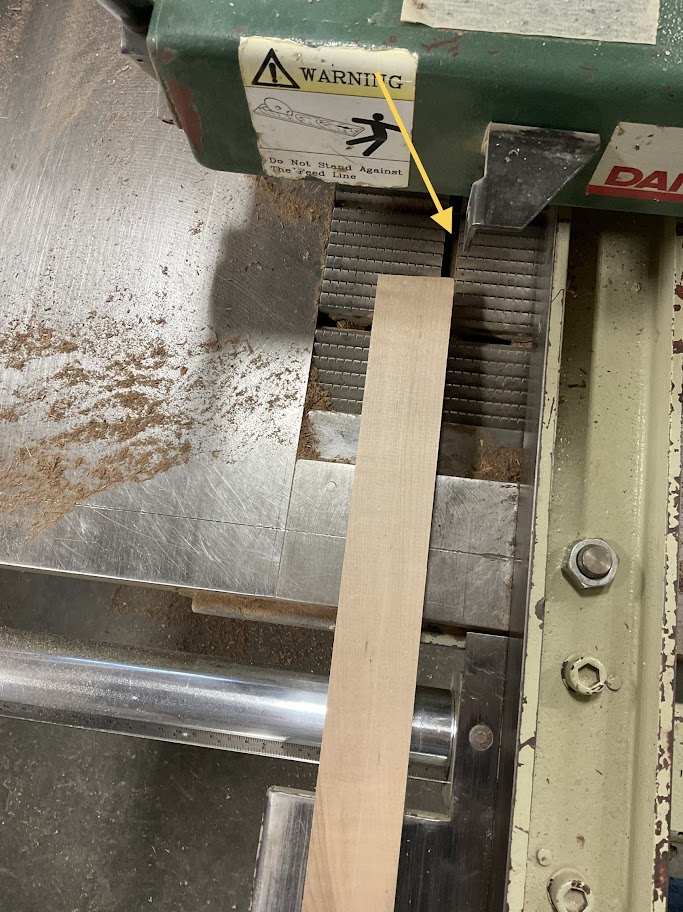 |
|
2. Line up the back of the board with the laser guide |
 |
|
3. Push the board forward till the conveyor catches it If the conveyor doesn't grip the board, stop the machine and double check your conveyor height |
 |
4. After the board passes through the rip saw, verify that you have a smooth straight side.
|
5. Loosen the fence clamp |
 |
|
6. Set fence to measurement the board needs to be and set the clamp back into the locked position |
 |
|
7. Set the smooth side of the board flat against the fence and push the board back through the conveyor |
 |
Power of Machine
|
1. Press both red buttons for the saw blade and the link chain conveyor |
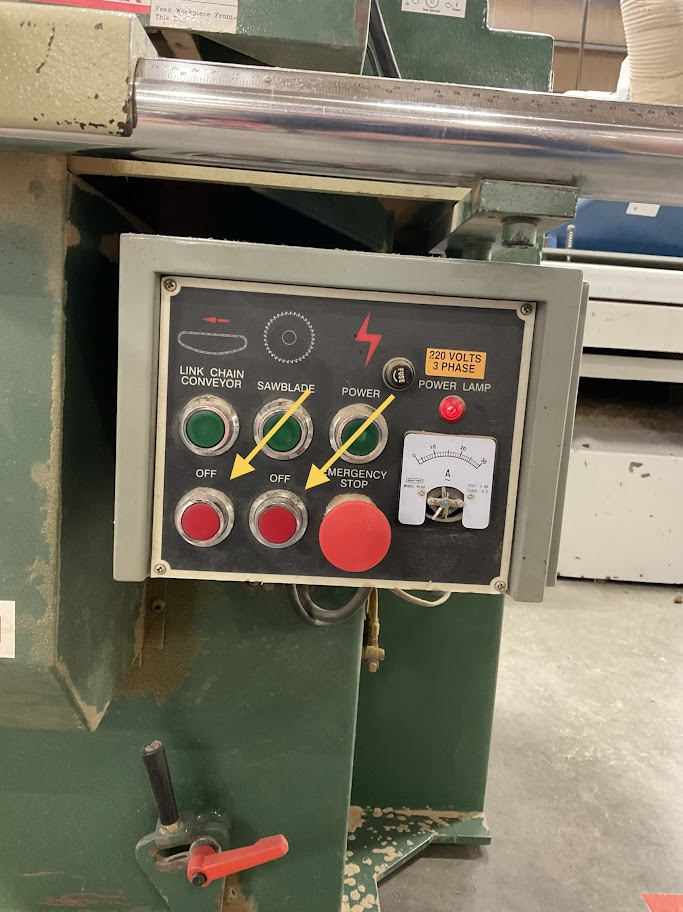 |
|
2. Make sure to close the gate to the dust collector |
 |
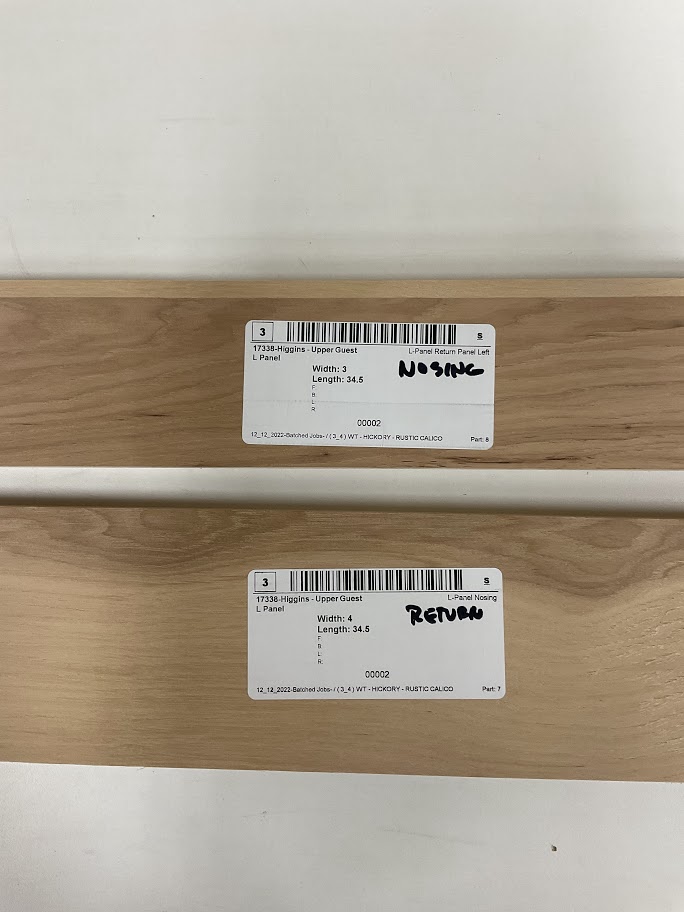
L-Panel Instruction Procedure
Purpose
The purpose of an L-Panel is to fill the void between the wall and the cabinet. This will allow for a smoother and much cleaner look.
Material Prep
| 1. Review paperwork for any special instructions that might be needed | 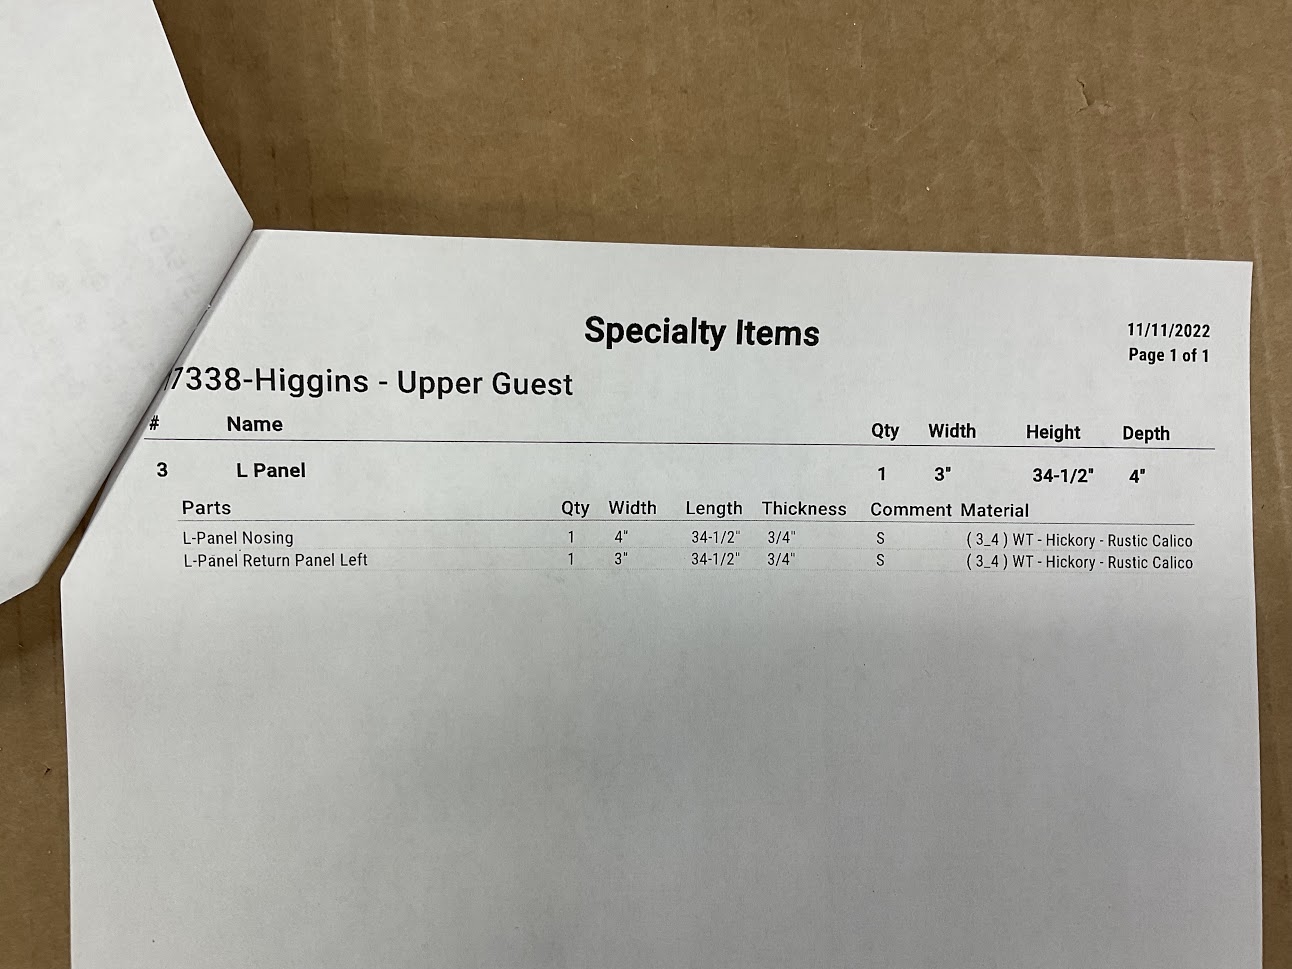 |
| 2. Gather materials and verify parts are correct with your paperwork. | 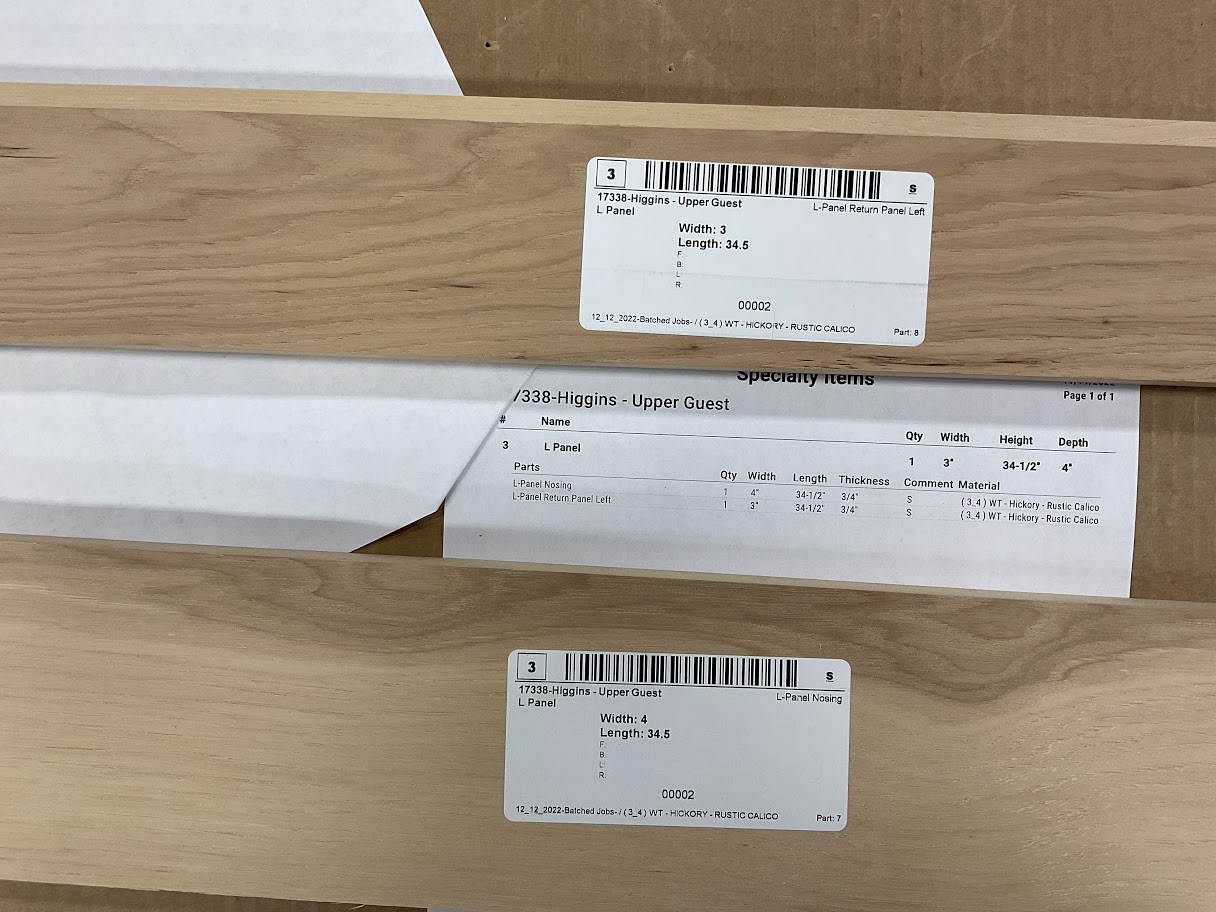 |
|
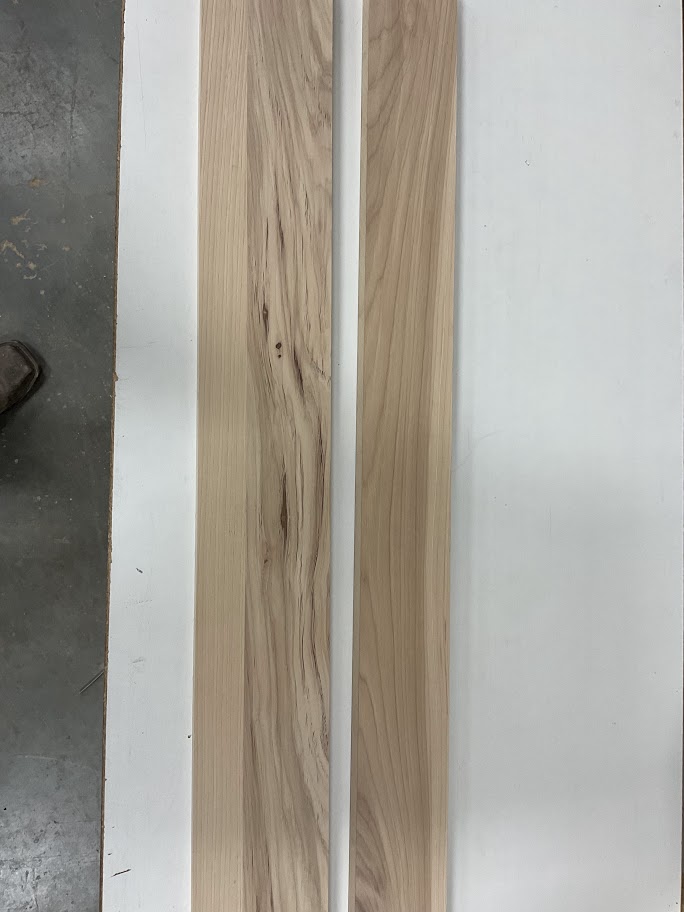
3. Inspect your material for any imperfections If any imperfections are found, inform our supervisor before continuing! |
 |
Assembly
|
1. Once parts are inspected, determine which part is your return panel and which is your nosing Note that typically your return panel will be your wider part |
 |
2. Use the Lock Miter to cut our nosing and return panel
Refer to the Lock Miter Instruction Procedure for proper equipment usage
| 3. Apply two strips of glue to your return panel | 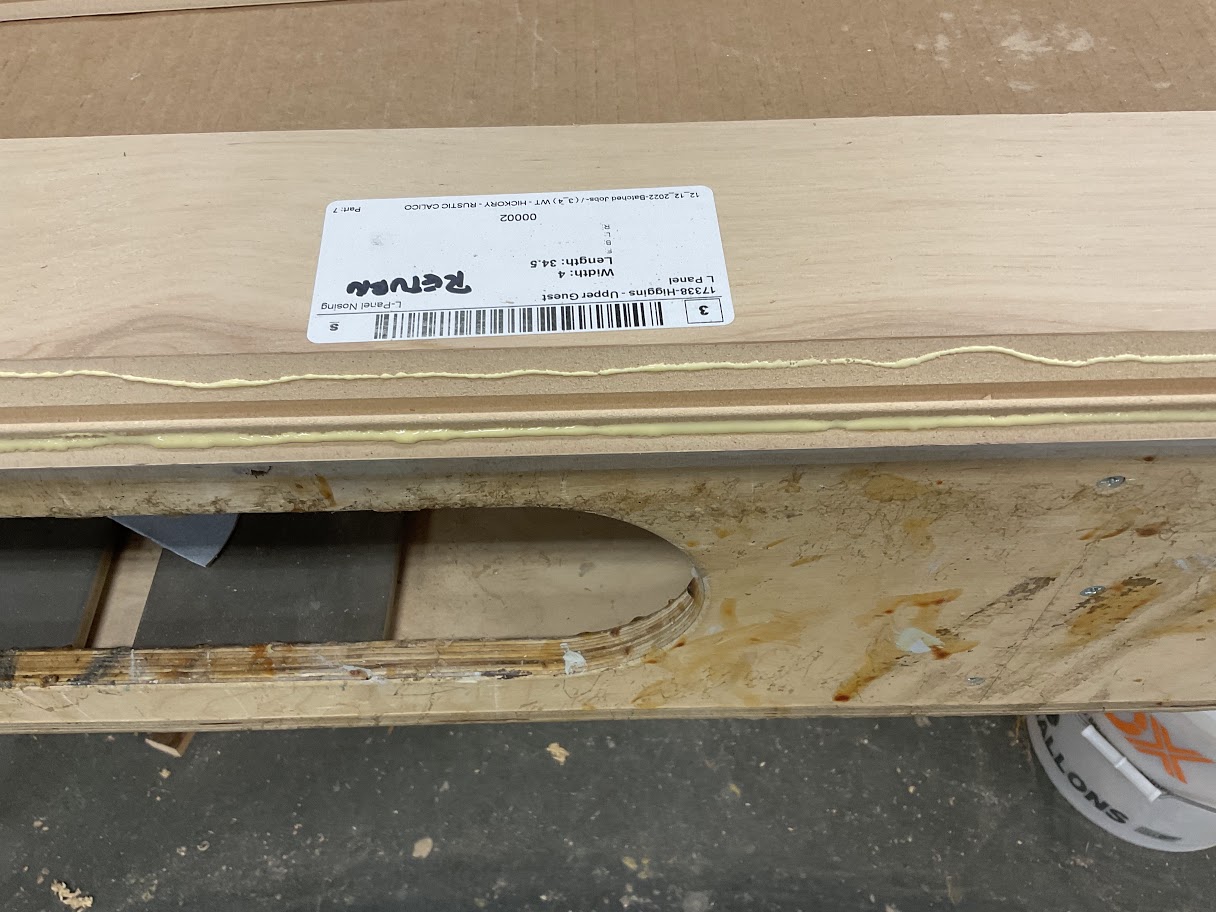 |
| 4. Place your nosing on the return panel ensuring each side is flush | 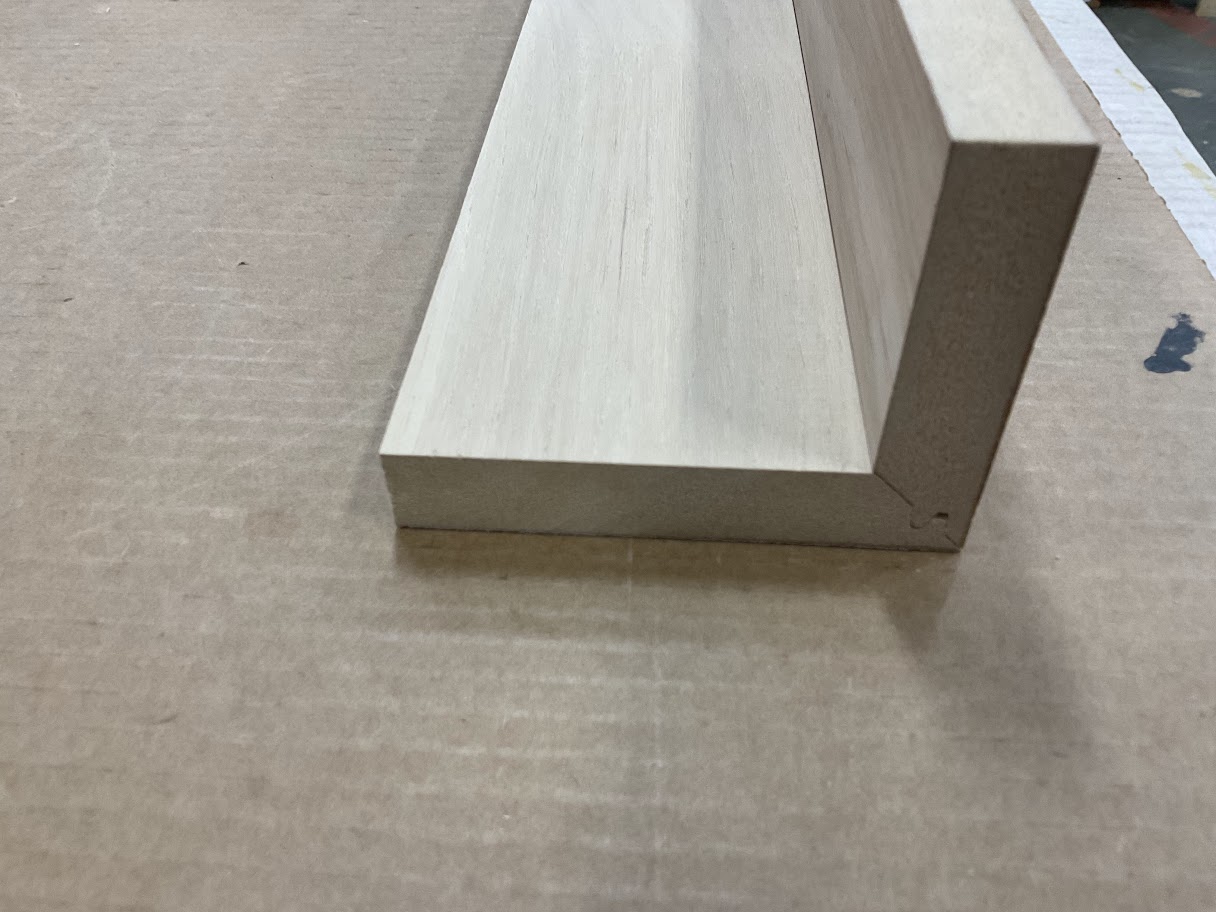 |
| 5. Apply clamps to join the two parts together and set our egg time for 10 minutes | 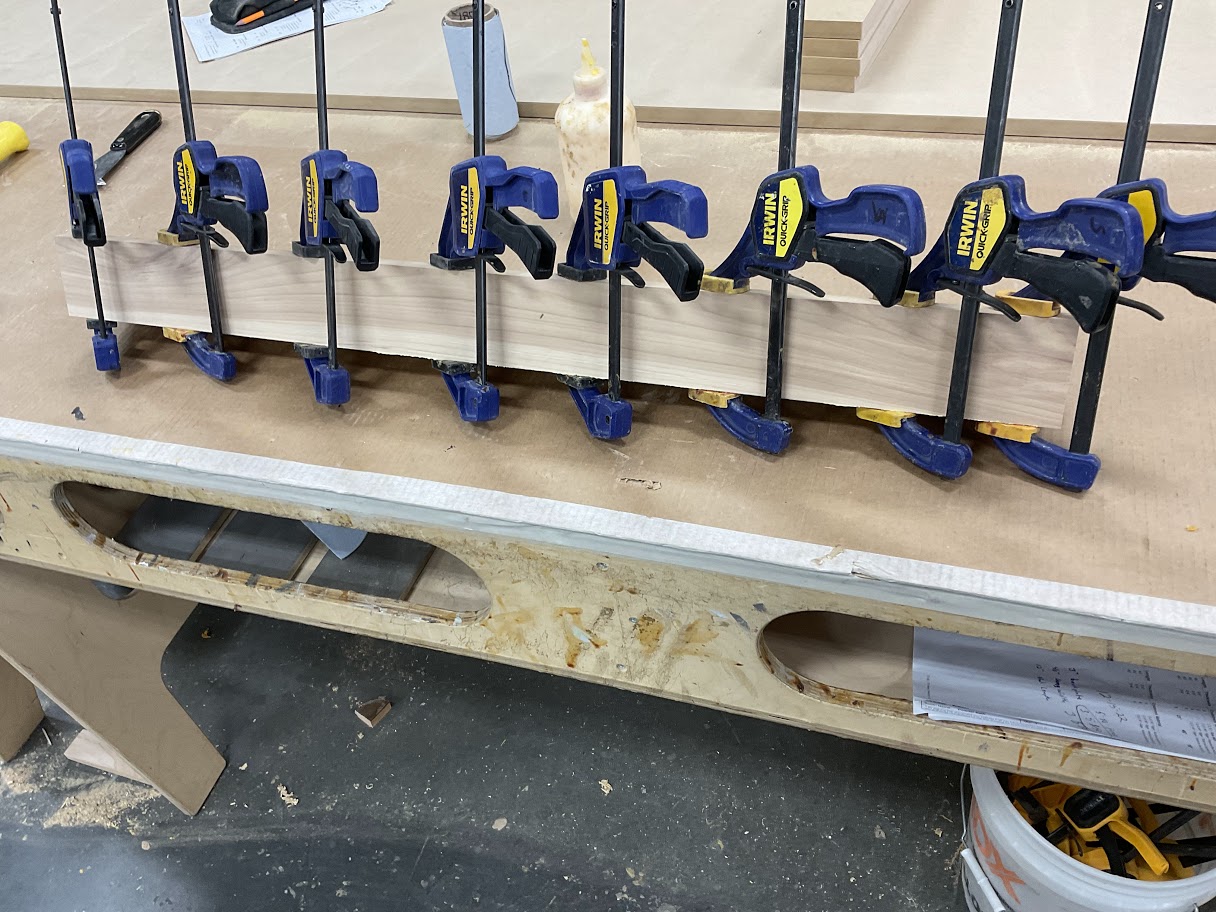 |
Finish Part
1. Once glue has dried remove all unwanted glue that seeped through
2. Use orbital sander to give the finished peace a smooth finish
Note 180 grit sandpaper is ideal for this step
3. Roll jointed edge with round metal dowel to mash the fibers at the seemWide Belt Sander Instruction Procedure
Purpose
To take a rough board to a fine finish thus shortening hand sanding time
Starting Machine
|
1. Press the left white button Wait for the gage to reset |
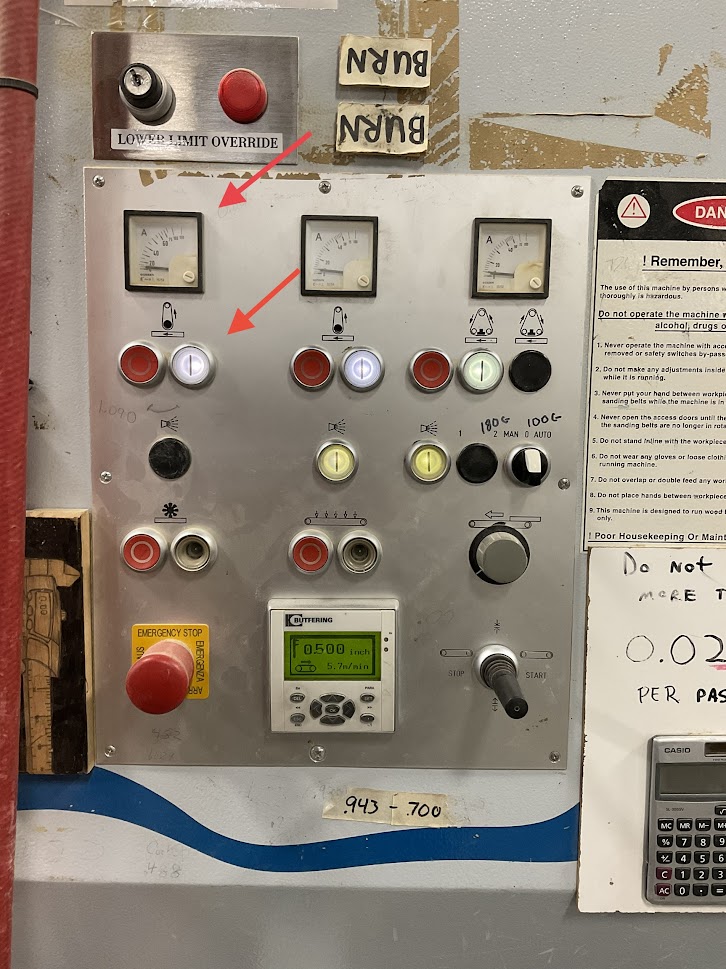 |
|
2. Press the middle white button Wait for the gage to reset |
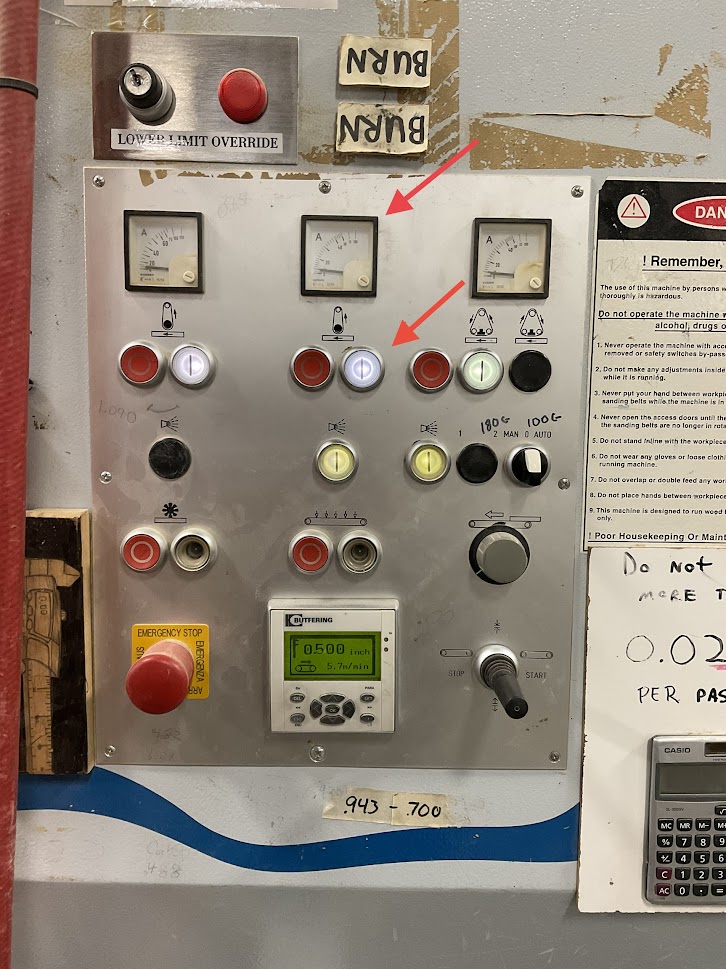 |
|
3. Press the right white button Wait for gage to reset |
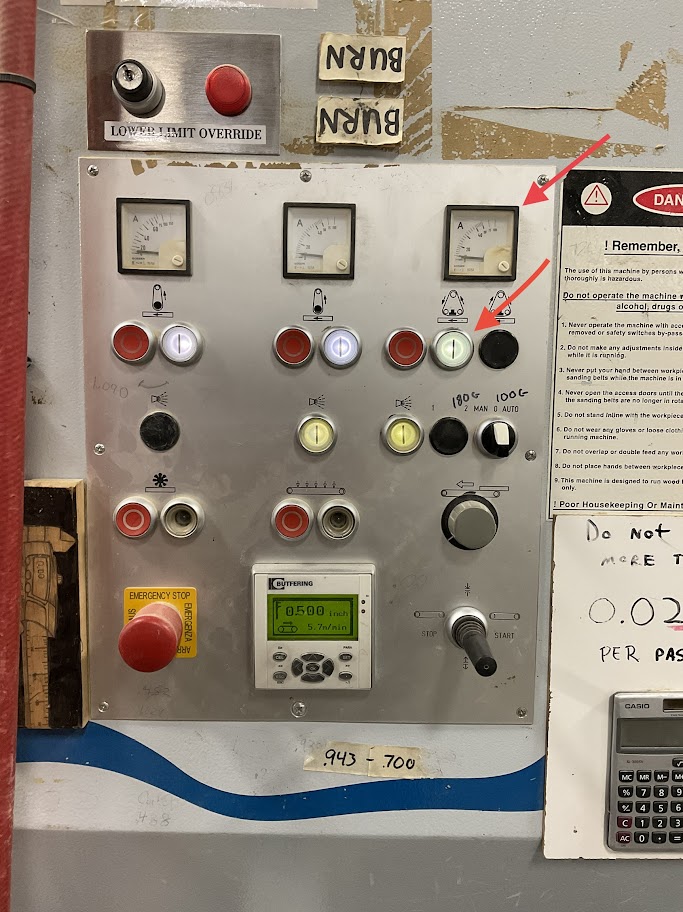 |
Explain to the employee why it is imported to wait for the gages to reset before continuing
Setting Up Machine
1. Use micrometer to see the boards thickness in decimals
|
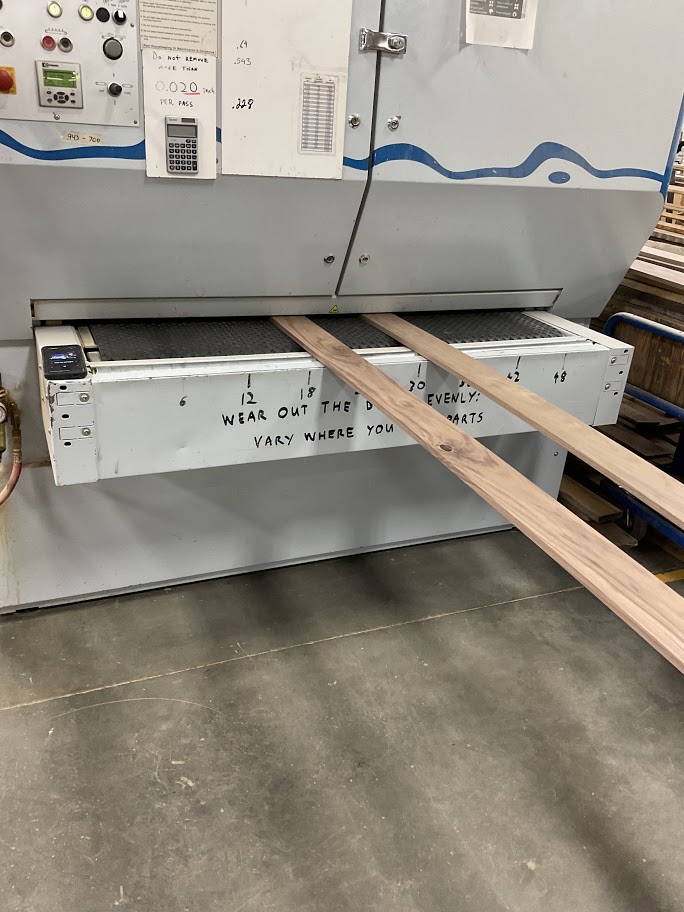
2. Move the toggle switch up or down to set thickness Do not exceed more than .02 per pass. For example if the board's thickness is .80 then set the machine to .78. Use the conversion table to help |
 |
| 3. Move the toggle switch to the right to start the conveyor | 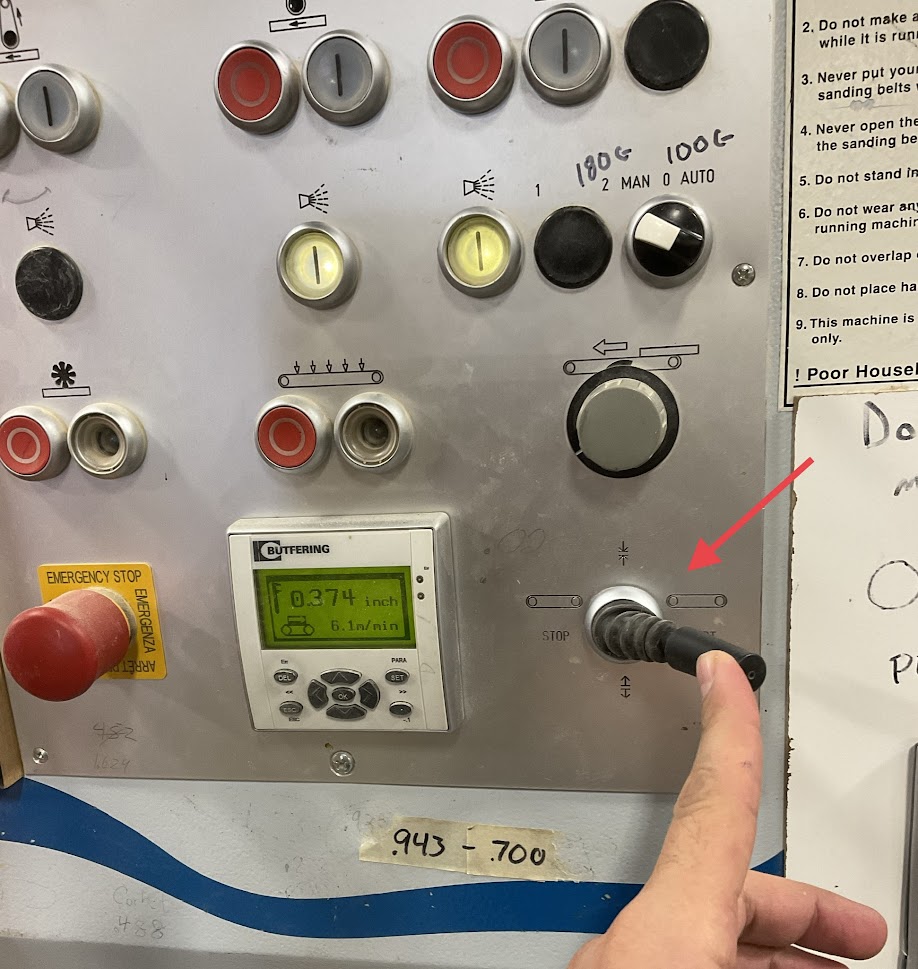 |
|
4. Place boards through the conveyor staggered in a slight angle Do not pass anything less than 16 inches through the wide belt sander |
 |
Powering off Machine
| 1. Press the left red button to power off the machine |  |
| 2. Move the toggle switch to the left to power off the conveyor | 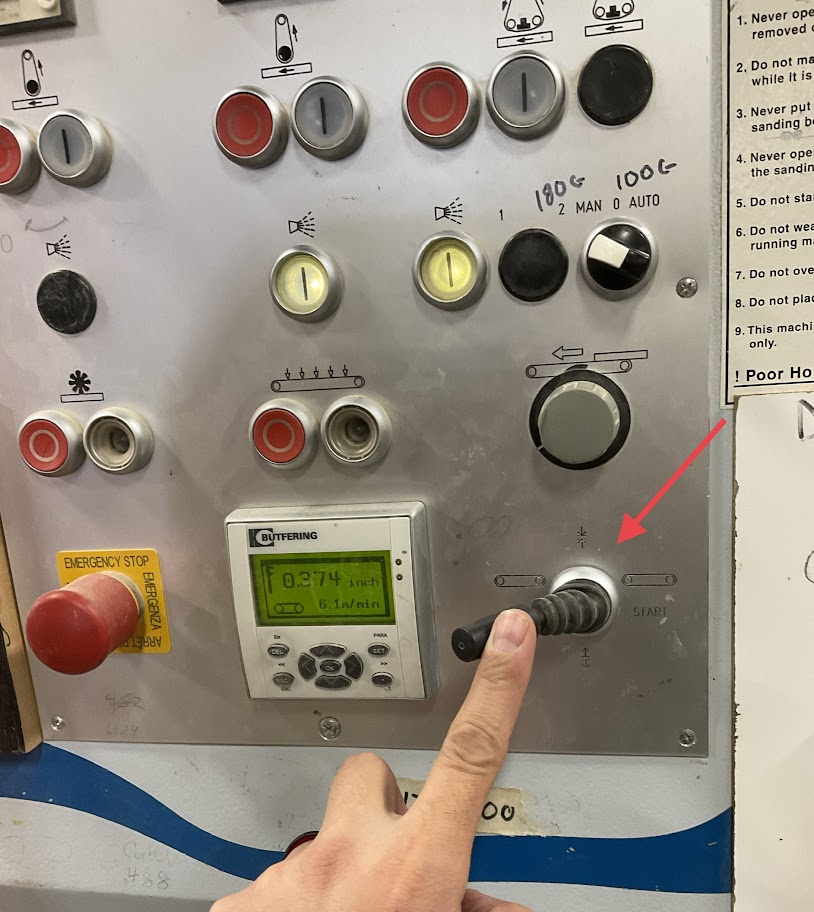 |