# Shipping
# Cabinet Inspection
**Purpose**
To make sure all imperfection are caught and the cabinet, including any additional parts are properly wrapped and labeled for safe shipping
Part Identification
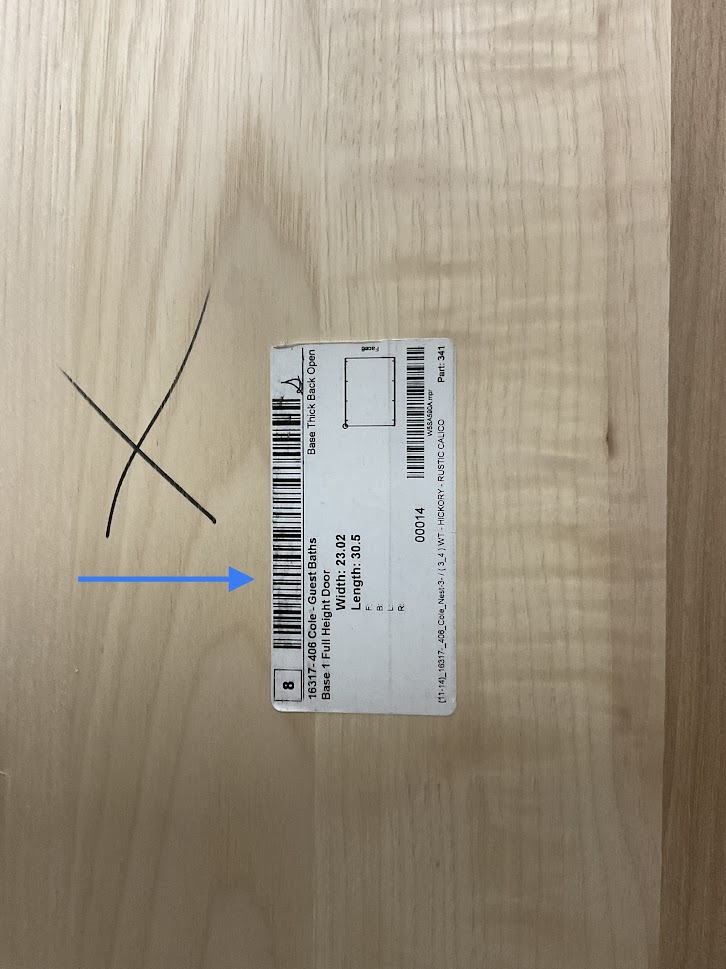
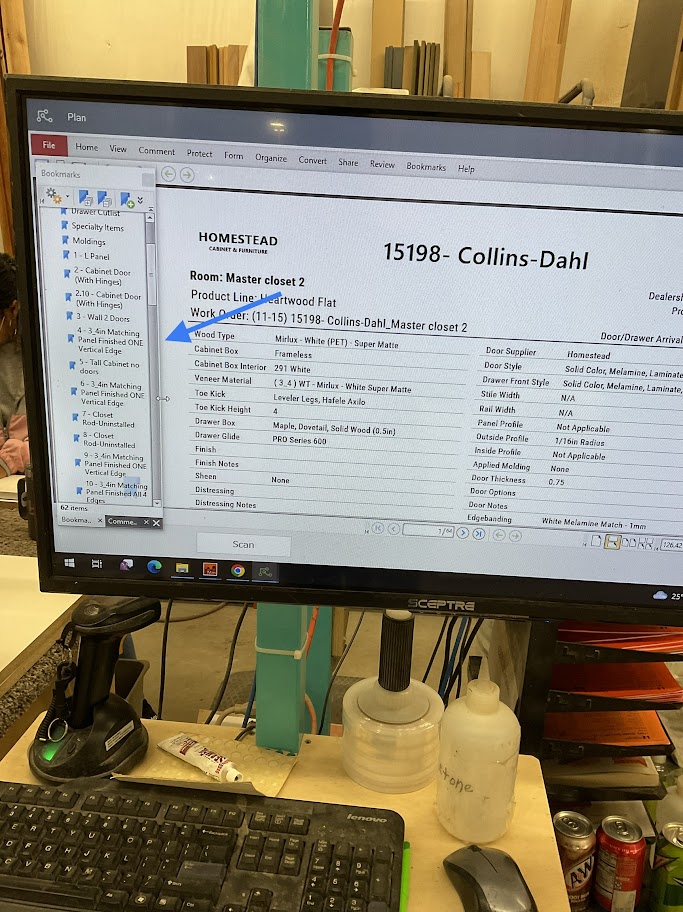
| **1. Scan product identification label**
**Do not scan any labels unless you're going to finish the inspection**
| **[](http://help.homesteadcabinet.net/uploads/images/gallery/2023-01/image-1.jpg)** |
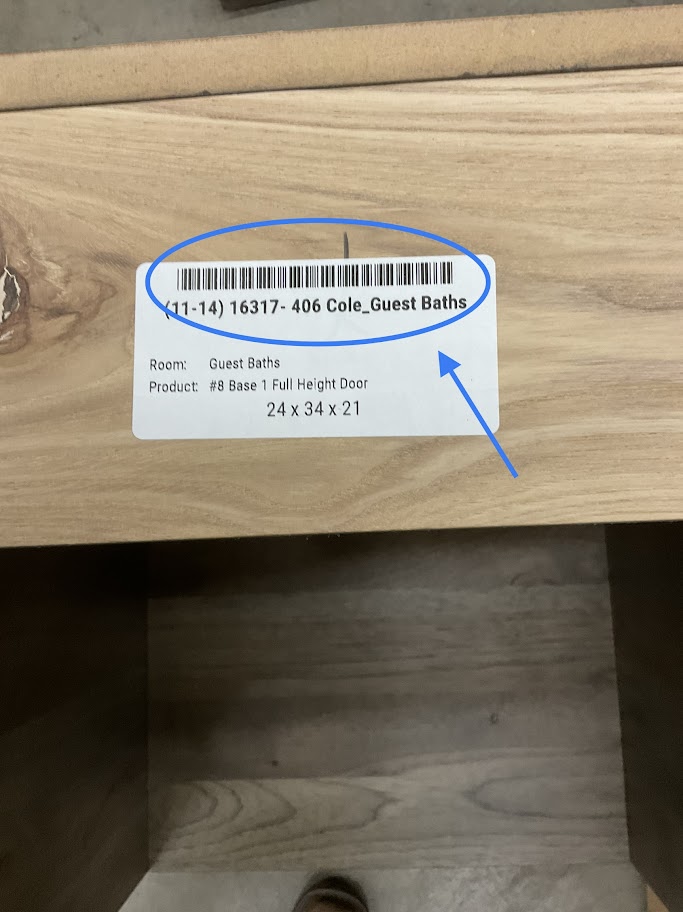
| **2. Using the part number on the label to verify the right part was scanned** | **[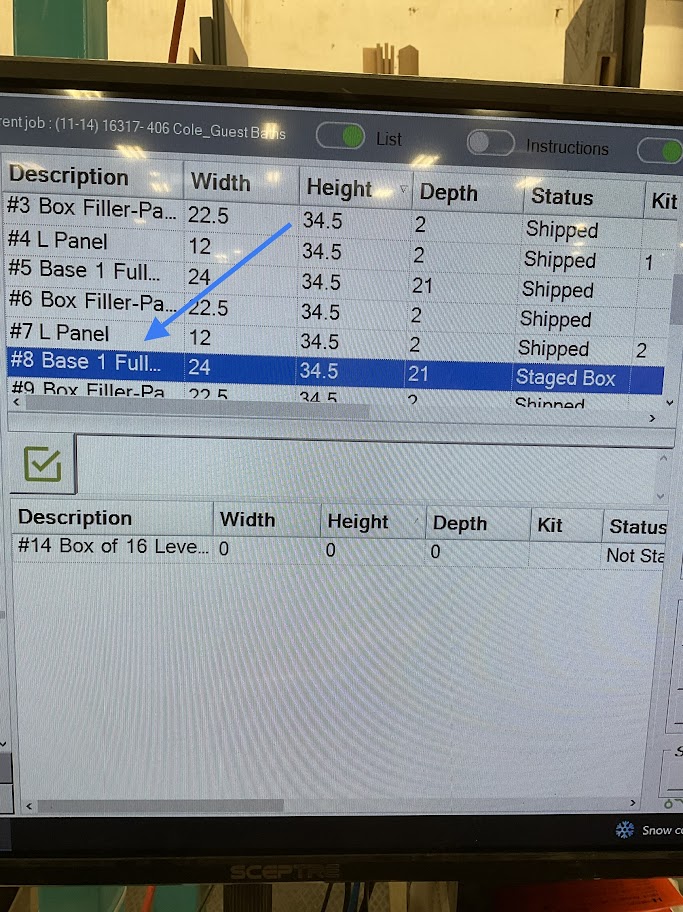](http://help.homesteadcabinet.net/uploads/images/gallery/2023-01/image-2.jpg)** |
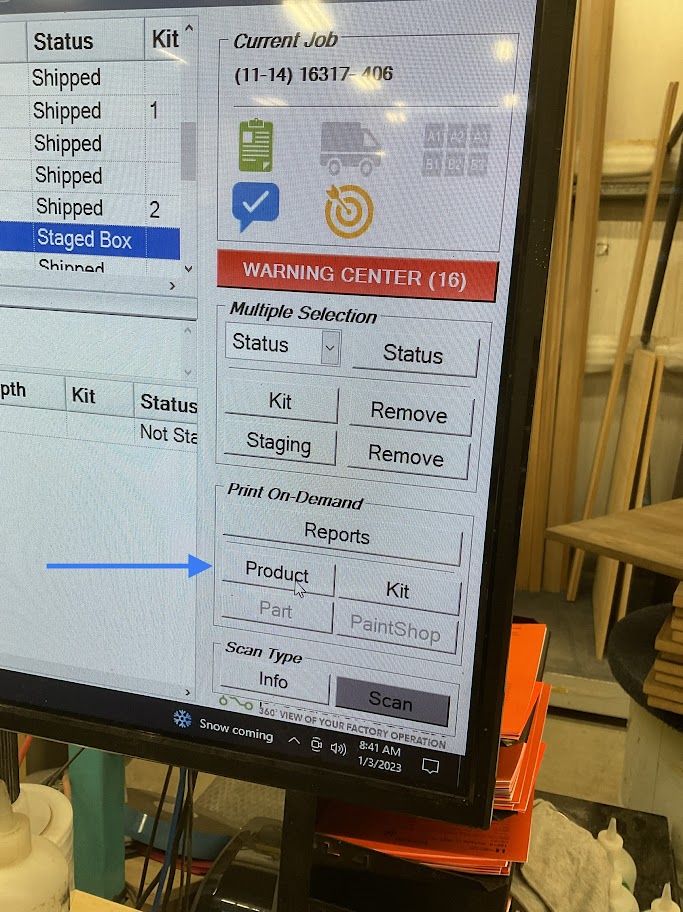
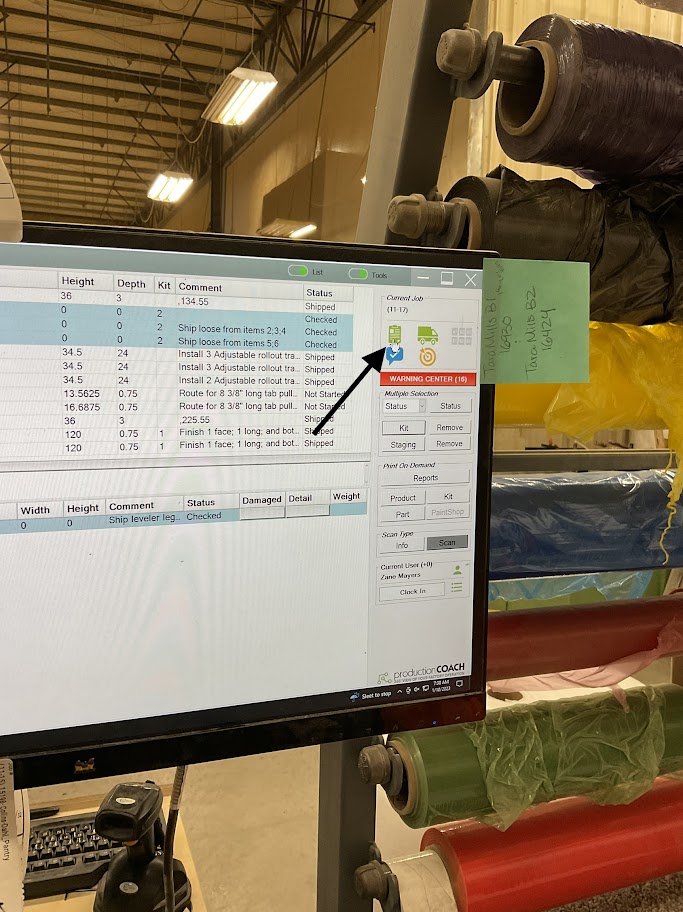
| **3. Click the "Product" icon located on the lower right side of the screen**
***This step will print a finished product label to be applied to the part when inspection is completed***
| **[](http://help.homesteadcabinet.net/uploads/images/gallery/2023-01/image-3.jpg)** |
Part Verification
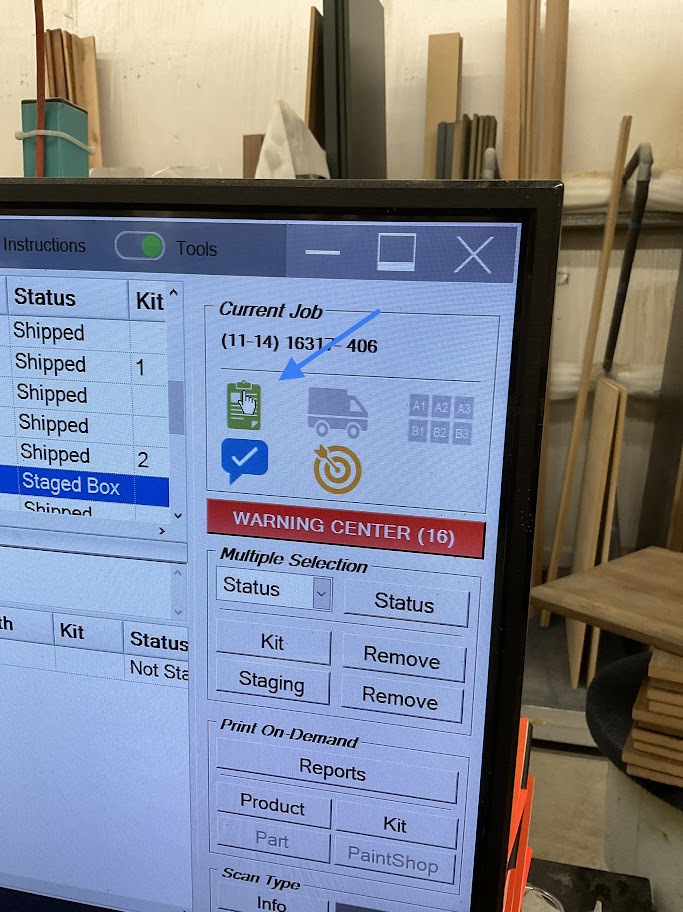
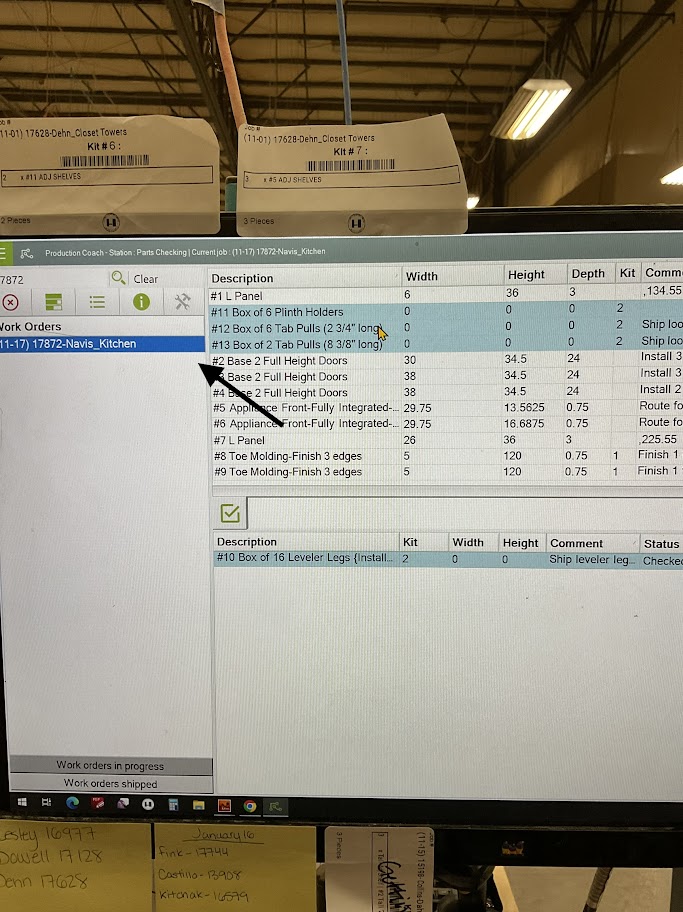
| **1. Click the "Green Clipboard" icon**
***This will bring up a list of all the parts for the room on the left side of the screen***
| **[](http://help.homesteadcabinet.net/uploads/images/gallery/2023-01/image-4.jpg)** |
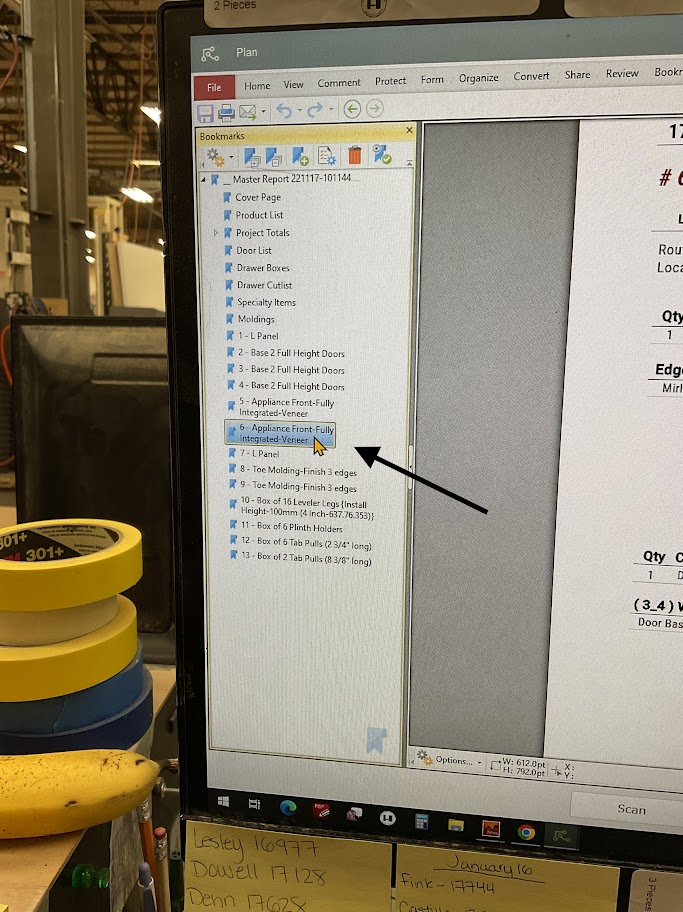
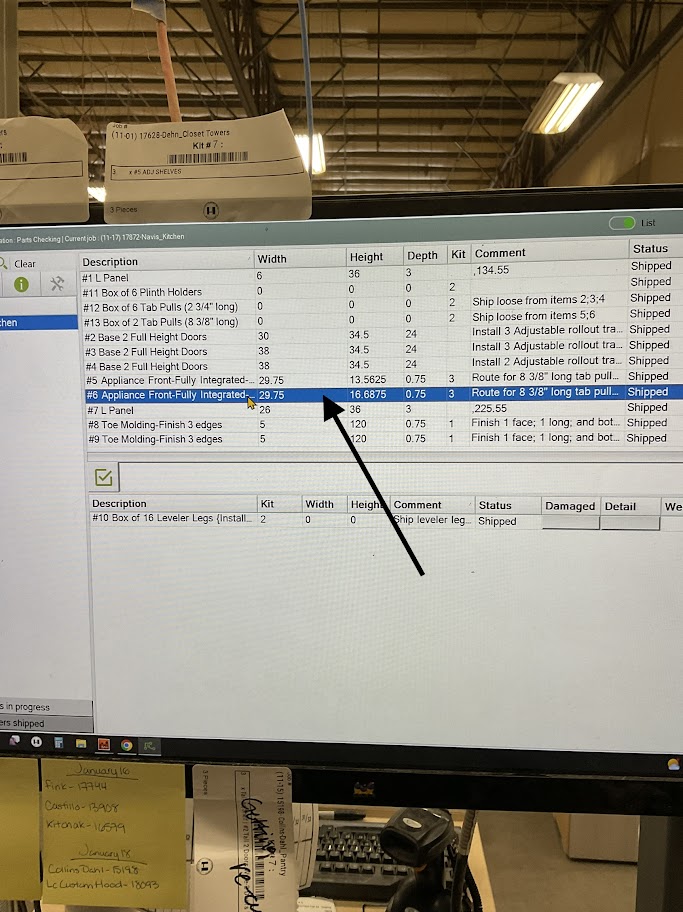
| **2. On the left side of the screen select the part your inspecting**
***This will bring up the parts spec sheet***
| **[](http://help.homesteadcabinet.net/uploads/images/gallery/2023-01/image-5.jpg)** |
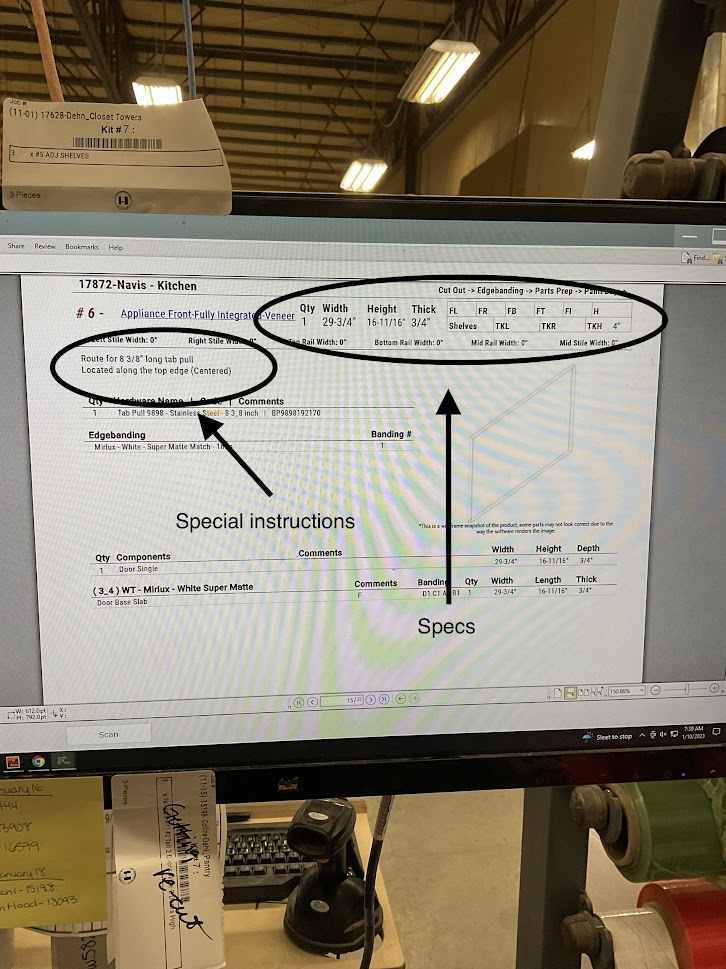
| **3. Use the spec sheet to verify measurements and any special instructions for the part. If there are any addons or shelves, make sure they are all accounted for**
***If your not sure if all addons are accounted for, stop your process and ask your supervisor***
| **[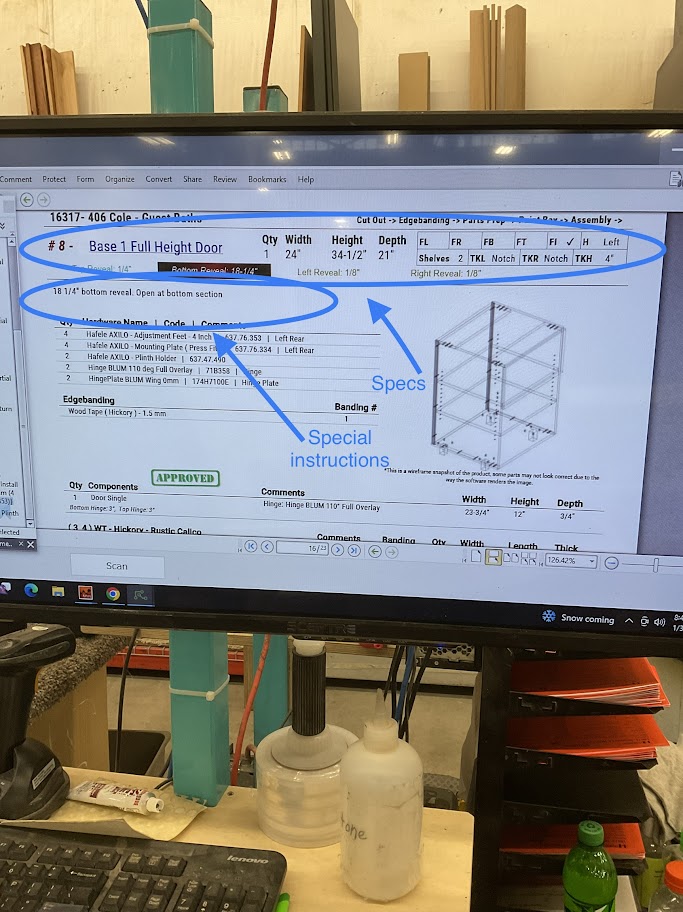](http://help.homesteadcabinet.net/uploads/images/gallery/2023-01/image-6.jpg)** |
**4. Measure the width, height, and depth of the part being inspected**
**5. Verify all special instructions are complete and correct.**
Part Inspection
**1. Inspect all finished surfaces for any imperfections
***If imperfections are found inform your supervisor before continuing***
**2. Inspect all drawers, drawer banks, and drawer fronts for imperfections**
***If imperfections are found inform your supervisor before continuing***
**3. Inspect edge band for imperfections and remove any remaining glue left by the edge bander.**
**4. If the special instructions call out for fixed shelves, adjustable shelves, and/or addons make sure they are inspected for any imperfections as well.**
***If imperfections are found inform your supervisor before continuing***
**5. If tall adjustable shelves are needed for the cabinet, make sure they are wrapped separately according to the proper color and labeled correctly**
Part Shipping Prep
| **1. Use both cardboard and foam**
| **[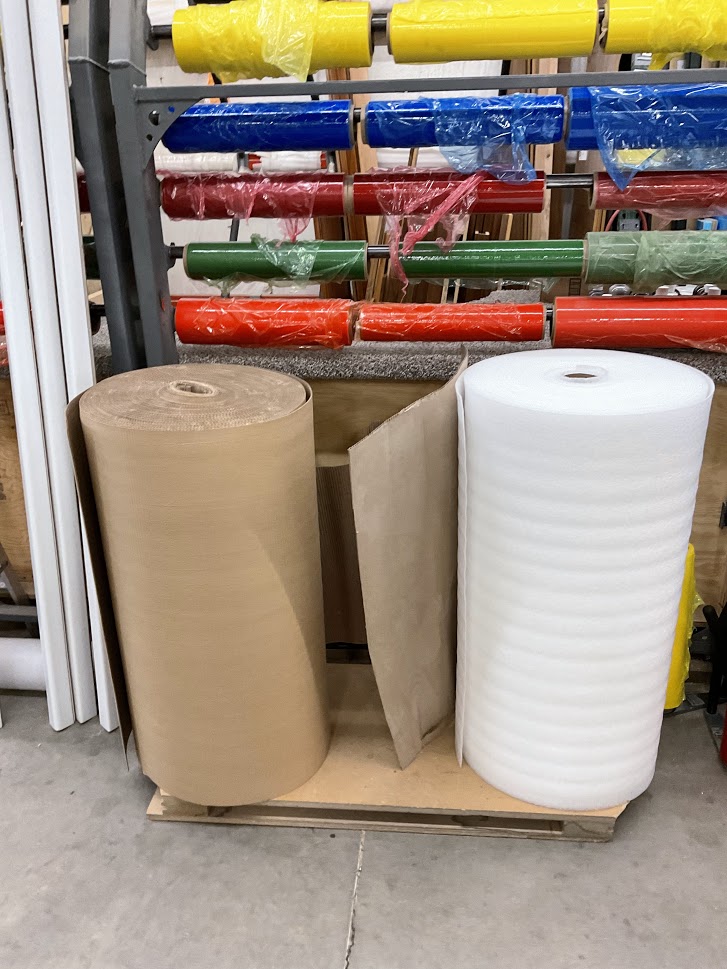](http://help.homesteadcabinet.net/uploads/images/gallery/2023-01/image-7.jpg)** |
| **2. Cover all finished services that will be seen after installation**
| [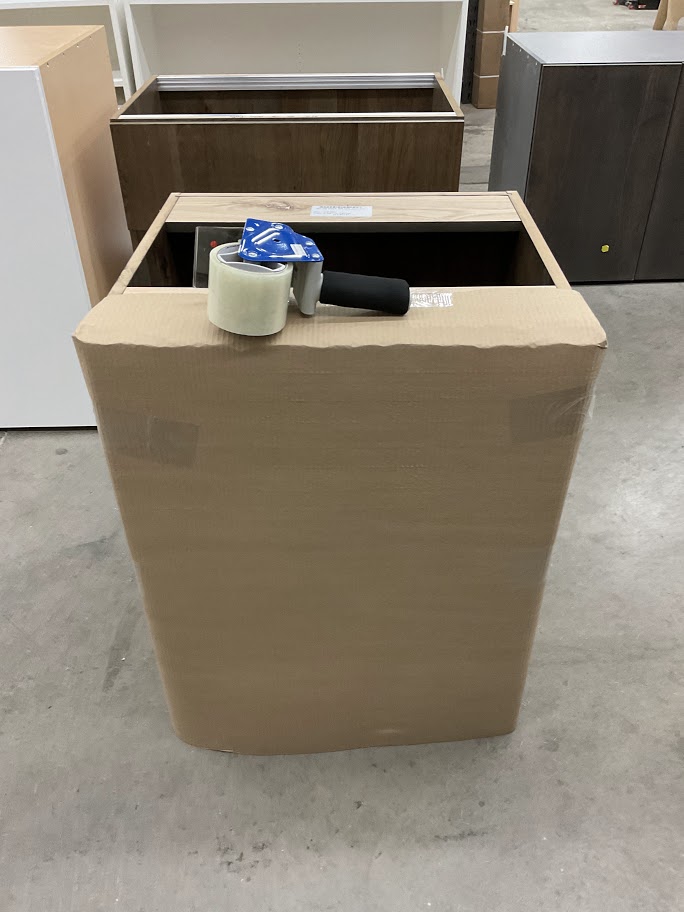](http://help.homesteadcabinet.net/uploads/images/gallery/2023-01/image-8.jpg)
|
| **3. Refer to the white board to verify color the part will be wrapped in**
| **[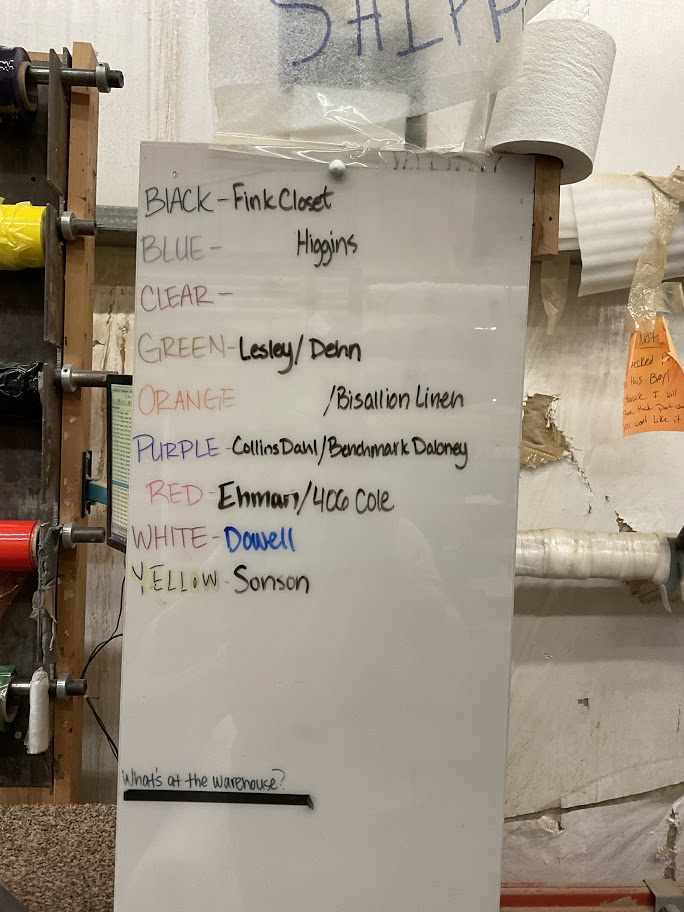](http://help.homesteadcabinet.net/uploads/images/gallery/2023-01/image-9.jpg)** |
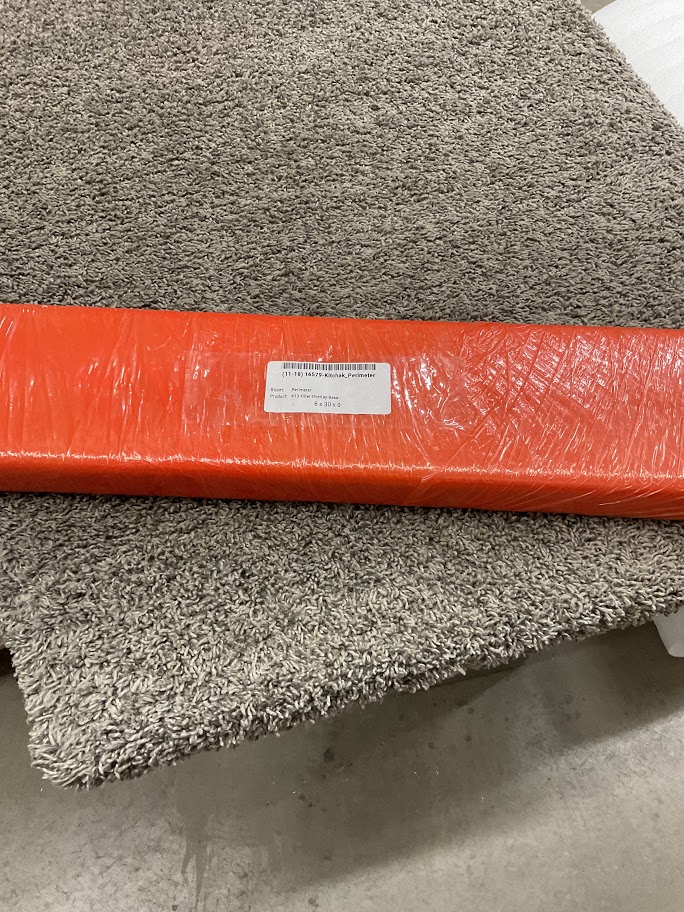
| **4. Wrap part in coordinated color**
| **[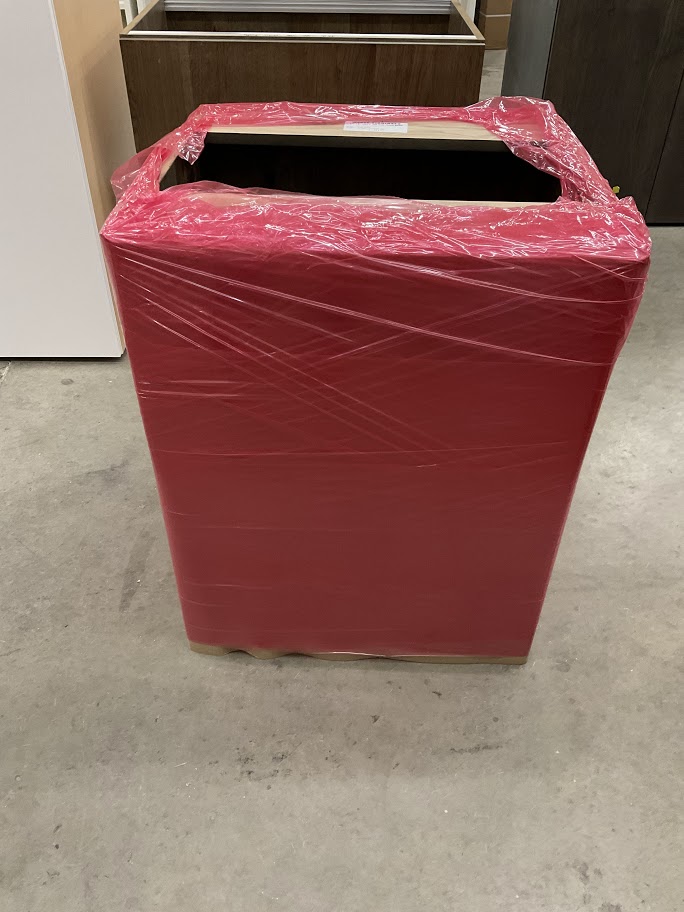](http://help.homesteadcabinet.net/uploads/images/gallery/2023-01/image-10.jpg)** |
| **5. Scan finished label**
***This will change the status of the part to wrapped***
| **[](http://help.homesteadcabinet.net/uploads/images/gallery/2023-01/image-11.jpg)** |
Part Identification
**1. Go to production coach**
| **2. Type the job name or job number in the search bar located in the top left corner**
| **[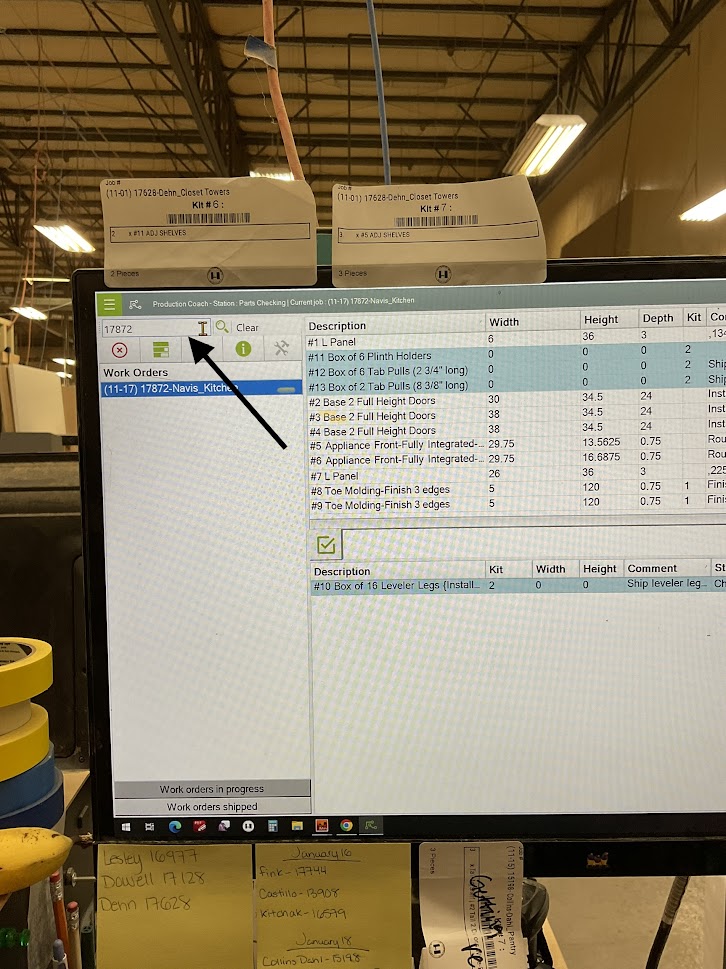](http://help.homesteadcabinet.net/uploads/images/gallery/2023-01/CkQimage-1.jpg)** |
| **3. On the left side of the screen click on the room the part is for**
| **[](http://help.homesteadcabinet.net/uploads/images/gallery/2023-01/a28image-2.jpg)** |
| **4. Click on the green clipboard located on the right side of the screen**
| **[](http://help.homesteadcabinet.net/uploads/images/gallery/2023-01/rtYimage-3.jpg)** |
| **5. On the left side of the screen click on the part you are inspecting**
| **[](http://help.homesteadcabinet.net/uploads/images/gallery/2023-01/Dr7image-4.jpg)** |
**6. Using the part number on the label to verify the right part was looked up**
**Often there are parts that are labeled incorrectly or not labeled. If you come across this, stop and get your supervisor, they will walk you through the additional steps**
Part Verification
| **1. Use the spec sheet to verify measurements and any special instructions for the part. If there are any additional steps, make sure they are all accounted for**
***If your not sure of all additional steps, stop your process and ask your supervisor***
| **[](http://help.homesteadcabinet.net/uploads/images/gallery/2023-01/XyLimage-5.jpg)** |
**2. Measure the width, height, and depth of the part being inspected**
**3. Verify all special instructions are complete and correct**
Part Inspection
**1. Inspect all finished surfaces for any imperfections**
***If imperfections are found inform your supervisor or the department it was made in before continuing***
**2. Inspect edge band for imperfections, including chips around the edge band and remove any remaining glue let by the edge bander**
| **3. When the inspection is complete go back to the main screen and click on the part that was inspected**
| **[](http://help.homesteadcabinet.net/uploads/images/gallery/2023-01/UOzimage-6.jpg)** |
**4. Status check the part as "Checked" to ensure others that the part has been inspected**
| **5. Click the "Product" icon located on the lower right side of the screen**
***This step will print a finished product label to be applied when inspection is completed***
| **[](http://help.homesteadcabinet.net/uploads/images/gallery/2023-01/nHwimage-7.jpg)** |
Part Shipping Prep
| **1. Wrap the part in foam**
| **[](http://help.homesteadcabinet.net/uploads/images/gallery/2023-01/YrHimage-8.jpg)** |
**2. Use edge protectors on all finished edges or edges that are 1.5 inches or bigger**
**3. Check finished label and refer to the white board to verify color the part will be wrapped in**
| **4. Wrap part in coordinated color**
| **[](http://help.homesteadcabinet.net/uploads/images/gallery/2023-01/SYximage-9.jpg)** |
**5. Attach finished label to the part and place tape over the label to prevent it from falling off**
**6. Scan finished label**
***This will change the status of the part to wrapped***